Grout Types Comparison: Sanded vs Unsanded vs Epoxy Grout

The choice between sanded, unsanded, and epoxy grout comes down to one measurement: the width of your tile joints. Get that wrong and your grout will crack, crumble, or fail within months, no matter how carefully you apply it.
This guide covers all three grout types in full, including joint width requirements, chemical composition, water resistance ratings, cost per square foot, food safety status, and the exact scenarios where each type outperforms the others.
By the Numbers
Grout Types Compared: Key Specifications at a Glance
Sources: ANSI A118.3, A118.6, A118.7 standards; Laticrete Technical Data; TCNA Handbook
What Is Grout and Why Does the Type You Choose Matter?
Grout is a cementitious or resin-based filler material used to fill the joints between ceramic tiles, porcelain tiles, natural stone, and glass mosaic installations. It serves three functions: it locks tiles in place laterally, prevents water and debris from penetrating the substrate, and finishes the visual appearance of the tile surface.
Choosing the wrong grout type does not just look bad. It causes structural failure. A sanded grout packed into a 1/16″ mosaic joint will scratch polished stone edges. An unsanded grout used in a 3/8″ floor joint will shrink and crack as water evaporates during curing. Epoxy grout applied without proper surface preparation will delaminate from the tile face in sheets.
The three main grout categories available to tile installers and ceramics hobbyists are sanded cement grout, unsanded cement grout, and epoxy grout. Each is governed by specific ANSI standards: sanded and unsanded grouts fall under ANSI A118.6 (standard performance) or ANSI A118.7 (high performance), while epoxy grout is covered by ANSI A118.3.
Understanding the chemistry behind each type tells you exactly when to use each one and when to avoid it entirely.
What Is Sanded Grout and When Should You Use It?
Sanded grout is a portland cement-based mixture containing fine silica sand as an aggregate filler, used for tile joints between 1/8 inch (3mm) and 1/2 inch (12mm) wide. The sand prevents the grout body from shrinking excessively as water evaporates during the curing process, which is the primary cause of cracking in wide joints.
According to the Tile Council of North America (TCNA) Handbook for Ceramic, Glass, and Stone Tile Installation, sanded grout is the correct choice for any floor tile installation with joints wider than 1/8 inch. It is also standard for wall tiles with joints in the 3/16 inch to 1/2 inch range when the tile surface is not easily scratched.
The Chemistry Behind Sand Aggregate in Cement Grout
Portland cement shrinks as it hydrates. The silica sand particles in sanded grout act as a rigid skeleton that resists that shrinkage. Without them, a wide joint would lose volume as it dried and pull away from the tile edges, leaving a crack running the full length of every joint.
The sand-to-cement ratio in most commercial sanded grouts runs approximately 3:1 by weight, producing a mix that achieves a compressive strength of 3,000 to 4,000 psi after 28 days of full cure. This is the mechanism that makes sanded grout structurally stable in high-traffic floor installations.
If the joint is narrower than 1/8 inch, the sand particles are physically too large to pack properly into the gap. The result is a weak, porous surface that falls apart under foot traffic. That is the condition boundary where sanded grout fails and unsanded grout becomes necessary.
Where Sanded Grout Performs Best
Sanded grout excels on floor installations using ceramic tile, porcelain tile, unpolished natural stone, and terra cotta pavers. It is available in a wide color range from manufacturers including Laticrete sanded grout, Custom Building Products (Polyblend), and Mapei Keracolor S.
Key Specifications for Sanded Cement Grout:
- Joint width range: 1/8 inch (3mm) to 1/2 inch (12mm)
- Compressive strength (28-day cure): 3,000 to 4,000 psi
- Water absorption: 4–8% (requires sealing every 1–3 years)
- Installed cost: $1–$3 per square foot including labor
- Full cure time before water exposure: 72 hours minimum
- ANSI standard: A118.6 (standard) or A118.7 (high performance)
Where Sanded Grout Fails
Do not use sanded grout on polished marble, polished travertine, or highly glazed ceramic tile. The silica sand particles will scratch the tile face during tooling and wiping, leaving permanent micro-abrasions visible in raking light. The fix is to switch to unsanded grout or use a non-sanded epoxy formula on these surfaces.
Sanded grout also underperforms in continuously wet environments such as steam showers and outdoor pools when used without a penetrating sealer. Its water absorption rate of 4–8% means it will absorb moisture, support mold growth, and stain without regular maintenance. For those environments, epoxy grout is the correct choice.
For most residential and commercial floor installations with joints between 3/16 inch and 3/8 inch, sanded cement grout sealed at installation and resealed every two years delivers reliable, cost-effective performance.
What Is Unsanded Grout and When Should You Use It?
Unsanded grout is a portland cement and polymer mixture with no aggregate filler, formulated for tile joints between 1/16 inch (1.5mm) and 1/8 inch (3mm) wide. The absence of sand gives it a smooth, paste-like consistency that packs tightly into narrow gaps without scratching delicate tile surfaces.
Laticrete’s technical data for their unsanded grout (Laticrete PermaColor Select Unsanded) specifies a minimum joint width of 1/16 inch and a maximum of 1/8 inch. This narrow range is the defining characteristic of unsanded grout: it is a precision tool for fine-joint work, not a general-purpose material.
Why Unsanded Grout Cracks in Wide Joints
Without aggregate to resist shrinkage, unsanded cement grout loses significant volume as it cures. Laticrete technical documentation reports a linear shrinkage of approximately 1–3% in unsanded formulas. In a 1/8 inch joint, that shrinkage is manageable. In a 3/8 inch joint, it produces a visible crack running down the center of every grout line within weeks of installation.
This is not a brand-specific defect. It is a fundamental property of cement hydration without aggregate reinforcement. The condition is any joint wider than 1/8 inch. The failure mode is longitudinal cracking accompanied by loose grout that pulls away from tile edges when pressed.
Applications Where Unsanded Grout Is the Correct Choice
Unsanded grout is the correct choice for glass mosaic tile, polished marble, polished porcelain, and any installation where the tile surface is soft enough to be scratched by silica sand. It is also standard for wall tile installations where grout joints are uniformly narrow, such as subway tile set with 1/16 inch spacers.
Key Specifications for Unsanded Cement Grout:
- Joint width range: 1/16 inch (1.5mm) to 1/8 inch (3mm)
- Compressive strength (28-day cure): 2,500 to 3,500 psi
- Water absorption: 5–10% (requires sealing; higher than sanded)
- Installed cost: $1.50–$3.50 per square foot
- Full cure time before water exposure: 72 hours minimum
- ANSI standard: A118.6 or A118.7
Popular commercial options include Custom Building Products Polyblend Unsanded Grout and Mapei Keracolor U, both available in over 40 colors and formulated for wall and mosaic applications.
Unsanded Grout on Vertical Surfaces
Unsanded grout’s thicker, stickier consistency makes it easier to apply on vertical surfaces than sanded grout, which tends to sag before it sets. This is why nearly all wall tile backsplash installations use unsanded formula, even when the joint width might technically permit sanded grout. The working time for most unsanded cement grouts is 30–45 minutes at 70°F (21°C) before the mix begins to stiffen.
For tile installations involving polished or delicate surfaces with joints under 1/8 inch, unsanded grout is the only cement-based option that will not scratch the tile while delivering adequate fill and adhesion.
What Is Epoxy Grout and When Is It Worth the Cost?
Epoxy grout is a two-part or three-part system composed of an epoxy resin, a hardener, and in some formulations a filler powder, that cures through a chemical cross-linking reaction rather than through cement hydration. It achieves a bond strength of 2,000 to 3,000 psi in shear, compared to 400 to 800 psi for standard cement grout, and has a water absorption rate of less than 0.5%, making it effectively impermeable without any sealing.
According to ANSI A118.3, commercial-grade epoxy grout must achieve a minimum bond strength of 300 psi in tension and demonstrate chemical resistance to a defined list of acids, alkalis, and solvents. No cement-based grout meets this chemical resistance standard, which is why epoxy grout is the required specification for food processing facilities, commercial kitchens, laboratory floors, and pool interiors.
The Chemical Mechanism Behind Epoxy Grout’s Performance
When epoxy resin and hardener are combined, the amine groups in the hardener react with the epoxide rings in the resin through a process called ring-opening polymerization. This creates a dense, three-dimensional polymer network with no pores, no calcium carbonate matrix, and no susceptibility to the acid attack that degrades cement grout.
This cross-linking reaction only occurs correctly within a specific temperature window. Most epoxy grout systems require an ambient temperature between 60°F (15°C) and 90°F (32°C) during mixing and application. Below 60°F, the reaction slows and the grout may never achieve full cure strength. Above 90°F, the pot life drops from the standard 45 minutes to as little as 15 minutes, making large installations extremely difficult to complete before the material stiffens in the joint.
If the temperature condition is not met and epoxy grout is applied below 60°F, the failure mode is a soft, tacky grout surface that never hardens fully and continues to collect dirt. The fix is to bring the substrate and room temperature into the correct range before mixing.
Where Epoxy Grout Outperforms Cement-Based Options
Epoxy grout is the correct specification for these environments:
- Steam showers and wet rooms with continuous moisture exposure
- Swimming pools and spa surrounds
- Commercial kitchen floors exposed to cooking oils, acidic foods, and cleaning chemicals
- Laboratory and medical facility floors with chemical spill exposure
- Outdoor installations in freeze-thaw climates where water infiltration causes cement grout to crack
- Installations requiring zero staining risk, such as white grout in high-traffic areas
Leading commercial epoxy grout products include Laticrete SpectraLock Pro Premium Grout and Mapei Kerapoxy CQ. Both are three-part systems (Part A resin, Part B hardener, Part C filler aggregate) available in sanded and unsanded versions for joints from 1/16 inch to 1/2 inch.
Key Specifications for Epoxy Grout:
- Joint width range: 1/16 inch to 1/2 inch (varies by aggregate content)
- Bond strength (shear): 2,000 to 3,000 psi
- Water absorption: less than 0.5% (no sealing required)
- Chemical resistance: passes ANSI A118.3 battery of acids and alkalis
- Installed cost: $3–$8 per square foot including labor
- Application temperature: 60°F to 90°F (15°C to 32°C)
- Working pot life: 45 minutes at 70°F (21°C)
The Real Costs and Challenges of Working with Epoxy Grout
Epoxy grout costs 3 to 5 times more than cement grout for materials alone. The labor cost premium is even higher because epoxy grout is more difficult to work with: it is sticky, has a short pot life, and requires more aggressive cleanup before it cures.
Haze removal is the most common installation problem. Epoxy grout leaves a thin film on the tile surface as it is wiped back. If this haze is not removed within the working window using a dedicated epoxy grout haze remover, it cures permanently to the tile face and requires mechanical removal. Cement grout haze dissolves easily with water and a sponge. Cured epoxy haze does not.
For residential tile work in dry areas such as kitchen backsplashes, living room floors, and bathroom walls that are cleaned regularly, the additional cost and difficulty of epoxy grout rarely provides enough benefit to justify the investment. Save epoxy grout for applications where its impermeability and chemical resistance genuinely matter.
Product Comparison
Sanded vs Unsanded vs Epoxy Grout: Full Specification Comparison
Use the table below to match your tile type, joint width, and environment to the correct grout category before purchasing materials.
| Feature | Sanded Grout | Unsanded Grout | Epoxy Grout |
|---|---|---|---|
| Joint Width | 1/8″ to 1/2″ (3–12mm) | 1/16″ to 1/8″ (1.5–3mm) | 1/16″ to 1/2″ (varies) |
| Composition | Portland cement + silica sand | Portland cement + polymer, no sand | Epoxy resin + hardener + filler |
| Water Absorption | 4–8% (requires sealing) | 5–10% (requires sealing) | Less than 0.5% (no sealing needed) |
| Bond Strength | 400–800 psi (shear) | 400–700 psi (shear) | 2,000–3,000 psi (shear) |
| Chemical Resistance | Low (acid degrades cement) | Low (same as sanded) | High (passes ANSI A118.3) |
| Food Safety | Yes when sealed | Yes when sealed | Yes (FDA-compliant formulas available) |
| Installed Cost | $1–$3 per sq ft | $1.50–$3.50 per sq ft | $3–$8 per sq ft |
| Full Cure Time | 72 hours before water exposure; 28 days full strength | 72 hours before water exposure; 28 days full strength | 24 hours light traffic; 7 days full chemical resistance |
| Best For | Floor tile, unpolished stone, wide joints | Mosaic, polished stone, glass tile, wall tile | Wet areas, pools, commercial kitchens, outdoor |
| ANSI Standard | A118.6 / A118.7 | A118.6 / A118.7 | A118.3 |
Sources: TCNA Handbook, ANSI A118.3/A118.6/A118.7 standards, Laticrete and Mapei technical data sheets. Installed cost includes labor at standard residential rates.
The table above captures every major decision dimension in one place. For most home tile projects in dry interior spaces, sanded or unsanded cement grout is the right answer. Epoxy becomes the correct choice when impermeability and chemical resistance are genuine requirements, not just preferences.
Sanded vs Unsanded: How to Choose the Right One for Your Project
The single deciding factor between sanded and unsanded grout is joint width. If the joint is wider than 1/8 inch, use sanded. If it is 1/8 inch or narrower, use unsanded. There is no scenario where either type performs equally across both ranges.
The TCNA Handbook is explicit on this point: using unsanded grout in joints wider than 1/8 inch is classified as an installation defect because shrinkage cracking is a predictable and unavoidable outcome.
The 1/8 Inch Boundary and What Happens at the Edge Cases
Many tile installers ask what to do when joints land exactly at 1/8 inch. The TCNA recommendation for this boundary case is to use unsanded grout on wall applications (where gravity reduces slump risk) and sanded grout on floor applications (where traffic load requires compressive strength). The key variable is not just the joint width but the mechanical stress the grout will experience in service.
For a kitchen backsplash at 1/8 inch, unsanded is the safer choice because it will not scratch the tile face during application and will pack the narrow joint cleanly. For a floor tile installation at 1/8 inch, sanded grout provides the structural performance needed under foot traffic and furniture loads.
Tile Material Determines Sand Compatibility
Even when the joint width would permit sanded grout, certain tile materials require unsanded formula regardless of width. These include polished marble, polished travertine, hand-painted ceramic tile, soft-bodied earthenware with unglazed edges, and glass tile of any kind.
Silica sand has a Mohs hardness of 7. Polished marble has a Mohs hardness of 3 to 4. When sanded grout is forced into a joint adjacent to polished marble and tooled back, the sand particles in the grout body contact the tile face and cut through the polish. The damage is permanent and requires professional honing to correct.
A grout float loaded with unsanded formula will glide across polished stone without risk. This is not a preference; it is a material science requirement.
Color Consistency Differences Between Sanded and Unsanded
Sanded and unsanded grouts from the same manufacturer in the same nominal color will appear slightly different after curing. The sand aggregate in sanded grout scatters light differently than the smooth matrix of unsanded grout, causing sanded versions to appear slightly lighter and more matte at the same pigment loading.
If your project uses both grout types in adjacent areas (for example, a mosaic inset within a larger tile field), select colors separately from physical dry-out samples rather than from color cards. The difference is predictable but not severe; it matters most in dark saturated colors where any lightening is visible.
For most residential tile projects, the joint width and tile material together make the choice automatically: measure your spacers, check the tile surface hardness, and the correct grout type selects itself.
When Does Epoxy Grout Justify the Extra Cost?
Epoxy grout is worth the cost premium when the installation environment exposes grout joints to conditions that cement-based grout cannot survive without rapid deterioration. The three environments where epoxy grout is the correct specification, not just a premium option, are continuous wet immersion, repeated chemical exposure, and outdoor freeze-thaw cycling.
In all other environments, sanded or unsanded cement grout sealed at installation and maintained on a regular schedule performs adequately and costs 60–80% less to install.
Steam Showers and Continuous Wet Exposure
A steam shower operates at 100–120°F (38–49°C) with near-100% relative humidity for extended daily sessions. Cement grout with a water absorption rate of 4–10% will absorb and release moisture repeatedly under these conditions. Over 12 to 18 months, this cycling saturates the cement matrix, promotes mold colonization, and begins to degrade the calcium silicate hydrate bonds within the grout body.
Laticrete SpectraLock Pro, specifically tested for steam shower environments, achieves water absorption below 0.5% after full cure. That number means steam shower moisture has essentially no penetration pathway into the grout joint. The cost difference of $2–$5 more per square foot over a 50-square-foot steam shower installation is $100 to $250 total. Compared to the cost of tearing out and re-grouting failed joints in a steam shower, that premium is straightforward to justify.
Commercial Kitchens and Chemical Exposure
Commercial kitchen floors are exposed to animal fats, acidic foods (pH as low as 2.4 for undiluted vinegar), alkaline degreasers (pH as high as 12), and hot water washdowns. Acids attack the calcium carbonate components of portland cement grout, softening the matrix and eventually turning it to powder. A commercial kitchen floor grouted with cement-based product under heavy daily chemical exposure may need re-grouting within 2 to 3 years.
Epoxy grout is resistant to pH levels from 2 to 12 per ANSI A118.3 testing. For food service environments, FDA-compliant epoxy grout formulas are also available. This chemical resistance profile is why the TCNA Handbook specifies epoxy grout as the recommended type for commercial food service applications.
Outdoor Tile and Freeze-Thaw Environments
Water expands approximately 9% when it freezes. Cement grout with a water absorption rate of 4–8% will absorb water, freeze, expand, and crack the grout joint each winter cycle. In climates that experience more than 10 freeze-thaw cycles per year, unsealed cement grout on outdoor tile installations typically fails within 3 to 5 years.
Epoxy grout’s near-zero water absorption eliminates the freeze-thaw failure mechanism entirely. Outdoor tile installations in USDA hardiness zones 1 through 6 benefit meaningfully from epoxy grout. In zones 7 through 13, sealed cement grout with proper joint widths and appropriate tile selection performs adequately at much lower cost.
Use the following decision framework: if the installation involves continuous water, chemical exposure, or outdoor freeze-thaw cycling, specify epoxy grout from the start. For everything else, sealed cement grout is the correct and more economical choice.
How to Apply Each Grout Type Correctly: Step-by-Step Process
Correct grout application technique differs significantly across the three types. Using the application process for one type on another grout category is one of the most common causes of grout failure in DIY tile installations.
Step-by-Step Guide
How to Grout Ceramic Tile: Sanded and Unsanded Cement Grout Application
6 steps. Estimated working time: 2 to 4 hours for a standard 50-square-foot installation.
Remove spacers and clean joints
Pull all tile spacers from joints. Use a grout saw or joint cleaning tool to remove any adhesive that has squeezed up into the joint. Joints must be clean, dry, and free of thinset to a depth of at least 2/3 of the tile thickness.
Mix grout to correct consistency
Mix grout with the manufacturer-specified water ratio (typically 1 quart water per 25-pound bag for sanded, slightly less for unsanded). Target a smooth, peanut butter consistency with no dry lumps. Allow a 5-minute slake time after initial mixing, then remix briefly before applying.
Pack joints at a 45-degree angle
Hold the grout float at a 45-degree angle to the tile surface and sweep diagonally across the joints. This diagonal motion packs grout into the joint rather than pulling it back out. Work in 10-square-foot sections at a time to stay within the 30-minute working window.
Wipe haze before it dries
After filling joints in the first section, return with a damp grout sponge rinsed in clean water. Wipe the tile face in a circular motion to remove surface grout without pulling material from the joints. Change water frequently; cloudy water redistributes grout haze rather than removing it.
Tool and finish joints
Once grout begins to firm up (typically 20–30 minutes after application), run a damp sponge edge or a concave grout finishing tool along each joint to create a slightly recessed, uniform profile. A flat joint flush with the tile face traps water; a slightly concave joint sheds water more effectively.
Cure, seal, and protect
Allow cement grout to cure for a minimum of 72 hours before water exposure and 28 days before applying a penetrating grout sealer. Do not apply sealer to uncured grout; it will trap moisture inside the cement matrix and cause discoloration. Reapply sealer every 1 to 3 years depending on traffic and exposure.
Epoxy Grout Application: Key Differences
Epoxy grout application follows the same basic sequence as cement grout with four critical differences. First, all parts must be combined in their full measured ratio; partial batches produce incorrect resin-to-hardener ratios and unpredictable cure strength. Second, the pot life of 45 minutes at 70°F (21°C) is a hard deadline; grout that has begun to stiffen in the bucket must be discarded, not re-wetted. Third, epoxy haze must be removed from the tile face within the working window using a manufacturer-approved epoxy haze remover rather than plain water, which has no effect on curing epoxy. Fourth, temperature control during application and cure is critical, as described in the chemistry section above.
For installers new to epoxy grout, working in small sections of 5 to 8 square feet at a time is strongly recommended until the pace and timing of haze removal become familiar.
Grout Joint Width Reference: Which Grout for Which Installation
The permutation table below pre-calculates the correct grout type for the most common combinations of tile format and joint width. Find your tile type in the rows and your planned joint width in the columns to confirm the correct grout category before purchasing.
Cost Reference
Grout Type by Tile Format and Joint Width
All values pre-calculated. Find your row and column to see the correct grout type and sealing requirement.
| Tile Type | 1/16″ Joint | 1/8″ Joint | 3/16″–1/4″ Joint | 3/8″–1/2″ Joint |
|---|---|---|---|---|
| Ceramic / Porcelain Floor Tile | Unsanded Seal after cure |
Unsanded or Sanded Most common joint – seal after cure |
Sanded Seal after cure |
Sanded Seal after cure; check for movement joints |
| Glass Mosaic Tile | Unsanded Non-abrasive formula required |
Unsanded only Sand will scratch glass edges |
Unsanded only Joint too wide; check layout |
Redesign layout Joint too wide for mosaic format |
| Polished Marble / Travertine | Unsanded Polish-safe; seal required |
Unsanded only Sand scratches polish (Mohs 3 vs 7) |
Epoxy (unsanded formula) Avoids scratch and stain risk |
Epoxy (unsanded formula) No sealing needed |
| Subway Wall Tile | Unsanded Standard for 1/16″ spacers |
Unsanded Preferred for vertical adhesion |
Sanded Standard joint for brick pattern |
Sanded Wide joint requires sand aggregate |
| Pool / Outdoor / Wet Area | Epoxy only Water immersion requires impermeability |
Epoxy only Chemical resistance required |
Epoxy only Freeze-thaw resistance required |
Epoxy only Sanded epoxy for joint stability |
Sources: TCNA Handbook, ANSI A118.3/A118.6/A118.7. The 1/8″ joint for ceramic floor tile is highlighted as the most common residential scenario. Pool and outdoor installations specify epoxy regardless of joint width due to continuous water and freeze-thaw exposure.
Grout Sealing: Which Types Need It and How Often
Cement-based grout (both sanded and unsanded) requires a penetrating sealer applied after full cure to prevent staining, moisture infiltration, and mold growth. Epoxy grout does not require sealing because its polymer matrix is already impermeable. Applying grout sealer to epoxy grout is harmless but wasteful.
According to Custom Building Products’ technical documentation, most cement grout sealers provide effective protection for 1 to 3 years depending on traffic and cleaning frequency. A simple water bead test determines when resealing is needed: drop a few drops of water on the grout line. If the water beads up and sits on the surface, the sealer is still active. If it absorbs within 60 seconds, the sealer has failed and reapplication is due.
Choosing the Right Sealer for Cement Grout
Penetrating sealers (also called impregnating sealers) are the correct product for cement grout. They penetrate the porous cement matrix and cure within it, making the surface water-repellent without changing the appearance or texture of the grout line. Topical or film-forming sealers sit on the surface, peel under foot traffic, and trap moisture beneath the film during subsequent wet-dry cycling.
Popular penetrating sealer options include Aqua Mix Sealer’s Choice Gold and Miracle Sealants 511 Impregnator, both of which are compatible with sanded and unsanded cement grout on ceramic, porcelain, and natural stone. Application is a simple wipe-on process with a foam applicator or paint brush after the grout has completed its full 28-day cure.
Sealing Schedule for Different Environments
The sealing interval depends on how aggressively the grout surface is cleaned and what it is exposed to. Heavy-use areas require more frequent resealing.
- Bathroom floor (weekly cleaning with mild cleanser): reseal every 2 to 3 years
- Kitchen floor (daily cleaning, food and oil exposure): reseal every 1 to 2 years
- Shower wall with daily use: reseal annually or upgrade to epoxy grout
- Outdoor patio tile (frost zone, seasonal rain): reseal every 1 to 2 years; consider switching to epoxy
- Low-traffic bathroom wall tile (cleaned monthly): reseal every 3 to 5 years
Sealing does not make cement grout impermeable. It reduces absorption and extends the interval between staining events. For environments that genuinely need impermeability, the correct long-term answer is epoxy grout at the time of installation, not aggressive sealing of cement grout.
Common Grout Problems and How to Fix Them
Most grout failures trace back to one of four causes: wrong grout type for the joint width, incorrect water ratio during mixing, premature water exposure before cure is complete, or failure to seal cement grout in wet environments. Identifying the root cause before attempting a repair prevents repeating the same failure.
Cracked Grout Lines
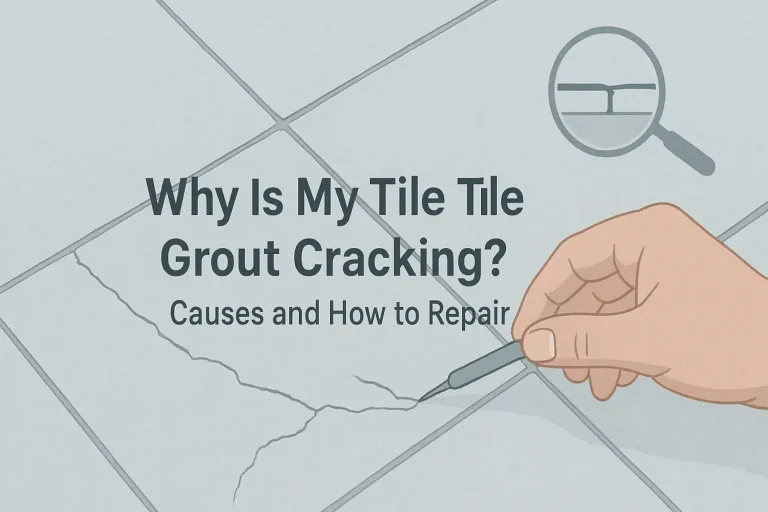
Cracked grout lines in cement grout result from shrinkage during curing (caused by using unsanded grout in joints wider than 1/8 inch), substrate movement (caused by a deflecting subfloor), or thermal cycling (in outdoor or underfloor heating installations). A simple visual test distinguishes the cause: if the cracks follow the center of the grout line consistently, the cause is shrinkage from an incorrect grout type or too much water in the mix. If the cracks run diagonally across multiple tiles and grout lines, the cause is substrate movement and the substrate must be addressed before re-grouting.
Shrinkage cracks are repaired by raking out the failed grout with a grout removal tool to a depth of at least 2/3 of the tile thickness, then re-grouting with the correct grout type. Applying new grout over existing failed grout without removal produces the same failure within 6 to 12 months.
Discolored or Stained Grout
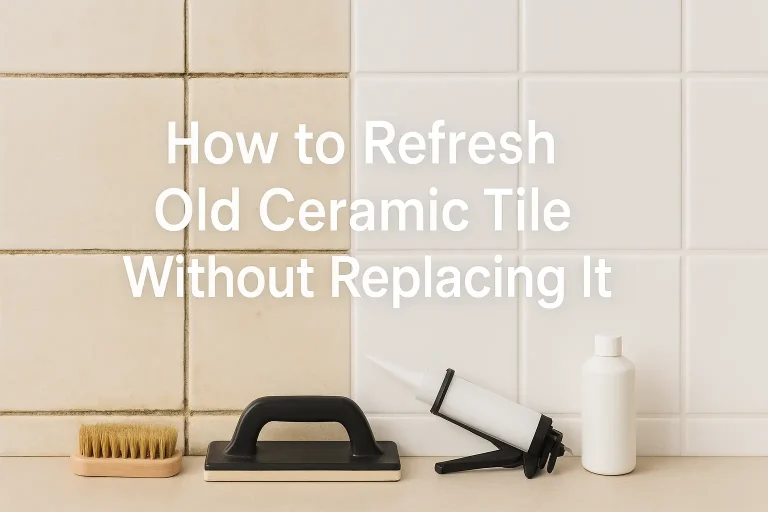
Gray or brown discoloration in unsealed light-colored grout lines is typically surface staining from cleaning product residue, mineral deposits, or embedded soil. This responds to a dedicated grout cleaning solution applied and scrubbed with a stiff-bristled brush, followed by sealing within 24 hours of drying.
Pink, orange, or green discoloration is biological: mold or mildew colonizing the porous cement matrix. A solution of one part household bleach to ten parts water applied with a stiff brush and left for 10 minutes before rinsing will eliminate surface mold. If mold recurs within weeks of treatment, the cement grout has been compromised and should be replaced with epoxy grout, which provides no nutrient pathway or moisture reservoir for mold colonization.
Epoxy Grout Haze on Tile Face
Cured epoxy grout haze on a tile face is one of the most difficult installation problems to correct. Water and standard grout haze removers have no effect. The correct product is a dedicated epoxy haze remover such as Laticrete LatiClean or Aqua Mix Acetone-based Residue Cleaner, applied within the cure window (before 24 hours at 70°F) and scrubbed with a white nylon pad.
If epoxy haze has fully cured (beyond 72 hours), mechanical removal with a felt pad on an orbital grinder is required. This process risks scratching the tile face on anything softer than porcelain. On polished stone, cured epoxy haze may require professional restoration. The prevention is complete and thorough wiping of the tile face within 30 minutes of grout application, before the epoxy begins to cross-link.
Correct grout selection from the start eliminates the most damaging failure modes before they begin. A set of calibrated tile spacers used during installation ensures joint widths are consistent and match the grout type specification throughout the entire installation.
Grout Finder
Find the Right Grout Type for Your Tile Project
Answer 2 questions to get a specific grout recommendation for your installation.
Cost Breakdown: Sanded vs Unsanded vs Epoxy Grout for a Typical Project
Material and labor costs for grouting a 100-square-foot tile installation vary significantly by grout type. The installed cost difference between sanded cement grout and epoxy grout on the same floor can exceed $500, which is why choosing the right grout type for the actual environment matters financially as well as technically.
Use the breakdown below to estimate project costs before purchasing materials. Prices reflect current retail averages from major tile supply distributors including Floor and Decor, The Tile Shop, and online suppliers.
| Cost Component | Sanded Cement | Unsanded Cement | Epoxy Grout |
|---|---|---|---|
| Material cost (100 sq ft) | $20–$50 | $25–$60 | $80–$200 |
| Labor cost (professional) | $80–$200 | $80–$200 | $200–$600 |
| Sealer cost | $15–$40 (required) | $15–$40 (required) | $0 (not required) |
| Resealing interval | Every 1–3 years ($15–$40 per application) | Every 1–3 years ($15–$40 per application) | None required |
| 10-year total cost | $230–$550 | $240–$570 | $280–$800 |
| Re-grouting risk (wet area) | High without sealing | High without sealing | Very low |
Over a 10-year period in a dry interior installation, the total cost difference between sanded cement grout and epoxy grout is modest when maintenance is factored in. In a wet installation where unsealed cement grout requires early replacement, epoxy grout pays for itself by eliminating the demolition and re-grouting cost, which typically runs $200 to $600 for a standard shower or bathroom floor.
Quick Reference: Key Grout Terms Explained
The following definitions cover the technical terms used throughout this guide. Each term is defined in plain language for readers new to tile installation.
- Sanded grout: Portland cement grout containing fine silica sand aggregate. Correct for joints 1/8 inch to 1/2 inch wide.
- Unsanded grout: Portland cement grout without sand aggregate. Correct for joints 1/16 inch to 1/8 inch wide. Softer surface that will not scratch polished tile.
- Epoxy grout: Two- or three-part resin and hardener system. Cures by chemical reaction rather than cement hydration. Near-zero water absorption. No sealing required.
- Joint width: The gap between adjacent tiles, set by plastic spacers during installation. The single most important factor in selecting grout type.
- Cement hydration: The chemical reaction between portland cement and water that produces the rigid calcium silicate hydrate matrix in cured cement grout.
- Water absorption rate: The percentage of a grout body’s weight that it absorbs when submerged in water. Sanded grout: 4–8%. Unsanded: 5–10%. Epoxy: less than 0.5%.
- ANSI A118.3: The American National Standards Institute standard for chemical-resistant, water-cleanable tile setting and grouting epoxy materials.
- ANSI A118.6 / A118.7: ANSI standards covering standard performance and high-performance cement-based grout formulations respectively.
- Pot life: The working time after mixing before a material becomes too stiff to apply. Cement grout: 30–45 minutes. Epoxy grout: 45 minutes at 70°F (21°C).
- Penetrating sealer: A sealer that soaks into the porous cement matrix and cures within it, rather than forming a film on the surface. Correct product type for cement grout.
- Haze: The thin film of grout left on the tile face after joint packing and initial wipe-back. Cement haze dissolves with water. Cured epoxy haze requires dedicated chemical remover.
- Freeze-thaw cycling: The repeated expansion and contraction of water absorbed into grout as it freezes and thaws in outdoor or cold-climate installations. Primary cause of outdoor cement grout failure.
What Is the Correct Way to Store and Mix Grout to Avoid Failures?
Cement grout stored in conditions above 70% relative humidity will begin to partially hydrate inside the bag, producing hard lumps that do not dissolve during mixing. Lumpy grout produces weak, inconsistent joints. Store all cement grout bags in a dry indoor location off the floor on a pallet or shelf, and use within 12 months of the manufacture date printed on the bag. Discard any bag that feels stiff or contains unmixed lumps.
The water-to-grout ratio is the most common source of DIY application failure. Too much water increases shrinkage, reduces compressive strength, and causes color variation after curing. The correct consistency is a smooth, stiff paste that holds its shape when scooped on a float without slumping. Add water incrementally in small amounts; it is much easier to add more water than to correct an over-wet batch. Most sanded grout mixes use approximately 1 quart of water per 25-pound bag, but always follow the specific manufacturer ratio on the packaging.
Can You Grout Handmade Ceramic Tile Differently from Commercial Tile?
Handmade ceramic tile, including studio pottery tiles, hand-pressed earthenware tiles, and relief tiles produced by individual ceramic artists, differs from commercial porcelain in three ways that directly affect grout selection. First, handmade tile often has irregular joint widths because the tiles themselves vary in dimension by 1/16 to 1/8 inch across a batch. Second, the tile body is frequently earthenware or low-fire stoneware with a water absorption rate of 3 to 10%, much higher than vitrified commercial porcelain. Third, many studio-made tiles have unglazed edges that are softer and more susceptible to scratching than factory tile.
For handmade tile with irregular joints averaging 1/4 inch, sanded cement grout is the correct choice for most interior dry installations. The irregular joint widths make the sand aggregate essential for preventing shrinkage cracking in the wider sections. However, the unglazed edge condition means that grout should be applied carefully with a soft rubber grout float rather than a hard plastic float to minimize abrasion. For handmade tile in wet environments, the high water absorption of the tile body itself is also a concern. Consult the tile maker for their recommended installation system, which may include a specific waterproofing membrane beneath the tile bed in addition to epoxy grout in the joints.
The relationship between ceramic tile properties and grout selection is one of the more detailed aspects of the broader world of choosing compatible tile setting materials for different ceramic substrates, where the tile body absorption rate and surface hardness both influence which installation system performs correctly.
Does Grout Color Change After Curing?
Yes. Cement grout changes color as it cures and is one of the most common sources of installation anxiety for homeowners and tile setters. Freshly applied cement grout is 2 to 4 shades darker than the fully cured color because of the water content still present in the hydrating cement matrix. As water evaporates over the 72-hour to 28-day cure window, the grout lightens progressively toward its final color.
Color variation across the same installation is caused by uneven water loss during curing. Joints in direct sunlight or near a heat source cure faster and appear lighter than joints in shaded or cooler areas at the same point in time. The colors will equalize as curing completes, typically within 7 to 14 days. Wiping fresh grout with excessive water during cleanup also lightens the surface color by drawing calcium carbonate (efflorescence) to the surface. Using as little water as possible in the cleanup sponge and changing sponge water frequently minimizes this effect.
Epoxy grout is significantly more color-stable than cement grout because its cure is chemical rather than evaporative. The color you see immediately after cure completion is the color you will see indefinitely, making epoxy grout the preferred choice for large-format light-colored installations where color consistency is critical.
Is Grout Food-Safe for Countertops and Tile Used with Ceramics and Pottery?
Unsealed cement grout is not food-safe for countertop applications because its porous surface absorbs bacteria, food particles, and cleaning chemicals that cannot be fully removed through surface cleaning alone. The FDA does not certify grout products directly, but the food safety standard for tile countertops is generally understood to require either fully sealed cement grout or certified epoxy grout with documented compliance.
Sealed cement grout on a tile countertop is considered conditionally food-safe when the sealer is maintained properly and reapplied before the water bead test indicates sealer failure. The practical problem is that knife cuts and heavy impacts can compromise the sealer film locally, creating unsealed pathways into the cement matrix. For a working kitchen countertop with daily cutting, prep, and cleaning activity, epoxy grout with FDA-compliant documentation provides a more reliable long-term food-safe surface than repeatedly sealed cement grout.
Studio ceramic tile used as a decorative backsplash rather than a working food preparation surface has a much lower standard: sealed cement grout is adequate because the surface is wiped rather than cut on, and bacterial infiltration risk is lower. Pottery and ceramics installations that are purely decorative wall surfaces do not require food-safe grout specification at all. The food safety requirement applies specifically to surfaces that contact food directly during preparation.
Understanding how different ceramic materials behave in functional use contexts connects directly to the broader question of how ceramic material properties compare to other surface materials in terms of durability and chemical resistance.
What Happens if You Use the Wrong Grout Type?
Using unsanded grout in a joint wider than 1/8 inch produces longitudinal shrinkage cracks within 4 to 12 weeks of installation as the cement matrix contracts during curing. The crack typically runs down the center of the grout line and cannot be patched without removing the existing grout entirely and re-grouting with the correct product. This repair costs $150 to $400 for a standard bathroom floor when done professionally.
Using sanded grout on polished marble or glass tile produces permanent surface scratches on the tile face during tooling and cleanup. Silica sand at Mohs 7 cuts through polished marble at Mohs 3 to 4 during every contact. The scratches are not repairable without professional stone honing, which costs $150 to $500 per 100 square feet depending on severity.
Using cement grout in a pool or outdoor freeze-thaw installation without epoxy grout produces progressive joint deterioration as water absorption and freeze expansion crack the cement matrix over 2 to 5 winter cycles. Re-grouting an outdoor installation is labor-intensive because all original grout must be mechanically removed before new grout can adhere properly. The total repair cost for a 200-square-foot outdoor patio re-grouting runs $600 to $1,500 depending on joint depth and accessibility.
All three failure scenarios are entirely preventable by selecting the correct grout type for the joint width and environment before installation begins.
How Does Polymer-Modified Grout Differ from Standard Cement Grout?
Polymer-modified grout is a cement-based grout (either sanded or unsanded) that incorporates polymer additives (typically acrylic or latex polymers) either pre-blended into the dry powder or added to the mix water in place of plain water. The polymers fill micro-pores in the cement matrix during curing, reducing water absorption by 20 to 40% compared to unmodified cement grout and improving bond strength and flexibility.
According to Custom Building Products’ technical data, their Polyblend Plus line (a polymer-modified sanded grout) achieves a water absorption rate of 3.5% versus 6–8% for unmodified cement grout. This improvement is meaningful for bathroom floor and shower wall applications but still falls far short of epoxy grout’s sub-0.5% absorption rate. Polymer-modified grout represents the practical middle ground: it offers meaningfully better moisture performance and stain resistance than standard cement grout without the application complexity and cost premium of epoxy grout.
For most residential bathroom and kitchen tile installations, a polymer-modified sanded or unsanded grout sealed after cure delivers the best combination of performance, ease of application, and cost. It is the recommended upgrade from standard cement grout for anyone who wants better performance without committing to an epoxy installation system.
Understanding how polymer additives improve ceramic and grout material properties connects to the same material science principles covered in the comparison of how polymer-modified ceramic materials differ from pure clay ceramic compositions.
Can You Mix Different Grout Brands in the Same Installation?
Mixing different grout brands in the same installation is technically possible but inadvisable for color-critical projects. Grout color formulations vary by brand and even between production batches within the same brand. A “Bright White” from Mapei and a “Bright White” from Custom Building Products will not match perfectly after curing because the pigment systems, cement ratios, and aggregate grades differ between manufacturers.
For a single-room installation started and completed in one session, use grout from the same manufacturer, the same product line, and ideally the same production batch (same lot number on the bag). Lot numbers are printed on all grout packaging. For large projects requiring multiple bags, purchase all bags at once from the same shipment to maximize color consistency. If you must add bags mid-project, dry mix a small amount from the new bag with dry product from the original bag before adding water to blend any lot-to-lot variation.
What Is the Best Grout for a DIY Bathroom Remodel?
For a standard DIY bathroom remodel using ceramic or porcelain wall tile with 1/16 to 1/8 inch joints and ceramic or porcelain floor tile with 1/8 to 3/16 inch joints, the best grout choice is a polymer-modified unsanded grout for the walls and a polymer-modified sanded grout for the floor. Both are forgiving to apply, widely available at home improvement retailers, and perform adequately in a residential bathroom when sealed after installation.
The Mapei Keracolor series and Custom Building Products Polyblend Plus are the most commonly available polymer-modified options at Home Depot and Lowe’s, both retailing at $12 to $18 per 10-pound bag. A 10-pound bag of sanded grout covers approximately 50 to 80 square feet at a 12×12 inch tile format with 3/16 inch joints. A 10-pound bag of unsanded grout covers approximately 100 to 130 square feet of wall tile at 3×6 inch subway format with 1/16 inch joints.
For a DIY installer doing their first tile project, avoiding epoxy grout is strongly recommended. The short pot life, haze removal requirements, and temperature sensitivity of epoxy grout create installation errors that are expensive to correct. Master cement grout application on one or two projects before attempting an epoxy installation.
How Long Does Grout Last Before It Needs Replacing?
Properly installed and sealed cement grout in a dry interior installation lasts 15 to 25 years before replacement becomes necessary due to cracking, crumbling, or irreversible staining. In a wet installation such as a shower floor with daily use, the realistic service life of unsealed or poorly maintained cement grout drops to 5 to 10 years. Properly maintained sealed cement grout in a standard bathroom shower achieves 10 to 15 years of service life before deterioration requires replacement.
Epoxy grout installed correctly in a residential or commercial application has a service life exceeding 30 years under normal use conditions, per Laticrete’s published product documentation. The polymer matrix does not hydrate, does not carbonate, and does not support biological growth, eliminating the primary degradation mechanisms that limit cement grout life. The practical limiting factor on epoxy grout longevity is the tile and substrate beneath it rather than the grout itself.
Signs that cement grout has reached end of service life include: crumbling or powdering grout lines that cannot be cleaned back to a firm surface, persistent mold that returns within days of bleach treatment, visible grout depth loss of more than 50% from the original joint depth, and cracks or gaps at the tile-grout interface indicating loss of adhesion. At this point, full grout removal and replacement produces better results than patching, which rarely bonds adequately to aged cement grout surfaces.
The durability of ceramic tile installations also depends on how well the original tile adhesive held up beneath the tile. Understanding the relationship between professional and DIY tile installation systems in terms of long-term durability helps set realistic expectations for the full service life of any tile project.
Is Epoxy Grout Toxic During Application?
Epoxy grout components are skin and respiratory sensitizers that require appropriate personal protective equipment during mixing and application. The hardener (Part B) in most epoxy grout systems contains reactive amine compounds that cause skin sensitization with repeated exposure. Once sensitized, subsequent contact can trigger allergic dermatitis even from small amounts. Wearing chemical-resistant nitrile gloves and eye protection throughout the entire application and cleanup process is not optional.
Epoxy grout vapors during application and cure can cause respiratory irritation in poorly ventilated spaces. The OSHA permissible exposure limit for epoxy resin vapor is 1 ppm over an 8-hour workday. In a small enclosed bathroom, adequate ventilation means running an exhaust fan at full power and keeping a window open throughout application and for 24 hours after. A half-face respirator with organic vapor cartridges provides additional protection for enclosed space installations.
Fully cured epoxy grout is chemically inert and poses no ongoing health or safety concern. The sensitization risk is entirely during the liquid phase before full cure. Cement grout poses a lower acute chemical risk than epoxy grout but still contains crystalline silica (in sanded versions) and alkaline portland cement that cause skin and eye irritation. Always wear gloves and wash hands thoroughly after handling any cement grout product.
Sanded grout in enclosed spaces without adequate ventilation also poses a silica dust inhalation risk during dry mixing. Always mix cement grout in a ventilated area or wear an N95 particulate respirator during the dry mixing stage to avoid inhaling fine silica dust particles, which cause progressive and irreversible lung damage with repeated long-term exposure per OSHA crystalline silica standards.
Choosing the right grout type for your joint width, tile material, and installation environment is the single most important decision in any tile project. Sanded cement grout serves most floor tile installations correctly and cost-effectively. Unsanded cement grout is the correct and only option for polished stone, glass tile, and joints under 1/8 inch. Epoxy grout earns its premium cost in any installation exposed to continuous moisture, chemical exposure, or outdoor freeze-thaw cycling. Start by measuring your joint width, assessing your environment, and letting those two factors make the selection for you.