How to Paint Ceramic: Complete Guide (Glazed, Unglazed, Indoor & Outdoor)

Most people reach for a brush and start painting ceramic without checking one thing first: whether the surface will actually hold the paint at all.
Glazed ceramic rejects most standard paints because the glassy fired surface has near-zero porosity, while unglazed bisque or terra cotta soaks up paint like a sponge. Getting this wrong means peeling, flaking, and a finished piece that looks good for a week before it falls apart.
This guide covers every surface type you will encounter: glazed ceramics, unglazed bisque, terra cotta, fired stoneware, and porcelain. It covers every use case: indoor decorative pieces, outdoor planters, functional mugs, and holiday collectibles. For each combination, you will find the correct paint type, the right surface preparation method, the application sequence, and the sealing strategy that makes the finish last.
What Kind of Ceramic Are You Painting? Surface Type Changes Everything
The single most important variable in painting ceramic is the absorption rate of the surface you are working on. Unglazed ceramics absorb water readily, which means paint bonds directly into the porous clay matrix. Glazed ceramics have already been fired with a glass coating, and that surface resists absorption completely.
According to the Digitalfire Reference Library (Tony Hansen), a fully vitrified glazed surface has an absorption rate under 1%. That means standard acrylic paint has almost nothing to grip. The paint sits on top rather than bonding to the surface, and it peels as soon as the piece is handled.
Unglazed earthenware and terra cotta typically have absorption rates between 5% and 15%, depending on firing temperature. Bisque-fired stoneware sits at 4% to 8% absorption. These surfaces are excellent candidates for direct paint application with minimal preparation.
Knowing your surface type before you buy a single bottle of paint eliminates the most common reason painted ceramics fail.
Identifying Glazed vs Unglazed Ceramic Before You Start
Run a finger across the surface. Glazed ceramic feels glassy and slightly slick. Unglazed ceramic feels matte, slightly rough, and cool against skin in a way that glass does not.
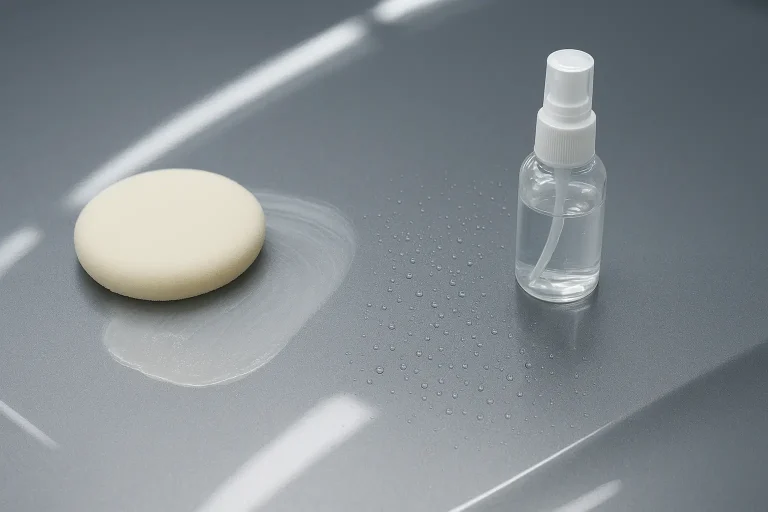
The water drop test confirms it: place a single drop of water on the surface and watch for 30 seconds. On unglazed ceramic, the water absorbs within 5 to 15 seconds. On glazed ceramic, the water bead sits in place with no absorption at all.
Bisque-fired pottery, terra cotta planters, ceramic tiles before grouting, and raw stoneware vessels are all unglazed. Dinner plates, mugs, decorative figurines with a shiny finish, and most store-bought ceramic pieces are glazed.
Understanding Fired vs Unfired Ceramic Surfaces
Greenware ceramic that has never been fired is soft, water-soluble, and fragile. Paint applied to greenware will dissolve with the clay when moisture is introduced. This surface is only suitable for underglazes and engobes applied before bisque firing.
Bisque-fired ceramic has been fired to cone 06 (1828°F / 998°C) without glaze. This is the standard porous surface that accepts ceramic underglaze, commercial glaze, and many acrylic paints without priming. Most hobbyist ceramic painting projects use bisque-fired blanks purchased from a ceramics supplier.
Glaze-fired ceramic has completed both a bisque fire and a glaze fire (typically cone 06 bisque and cone 6 glaze at 2232°F / 1222°C for mid-fire work). This surface is glassy and non-porous. Any decorative painting on top requires either mechanical abrasion, chemical priming, or specialty paints formulated for non-porous surfaces.
What Paint Will Stick to Glazed Ceramic: The Honest Answer
Standard craft acrylics do not adhere reliably to glazed ceramic. The glassy fired surface has no mechanical or chemical grip for water-based paints. Paint may look fine when it dries, but it peels within days of normal handling.
Three paint categories genuinely bond to glazed ceramic without firing: enamel-based paints, specialty ceramic paints with built-in adhesion promoters, and two-part epoxy paints. Each has specific application requirements and durability trade-offs that determine which one fits your project.
Enamel Paints for Glazed Ceramic
Oil-based enamel paints create a hard, durable film on glazed ceramic because the oil resin cures by oxidation rather than water evaporation. The cured film has much stronger surface adhesion than standard acrylic because it forms a cross-linked polymer structure.
Rust-Oleum Painter’s Touch Ultra Cover Gloss and DecoArt Americana Gloss Enamel are two well-documented enamel options for glazed ceramic surfaces. Both cure to a Mohs hardness of approximately 3 to 4, compared to standard dried acrylic at 1 to 2.
Key Specifications:
- Dry time: 20 to 30 minutes to touch, 24 hours to handle
- Full cure time: 21 days for maximum hardness
- Compatible surfaces: glazed ceramic, glass, metal, tile
- Food safety: not rated food-safe after surface application
- Cleanup: mineral spirits or paint thinner required for oil-based
Water-based enamel paints (such as FolkArt Enamel or Martha Stewart Multi-Surface Satin Enamel) offer easier cleanup and lower fumes. They do not cure as hard as oil-based options but perform adequately on decorative glazed pieces that will not be washed frequently.
Specialty Ceramic Paints with Adhesion Promoters
Pebeo Vitrea 160 and Pebeo Porcelaine 150 are two specialty paint lines specifically formulated for glazed ceramic and glass. These paints contain silicone-based adhesion promoters that mechanically key into the micro-imperfections of a fired glaze surface.
Pebeo Porcelaine 150 can be oven-baked at 300°F (149°C) for 35 minutes to achieve a dishwasher-resistant finish. According to Pebeo’s technical data sheet, oven-baked Porcelaine 150 withstands 25 dishwasher cycles before showing visible wear on smooth glazed surfaces.
Key Specifications for Pebeo Porcelaine 150:
- Baking temperature: 300°F (149°C)
- Baking duration: 35 minutes
- Curing time before baking: 24 hours air dry
- Dishwasher resistance: rated for repeated cycles after baking
- Food safety: contact areas safe after baking per manufacturer data; decorative use only on painted exterior surfaces
Pebeo Porcelaine 150 oven-bake ceramic paint is the most widely recommended choice in the ceramics hobbyist community for glazed mugs and plates where light functional use is expected.
When to Use Two-Part Epoxy Paint on Glazed Ceramic
Two-part epoxy paints (Part A resin plus Part B hardener) produce the strongest bond achievable on a glazed ceramic surface without kiln firing. The epoxy crosslinks chemically as it cures, creating adhesion that resists both mechanical abrasion and moisture far beyond standard enamel or specialty ceramic paints.
Epoxy paints are the correct choice for glazed ceramic that will be exposed to outdoor conditions, repeated water contact, or physical handling. The trade-off is a 24 to 72 hour cure window, moderate fumes during application, and a stiffer, more industrial-looking finish than specialty ceramic paints.
For most decorative indoor projects on glazed ceramic, Pebeo Porcelaine 150 or a quality enamel paint is the more practical choice. Epoxy is reserved for high-demand applications like outdoor furniture ceramics or heavily used decorative tiles. Our full breakdown of which paint types bond to fired glassy surfaces covers adhesion chemistry and test results across six paint categories.
What Paint to Use on Unglazed Ceramic: Bisque, Terra Cotta, and Raw Stoneware
Unglazed ceramic surfaces are the easiest ceramic type to paint. The porous clay matrix accepts water-based acrylic paint directly, with no priming or surface treatment required in most applications. The paint soaks slightly into the surface, creating a mechanical bond that far outperforms the same paint on a glazed surface.
Standard craft-grade acrylic paint, artist-grade acrylic, chalk paint, and latex paint all bond acceptably to unglazed ceramic. The choice between them depends on the finish you want and whether the piece will be sealed afterward.
Acrylic Paint on Bisque Ceramic
Acrylic paint on bisque-fired ceramic is the most common starting point for hobbyist ceramic painting. Craft-grade acrylic paints such as DecoArt Americana, FolkArt, and Liquitex Basics all adhere well to bisque without primer. Coverage is excellent in 2 to 3 coats, and dry time between coats is 15 to 30 minutes.
The porosity of bisque causes some paints to absorb unevenly on the first coat. This is normal. The first coat seals the surface partially, and the second coat levels out the color. Always apply a minimum of 2 coats on bisque ceramic regardless of how opaque the first coat appears.
Artist-grade acrylics (Golden, Liquitex Professional) have higher pigment density than craft-grade acrylics. Two coats of artist-grade acrylic on bisque typically produce equivalent coverage to three coats of craft-grade. The cost per project is higher, but the color accuracy and lightfastness ratings are significantly better.
Chalk Paint on Unglazed Terra Cotta
Chalk paint bonds exceptionally well to unglazed terra cotta because the calcium carbonate particles in chalk paint create a mechanical key with the rough terra cotta surface. The result is an ultra-matte, slightly chalky finish that is characteristic of the style.
Chalk paint for ceramic and terracotta surfaces requires sealing with wax or matte varnish after application. Without sealing, chalk paint on terra cotta scuffs and marks with light handling. Apply two thin coats of chalk paint, allow 24 hours to fully dry, then apply Annie Sloan Clear Wax or a water-based matte varnish to protect the surface.
Latex Paint on Large Unglazed Ceramic Surfaces
Interior latex paint works on large unglazed ceramic pieces such as floor tiles, large planters, and ceramic sculptures. Standard interior latex at a satin or semi-gloss sheen provides good coverage and acceptable durability for low-contact decorative applications.
Exterior latex paint is the correct choice for any unglazed ceramic that will be placed outdoors. Exterior latex contains UV stabilizers and mildew-resistant additives that standard interior latex lacks. Apply a coat of exterior-grade masonry latex paint directly to clean, dry unglazed ceramic and follow with two topcoats in your chosen color.
How to Prepare Ceramic Surfaces for Painting: The Step-by-Step Process
Surface preparation is where most painted ceramic projects fail. A properly cleaned and prepared ceramic surface makes paint adhesion reliable and the finish durable. A poorly prepared surface means paint peeling within weeks regardless of how high-quality the paint is.
The preparation steps differ depending on whether you are working with glazed or unglazed ceramic. Both require cleaning, but only glazed surfaces require the additional steps of sanding and priming.
The step-by-step widget below gives you the complete preparation sequence for both surface types before you pick up a brush.
Step-by-Step Guide
How to Prepare Ceramic for Painting: Glazed and Unglazed Surfaces
7 steps covering cleaning, sanding, priming, and surface testing. Estimated time: 30 to 60 minutes depending on surface type.
Wash the ceramic surface with dish soap and water
Remove all dust, oils, fingerprints, and residue using warm water and a small amount of dish soap. Oils from handling are invisible but prevent paint from bonding. Allow to dry completely, at minimum 2 hours, before proceeding.
Wipe down with isopropyl alcohol (glazed surfaces only)
For glazed ceramic, follow the soap wash with a wipe of 70% or 91% isopropyl alcohol on a lint-free cloth. Alcohol removes any wax residue or release agent that soap does not dissolve. This step is optional for unglazed ceramic.
Sand glazed surfaces with 220-grit sandpaper (glazed surfaces only)
Use 220-grit wet/dry sandpaper to scuff the glaze surface lightly. You are not removing the glaze. You are creating microscopic scratches that give paint a mechanical grip. Sand in circular motions for 2 to 3 minutes, then wipe off dust with a damp cloth and allow to dry for 30 minutes.
Apply a ceramic or multi-surface primer (glazed surfaces only)
Apply one thin, even coat of adhesion-promoting primer formulated for ceramic and glass. Rust-Oleum 2X Ultra Cover Primer and Zinsser Bulls Eye 1-2-3 are both documented to bond to glazed ceramic. Allow the primer to dry for the full time specified on the product label, typically 30 to 60 minutes, before applying paint.
Lightly sand unglazed ceramic if the surface is very rough
Very rough bisque or terra cotta benefits from a light pass with 400-grit sandpaper to smooth prominent texture before painting fine detail. This step is not required for most unglazed ceramic. Skip it for intentionally textured surfaces.
Run the water drop adhesion test before committing to full coverage
Apply a small test patch of paint to a hidden area of the prepared surface. Allow it to dry fully (at least 1 hour for acrylics). Try to scratch the test patch with a fingernail. If the paint lifts cleanly, repeat sanding and repriming before proceeding. If it resists scratching, the surface is ready.
Allow primed surface to cure for the full recommended time before painting
Primer that has dried to touch is not the same as cured primer. Painting over primer that has not fully cured causes lifting and adhesion failure. Follow the primer manufacturer’s full cure time, which is typically 1 hour for spray primers and up to 24 hours for brush-on primer.
Proper preparation on glazed ceramic adds 30 to 60 minutes to your project but eliminates the most common failure mode: paint that peels within a week of finishing. Our detailed guide on sanding, priming, and adhesion prep for all ceramic types covers each step with product recommendations and troubleshooting for difficult surfaces.
How to Paint Glazed Ceramic: Complete Application Guide
Painting glazed ceramic requires a different approach than painting unglazed surfaces. The non-porous glaze means every adhesion variable must be controlled before the brush touches the surface. Skip any one step and the paint will fail.
The correct process sequence for glazed ceramic is: clean, degrease, sand (220-grit), prime, apply 2 to 3 thin coats of paint with full dry time between each, and seal. This sequence is not optional. Each step serves a specific adhesion function.
Applying Paint in Thin, Even Coats
Thin coats are the single most important application technique on glazed ceramic. A thick coat of paint on a low-absorption surface traps solvent underneath the drying skin. The solvent eventually pushes through the dry surface as a bubble or causes the entire coat to peel away in sheets.
Apply each coat thin enough that you can almost see through it when wet. Allow each coat to dry completely, at least 30 minutes for acrylic, before applying the next. Three thin coats produce a stronger, more even finish than one thick coat on any ceramic surface.
Use a soft flat-bristle brush for painting ceramics rated for acrylic or enamel paints. Foam brushes reduce brush strokes on smooth glazed surfaces. Avoid rollers on curved ceramic forms because they deposit paint unevenly at the edges.
Drying Time Between Coats on Glazed Ceramic
The minimum drying time between paint coats on glazed ceramic is longer than on porous surfaces. On unglazed ceramic, moisture wicks into the clay and the coat dries quickly from both surfaces. On glazed ceramic, moisture can only escape from the top, so drying takes longer.
Allow a minimum of 30 minutes between acrylic coats on glazed ceramic in a room with normal humidity (40 to 60% relative humidity). In humid conditions above 70% RH, extend dry time to 60 minutes per coat. Enamel paints require 4 to 6 hours between coats. Never rush drying by applying heat from a heat gun on a freshly painted glazed surface. Rapid surface drying traps solvent underneath.
Fixing Mistakes on Glazed Ceramic While Wet
Acrylic paint on glazed ceramic is water-soluble when wet and can be wiped away cleanly with a damp cloth within 5 to 10 minutes of application. This is a significant advantage over enamel paints, which require mineral spirits for wet correction.
If a brushstroke goes wrong on a glazed surface, wipe it immediately with a barely damp cloth. Do not saturate the cloth. Excess water re-wets the primer layer and can lift it. Once acrylic paint on glazed ceramic has dried beyond 10 minutes, removal requires gentle sanding and repriming the affected area before repainting.
How to Paint Unglazed Ceramic: Bisque, Terra Cotta, and Pottery Blanks
Unglazed ceramic is the most forgiving surface for painting. The porous clay matrix accepts nearly any water-based paint without primer, and mistakes are easy to correct by painting over them once dry.
The preparation requirements are simpler: clean the surface, allow it to dry completely, and start painting. The main challenge with unglazed ceramic is managing how the porous surface absorbs the first coat and causes uneven coverage.
Managing Paint Absorption on Porous Bisque
Bisque ceramic at cone 06 (1828°F / 998°C) has approximately 4% to 8% absorption. This means the first coat of acrylic paint partially soaks into the surface rather than sitting on top. The result on the first coat is often streaky or uneven coverage, which is normal and expected.
Do not add extra paint to compensate for uneven first-coat coverage. Adding more wet paint to an already-absorbing surface creates a saturated surface that takes far longer to dry and can cause cracking in thick acrylic layers. Apply one thin, even first coat and wait for it to dry completely. The second coat will go on smoothly because the first coat has partially sealed the pores.
Painting Terra Cotta Pots and Planters
Terra cotta has higher porosity than bisque-fired stoneware or porcelain. Standard terra cotta flower pots have absorption rates between 10% and 15%. This high absorption causes paint to dry very quickly on contact, which leads to visible brushstrokes and uneven texture if the paint is applied too slowly or too thickly.
For terra cotta, thin acrylic paint slightly (5% to 10% water) for the first coat to allow it to flow more evenly across the surface. Apply the thinned first coat quickly with a wide foam brush for terra cotta pots. Follow with two full-strength coats for final coverage and color depth.
Seal all painted terra cotta with a waterproof varnish if the pot will be used for plants. Water from irrigation dissolves unsealed acrylic from terra cotta within a few weeks. Apply two coats of exterior-grade matte or satin varnish to both the interior and exterior of painted terra cotta planters intended for outdoor use.
Painting Ceramic for Outdoor Use: Weatherproofing Your Finished Piece
Outdoor painted ceramic faces four simultaneous threats that indoor pieces do not: UV radiation from sunlight, moisture from rain and irrigation, freeze-thaw cycling in cold climates, and direct physical contact from wind-blown debris. A paint and sealing strategy that works perfectly indoors will fail outdoors within one season without specific adaptations.
UV radiation breaks down the polymer chains in acrylic and enamel paint, causing fading and chalking. Moisture penetrates micro-cracks in paint and sealer, expands when it freezes, and pushes the coating off the ceramic surface. This is the primary failure mechanism for painted outdoor ceramics in climates with freezing winters.
Choosing Outdoor-Rated Paint for Ceramic
Exterior-grade multi-surface acrylic paint with UV inhibitors is the minimum standard for outdoor painted ceramic. FolkArt Outdoor, DecoArt SoSoft Fabric and Outdoor Paint, and Delta Ceramcoat Outdoor paint all include UV stabilizers not present in standard indoor craft acrylics. These UV stabilizers slow the photodegradation of the pigment and binder significantly, extending color life from 1 to 2 seasons (typical for indoor acrylic outdoors) to 3 to 5 seasons under normal sun exposure.
Key Specifications for Outdoor Ceramic Paint:
- UV stabilizer: required for any piece receiving direct sunlight
- Water resistance: look for “weatherproof” or “waterproof” rating on label
- Temperature range: paint and sealer must both be rated for your local freeze-thaw range
- Application temperature: most acrylics require 50°F to 90°F (10°C to 32°C) during application and initial cure
- Full cure before outdoor placement: minimum 72 hours after final sealer coat
Sealing Outdoor Painted Ceramic: What Actually Works
Paint alone is not sufficient for outdoor ceramic. Every outdoor painted ceramic piece requires a sealing coat specifically rated for exterior use and UV exposure. Without sealer, the paint surface is open to moisture penetration within weeks of outdoor placement.
The most effective sealer for outdoor painted ceramic is a two-part polyurethane or an exterior-grade water-based polyurethane varnish. Rust-Oleum Varathane and Minwax Helmsman Spar Urethane are two products with documented performance on outdoor painted surfaces in freeze-thaw conditions. Apply two to three thin coats, allowing full dry time between each, for a sealing system that resists both UV and moisture simultaneously.
Mod Podge Outdoor and similar craft-brand outdoor sealers are adequate for sheltered outdoor settings (covered porch, patio with overhead protection) but are not rated for direct rain exposure or freeze-thaw cycling. Do not use standard interior varnish, Mod Podge Original, or any sealer not explicitly rated for exterior use on outdoor painted ceramics.
Freeze-Thaw Protection for Painted Outdoor Ceramic
Painted ceramic in climates below 32°F (0°C) faces a specific failure risk that warm-climate users do not encounter. Moisture inside hairline cracks in the clay body or sealer expands 9% when it freezes. This expansion creates micro-fractures in both the ceramic and the paint coating. Over multiple freeze-thaw cycles, this process flakes off paint in patches regardless of the sealer quality.
The most effective protection is using only fully vitrified ceramic (absorption rate under 1%) for painted outdoor pieces in freezing climates. Vitrified ceramic has no pores for moisture to enter. Terra cotta and low-fire earthenware, with absorption rates of 5% to 15%, are fundamentally unsuitable for painted outdoor use in freezing climates. Even the best outdoor sealer cannot overcome the expansion forces from water trapped inside highly porous clay. Our guide on weatherproofing painted outdoor planters and pots covers sealer selection, application, and winter storage strategies for terra cotta in detail.
How to Paint Ceramic Mugs: Food Safety, Durability, and the Right Paint
Painting ceramic mugs introduces a constraint that purely decorative projects do not have: food and beverage contact. Paint on the interior of a mug or on the lip area where a person drinks is not a cosmetic concern. Certain pigments, solvents, and uncured paints can leach into hot beverages, and some contain heavy metals such as lead, cadmium, and chromium that are hazardous if ingested.
The correct approach for a painted mug that will be used for hot beverages is to paint only the exterior body, below the lip line, and use only paints and sealers that are AP certified non-toxic and rated for baking or firing after application.
The Safest Approach: Paint the Exterior Only
The simplest and safest method for a painted ceramic mug is to confine all paint and sealer to the exterior body of the mug, at least 1 inch (25mm) below the rim. This eliminates any risk of paint contact with beverages and allows a wider choice of paints and sealers.
Mark the 1-inch safety zone with a strip of low-tack painter’s tape before beginning. Keep all paint and sealer strokes below that line. Once finished and sealed, the tape-marked zone remains completely unpainted and food-contact safe.
Using Oven-Bake Ceramic Paint for Dishwasher-Resistant Mugs
Pebeo Porcelaine 150 and Marabu Porcelain Painter are two oven-bake ceramic paint products that, once properly cured, produce a finish that resists standard dishwasher cycles. The baking process causes the paint’s polymer chain to crosslink, producing a much harder film than air-dried acrylic.
The baking protocol matters precisely. Pebeo Porcelaine 150 requires air drying for 24 hours before baking, then baking at exactly 300°F (149°C) for 35 minutes. Placing the piece in a preheated oven produces more consistent results than starting in a cold oven. Allow the piece to cool completely inside the closed oven after the baking time ends. Removing it too quickly from heat causes thermal shock micro-cracking in the paint film.
Key Specifications for Mug Painting:
- Safe application zone: exterior body only, minimum 1 inch (25mm) below rim
- Paint type: oven-bake ceramic paint (Pebeo Porcelaine 150 or equivalent)
- Air dry before baking: 24 hours
- Baking temperature: 300°F (149°C)
- Baking time: 35 minutes
- Cooling: allow to cool in closed oven to room temperature
For a complete walkthrough of design techniques, brushwork, and sealing options for painted mugs, our step-by-step ceramic mug painting guide covers font lettering, pattern painting, and dishwasher resistance testing.
Paint Application Techniques for Ceramic: Brushwork, Sponging, Stenciling, and Spraying
The application method affects both the appearance of the finished surface and the adhesion of the paint. Each technique has specific requirements on ceramic that differ from applying paint to canvas or wood.
Brush Painting Ceramic: Choosing the Right Brush
Brush selection on ceramic matters more than on porous surfaces because the glassy or semi-smooth surface shows every bristle mark. Synthetic brushes leave fewer visible strokes on smooth ceramic than natural bristle brushes. Round and liner brushes are ideal for detail work and edge definition. Flat shader brushes cover large areas most efficiently.
Synthetic artist brush sets for ceramic and acrylic in a range of sizes (size 2 round, size 6 flat, size 1 liner) cover most ceramic painting applications. Replace brushes when bristles splay or lose their shape. A damaged brush deposits paint unevenly and creates visible application defects on smooth ceramic surfaces.
Load the brush lightly. Overloaded brushes leave thick ridges at the beginning of each stroke. Spread paint across the bristles on a palette before applying to ceramic. This distributes paint evenly and prevents overloading.
Sponge Painting for Texture Effects on Ceramic
Natural sea sponges create irregular, organic texture patterns on ceramic surfaces. Sponge painting is effective for faux stone finishes, mottled color effects, and background texture on decorative ceramic pieces.
Dampen the sponge slightly before loading with paint. A completely dry sponge absorbs too much paint and deposits it unevenly. Blot the loaded sponge on a palette before applying to the ceramic piece to prevent large paint deposits from the first contact. Build the texture in 2 to 3 layers, allowing each layer to dry before applying the next, for depth and variation in the pattern.
Stenciling on Ceramic Surfaces
Stenciling on ceramic requires low-tack adhesive stencils or standard stencils held firmly against the surface. On curved ceramic surfaces, flexible stencil material conforms to the curve better than rigid plastic stencils. Use adhesive-backed stencils designed for ceramic and glass for the cleanest edge definition on curved forms.
Apply stencil paint by dabbing vertically with a stiff-bristle stencil brush, not by sweeping horizontally. Horizontal brush strokes push wet paint under the stencil edge, creating bleed. Dab lightly in thin layers until the desired coverage is achieved. Remove the stencil immediately while the paint is still slightly wet for the cleanest edge. Removing a stencil from fully dry paint on ceramic can lift the paint along the edge.
Spray Painting Ceramic
Spray paint provides the most even base coat coverage on large ceramic surfaces and is particularly effective for full-coverage color changes on outdoor ceramic pieces. Use a spray paint specifically rated for ceramic and masonry surfaces, such as Rust-Oleum Universal or Krylon Fusion All-In-One.
Hold the spray nozzle 8 to 12 inches (20 to 30cm) from the ceramic surface. Move the can in smooth, continuous horizontal passes. Do not stop the spray motion while the nozzle is aimed at the piece. Stopping creates paint buildup and runs. Apply 3 to 4 light passes rather than one heavy coat. Allow 15 to 20 minutes between passes.
How to Seal Painted Ceramic: Protecting Your Finished Work
A sealing coat applied over finished painted ceramic serves two purposes. It protects the paint from physical abrasion and moisture, and it unifies the surface sheen across areas that may have dried at slightly different gloss levels due to uneven paint absorption.
The sealer must be compatible with the paint type used. Applying a solvent-based sealer over acrylic paint can dissolve the paint layer. Always confirm sealer and paint compatibility before applying.
Choosing the Right Sealer: Matte, Satin, or Gloss
The sheen level of the sealer determines the final appearance of the painted ceramic piece. Matte sealers produce a flat, non-reflective finish that is characteristic of chalk-painted and vintage-style ceramic. Satin sealers produce a low luster that is the most versatile and widely used for decorative ceramic pieces. Gloss sealers produce a shiny, glass-like finish that enhances color depth.
Water-based acrylic varnish for ceramic surfaces is the standard choice for indoor decorative pieces painted with acrylic or enamel paint. Apply two thin coats with a soft brush, allowing full dry time between each. Avoid applying in humid conditions (above 70% relative humidity) because water-based varnish can dry cloudy in high humidity.
Mod Podge as a Ceramic Sealer: When It Works and When It Does Not
Mod Podge Original is a water-based decoupage medium and sealer that is widely available and inexpensive. It adheres well to unglazed ceramic and provides adequate protection for indoor decorative pieces that will not be washed or handled roughly.
Mod Podge Original is not waterproof. Prolonged water exposure dissolves the sealer. It is not suitable for outdoor ceramic, for pieces that will be washed, or for items near water sources. Mod Podge Outdoor formula contains additional water-resistant additives and is suitable for sheltered outdoor use. Mod Podge is not rated for dishwasher use under any formulation. For dishwasher-resistant ceramic, use oven-bake paint and skip the Mod Podge entirely.
Applying Sealer Correctly to Avoid Brush Marks and Cloudiness
Apply sealer in the same thin-coat discipline used for the paint layers. Load the brush lightly, apply with long smooth strokes in one direction, and do not go back over an area once it begins to become tacky. Going back over semi-dry sealer with a loaded brush creates visible drag marks that cannot be corrected until the entire coat dries and is lightly sanded with 400-grit sandpaper.
Water-based acrylic sealers dry clear. Cloudiness in a dried sealer coat is almost always caused by one of three conditions: applying too thick a coat, applying in high humidity, or applying over paint that was not completely dry. Sand the cloudy coat lightly with 400-grit, wipe away the dust, and allow the surface to sit for 24 hours before applying a corrective coat in better conditions.
Ceramic Paint Comparison: Surface Type, Paint Type, and Durability at a Glance
Use the table below to match your ceramic surface type, intended use, and durability requirement to the correct paint and sealer combination before starting your project.
| Surface Type | Intended Use | Recommended Paint | Primer Required? | Sealer Required? | Durability Rating |
|---|---|---|---|---|---|
| Unglazed bisque | Indoor decorative | Acrylic craft paint | No | Yes (matte varnish) | Good (no handling) |
| Unglazed terra cotta | Indoor decorative | Chalk paint or acrylic | No | Yes (wax or varnish) | Good (light use) |
| Glazed ceramic | Indoor decorative | Enamel or specialty ceramic paint | Yes (adhesion primer) | Yes (satin varnish) | Moderate |
| Glazed ceramic mug | Functional beverage use | Oven-bake ceramic paint (exterior only) | Yes | No (baking replaces sealer) | Good (dishwasher rated) |
| Unglazed terra cotta | Outdoor planter (warm climate) | Exterior acrylic with UV inhibitor | No | Yes (exterior polyurethane) | Moderate (3 seasons) |
| Unglazed terra cotta | Outdoor planter (freeze-thaw climate) | Not recommended | N/A | N/A | Poor (absorption causes flaking) |
| Glazed vitrified ceramic | Outdoor decorative (any climate) | Two-part epoxy paint | Yes (epoxy primer) | Yes (exterior polyurethane) | Excellent |
| Unglazed stoneware | Indoor decorative or display | Acrylic or artist-grade acrylic | No | Yes (gloss or satin varnish) | Very good |
For most hobbyist projects, the paint that delivers the best balance of availability, ease of use, and reliable adhesion is an enamel-formula acrylic (on glazed surfaces) or standard craft acrylic (on unglazed surfaces) followed by a compatible exterior or interior varnish depending on the intended placement.
Painting Ceramic Holiday Decorations and Seasonal Collectibles
Ceramic Christmas villages, holiday figurines, and seasonal collectibles present specific painting challenges because they combine fine detail work with the need for durable, chip-resistant color that can be stored and retrieved repeatedly each year.
Most commercial ceramic holiday collectibles are glazed. Repainting or touching up a glazed ceramic Christmas tree or village building requires the same adhesion preparation as any other glazed ceramic: cleaning, light sanding, and priming before applying enamel or specialty ceramic paint.
The most common painting project for ceramic holiday pieces is spot repair of chipped paint or faded color, rather than full repaints. For chip repair, match the sheen level of the original finish and apply enamel paint with a fine liner brush (size 0 or 00 liner brush for ceramic detail work). Seal the repaired area with the same sealer finish as the surrounding surface to blend the sheen. Storage of painted ceramic holiday pieces in padded boxes or wrapped in acid-free tissue prevents the mechanical abrasion that causes most paint chips between seasons. Our guide on painting and caring for ceramic holiday collectibles covers touch-up techniques, storage, and full repaint methods for village pieces and figurines.
Common Mistakes When Painting Ceramic and How to Fix Them
The most common failures in painted ceramic projects follow predictable patterns. Recognizing the cause of each failure allows you to fix it correctly the first time instead of repeating the same process with the same result.
Paint Peeling Off Glazed Ceramic After It Dries
Paint peeling from glazed ceramic almost always traces back to one of three causes: oil contamination on the surface before painting, applying paint directly to unprimed glazed ceramic, or applying paint over primer that had not fully cured.
The fix requires stripping the peeling paint, cleaning the surface thoroughly with isopropyl alcohol, sanding with 220-grit sandpaper until the entire area has a uniform scuffed texture, applying adhesion primer, allowing the primer to cure for the full time specified (typically 1 hour for spray primer, 24 hours for brush-on), and repainting in thin coats. This full sequence is faster than re-doing a project three times with shortcuts.
Paint Cracking on Ceramic After Drying
Cracking in dried paint on ceramic is caused by applying a coat that was too thick. Thick acrylic paint dries from the outside in. The outer skin dries and becomes rigid while the inner layer is still wet and slightly flexible. As the inner layer loses moisture and contracts, it pulls against the rigid skin above and cracks it.
Prevention is more effective than repair. Apply only thin coats and allow each one to dry completely before adding the next. For cracked paint that has already dried, sand the cracked area back to the bare ceramic surface and repaint in thin layers. Applying a new coat of paint over a cracked surface fills the cracks temporarily but does not repair the underlying adhesion and the cracks return.
Uneven Coverage on the First Coat of Bisque Ceramic
Patchy first-coat coverage on bisque ceramic is not a paint quality problem. It is caused by the variable porosity of the bisque surface. Some areas absorb more paint than others, leaving lighter patches where the absorption was highest.
The correct response is to apply the first coat, let it dry completely, and apply a second coat. The first coat partially seals the pores and equalizes the absorption. The second coat goes on evenly across the entire surface. If two coats do not fully cover, a third thin coat resolves it. Adding more paint to a wet first coat on bisque causes overloading and uneven drying, not better coverage.
Brush Strokes Visible in the Finished Surface
Visible brushstrokes in dried paint on ceramic indicate either too thick a paint consistency or the wrong brush type. Smooth ceramic surfaces show brushstrokes more than porous surfaces because nothing absorbs the ridges left by bristles.
Thin the paint slightly (5% water for acrylics) to improve flow and reduce brushstroke ridges. Switch from a natural bristle brush to a soft synthetic brush, which deposits paint more evenly on smooth surfaces. Apply paint in long, even strokes all in the same direction rather than cross-hatching. If brush strokes are already present in a dried coat, lightly sand with 400-grit sandpaper and apply the next coat with better technique.
Underglaze vs Surface Paint: Understanding the Difference
Underglaze is a colorant formulated for application on greenware or bisque ceramic before glaze firing. It is not paint in the conventional sense. Underglaze is vitrified by the heat of the kiln and becomes a permanent part of the ceramic surface. Surface paint sits on top of the fired surface as a separate, removable coating.
These two categories are chemically and functionally different. Underglaze survives dishwashers, temperatures above 1800°F (982°C), and physical abrasion because it is fused glass, not a film coating. Surface paint does not survive kiln temperatures. Applying acrylic or enamel paint to ceramic and then firing it in a kiln destroys the paint completely and may fume toxic gases.
When to Use Underglaze Instead of Surface Paint
If your goal is a permanently food-safe, dishwasher-proof, chip-resistant decoration, underglaze applied before glaze firing is the correct approach. AMACO Velvet Underglaze sets for bisque and greenware are the most widely used commercial underglaze line in North America, available in 60 colors with documented cone 06 to cone 10 compatibility.
Apply underglaze to bisque-fired ceramic in 2 to 3 coats, allowing each coat to dry before applying the next. Cover with a clear commercial glaze, then fire to the cone appropriate for your clay body (typically cone 06 for earthenware, cone 6 for mid-fire stoneware). The result is a permanent, dishwasher-safe decoration that cannot be achieved with surface paint under any circumstances.
Surface paint is the correct choice when a kiln is not available, when you are working on an already-fired finished piece, or when the ceramic is not suitable for re-firing. Our guide on which paint types adhere and last on different ceramic surfaces compares surface paint, underglaze, overglaze enamel, and kiln-fired options across 12 criteria.
Frequently Asked Questions About Painting Ceramic
Can I use regular acrylic paint on glazed ceramic?
Regular craft acrylic paint does not adhere reliably to glazed ceramic without preparation. The glassy fired surface has near-zero porosity and provides no mechanical grip for standard water-based acrylics. Paint applied directly to an unprimed glazed surface will peel within days of normal handling.
The correct process is to clean the glazed surface, lightly sand it with 220-grit sandpaper to create micro-abrasions, apply an adhesion-promoting primer, allow the primer to cure fully, and then apply acrylic paint in thin coats. Alternatively, use a specialty ceramic paint like Pebeo Porcelaine 150 that contains adhesion promoters and does not require the same level of surface preparation.
What is the difference between enamel paint and acrylic paint for ceramic?
Enamel paint cures by chemical crosslinking (oil-based) or evaporation to a hard polymer film (water-based enamel), producing a Mohs hardness of 3 to 4. Standard acrylic paint dries by water evaporation alone and produces a softer film at Mohs hardness 1 to 2. On glazed ceramic, enamel adheres significantly better than standard acrylic because its harder film resists the micro-movement between the paint film and the glassy surface.
Enamel requires longer dry times (4 to 6 hours between coats vs 30 minutes for acrylic) and a 21-day full cure period. For decorative pieces that will not be washed, standard acrylic over primer performs adequately. For anything that will be handled repeatedly, enamel is the more durable choice.
Is painted ceramic food-safe?
Painted ceramic is not considered food-safe for interior surfaces that contact food or beverages, even when the paint is labeled AP non-toxic. AP non-toxic certification means the paint is safe if accidentally ingested in small amounts. It does not mean the paint is rated for repeated food contact or hot liquid immersion.
The only surfaces on a painted ceramic piece that can be considered food-safe are areas covered by a kiln-fired glaze layer applied before firing. Paint on the exterior body of a mug, below the lip line, poses no contact risk during normal use. Paint on the interior of a food vessel or on the drinking rim is a food-safety concern regardless of paint brand or sealing.
Can I put painted ceramic in the dishwasher?
Most painted ceramic is not dishwasher-safe. Standard acrylic paint, even when sealed, degrades rapidly in dishwasher conditions because the combination of hot water (140°F / 60°C), alkaline detergent, and mechanical agitation breaks down both the paint film and the sealer layer. Expect visible fading and lifting within 5 to 10 dishwasher cycles for standard acrylic-painted pieces.
Oven-baked ceramic paint (Pebeo Porcelaine 150, baked at 300°F / 149°C for 35 minutes) withstands dishwasher cycles significantly better. According to Pebeo’s technical data, properly baked Porcelaine 150 resists approximately 25 dishwasher cycles before showing visible wear. For true long-term dishwasher durability, underglaze fired under a clear glaze in a kiln is the only reliably permanent approach.
How long does painted ceramic last outdoors?
Outdoor-rated acrylic paint with UV inhibitors on a properly sealed and vitrified ceramic surface lasts 3 to 5 seasons under normal sun and rain exposure in temperate climates. The same paint on highly porous terra cotta in a freeze-thaw climate deteriorates within one season because moisture trapped in the clay body expands when frozen and pushes the paint off the surface from below.
Extending outdoor painted ceramic life requires using vitrified ceramic (absorption under 1%) as the base, applying UV-rated exterior acrylic paint, and sealing with two to three coats of exterior polyurethane. Storing painted outdoor ceramic pieces indoors during winter in freeze-thaw climates is the single most effective way to extend their life regardless of the paint or sealer used.
Do I need to seal painted ceramic?
Sealing is required for painted ceramic that will be handled, displayed outdoors, or exposed to any moisture. Unsealed acrylic paint on bisque or terra cotta scratches with light contact and absorbs moisture when wet. A two-coat application of water-based acrylic varnish increases the surface hardness from Mohs 1 to 2 (paint alone) to approximately Mohs 3, which is sufficient for decorative handling without chipping.
The only category of painted ceramic that does not require a separate sealer application is oven-baked specialty ceramic paint (such as Pebeo Porcelaine 150) on glazed surfaces. The baking process cures the paint to a hard, semi-resistant finish that functions as both paint and sealer. Standard acrylic on any ceramic surface requires a sealer to achieve acceptable durability.
Can I use nail polish to paint ceramic?
Nail polish adheres to glazed ceramic surfaces without primer because it contains the same solvent-based resin chemistry as enamel paint. The finish is hard and glossy. The limitations are significant: nail polish is available only in small quantities, the range of colors is limited for ceramic work, it is expensive per volume compared to dedicated ceramic paints, and the solvent fumes require good ventilation during application.
Nail polish is a workable option for very small ceramic pieces or for detailed accent work where only a small amount of a specific color is needed. It is not practical as a primary medium for ceramic painting projects. Use it as an accent paint on already-sealed pieces rather than as a base layer, because applying additional paint or sealer over nail polish can cause the nail polish to lift or wrinkle.
Why is my paint bubbling on the ceramic surface?
Bubbling in wet or drying paint on ceramic has three common causes. First, moisture trapped inside unglazed ceramic (painting ceramic that was not completely dry after washing) converts to vapor under the wet paint and forms bubbles. Second, applying paint too thickly traps solvent under the drying skin. Third, applying paint to ceramic that was heated in the sun or stored in a warm area causes the surface to off-gas and push air through the wet paint layer.
Prevention: Allow ceramic to dry for a minimum of 2 hours after washing before painting. Apply thin coats only. Allow the ceramic piece to reach room temperature before painting if it has been stored in a warm area. Popped bubbles in dried paint must be sanded flat with 400-grit sandpaper before repainting to prevent the texture from telegraphing through subsequent coats.
Can I paint over existing paint on ceramic?
You can paint over existing paint on ceramic if the existing paint layer is still firmly adhered, the surface is clean and free of grease, and the new paint is compatible with the existing layer. Test compatibility by applying a small amount of new paint over the existing paint in a hidden area and checking after 24 hours for softening, wrinkling, or lifting of the existing layer.
Incompatible combinations include solvent-based enamel over soft acrylic (the solvent in enamel dissolves the acrylic underneath) and water-based paint over oil-based enamel that has not fully cured (the water prevents curing and causes adhesion failure). If the existing paint layer is peeling, cracking, or incompatible with the new paint, strip it completely before repainting.
What happens if I fire painted ceramic in a kiln?
Surface paints (acrylic, enamel, chalk paint, latex) are completely destroyed by kiln temperatures above 200°F (93°C). Kiln firing begins far above this threshold: bisque firing reaches 1828°F (998°C) and glaze firing reaches 2232°F (1222°C) for mid-fire work. All organic binders in surface paints combust and volatilize at kiln temperatures, leaving no visible paint on the ceramic. The combustion also releases fumes from acrylic resins, oil binders, and pigment carriers that can be hazardous and can contaminate other pieces in the kiln.
Never fire a ceramic piece that has been painted with surface paint unless the intent is to completely burn the paint off as part of a specific finishing process (such as a smoke-fired surface treatment). If kiln-fired decoration is the goal, use ceramic underglaze or overglaze enamel, both of which are specifically formulated to survive kiln temperatures and fuse permanently to the ceramic surface.
How do I paint fine details on ceramic without a steady hand?
Fine detail work on ceramic is achievable without exceptional hand steadiness by using stabilization techniques rather than relying on freehand control. Rest the brush hand’s pinky finger or side of the palm against the ceramic piece or a support surface as a brace. This dramatically reduces unintended movement during a stroke. A banding wheel (a rotating platform for ceramic) allows you to rotate the piece slowly while holding the brush steady, producing precise horizontal lines without moving the brush at all.
Ceramic banding wheels for detail work range from $25 to $80 and are one of the most useful accessories for anyone painting round ceramic forms. For lettering and intricate patterns, pencil the design onto the primed ceramic surface first using a water-soluble ceramic pencil, then trace the pencil lines with paint. The pencil marks disappear under the paint and sealer without any visible trace.
Is it safe to paint ceramic with children?
Painting unglazed bisque ceramic with AP-certified non-toxic acrylic craft paint is one of the safest craft activities for children. Brands such as FolkArt, DecoArt Americana, and Crayola Washable Paints carry AP non-toxic certification from the Art and Creative Materials Institute, confirming the products contain no materials in sufficient quantities to cause acute or chronic harm under normal conditions of use.
Avoid enamel paints, two-part epoxy paints, and solvent-based products in any child-involved project. These contain solvents and hardeners that require adult ventilation precautions. Use ceramic painting in bisque-fire studios (where bisque blanks are provided pre-fired) as an ideal children’s activity. The porous bisque surface accepts child-safe acrylics without any preparation, and the finished pieces can be sealed by an adult afterward.
Conclusion
Painting ceramic successfully comes down to matching the right paint and preparation method to the specific surface you are working on. Glazed ceramic requires sanding, adhesion primer, and enamel or specialty ceramic paint to achieve a durable bond. Unglazed bisque and terra cotta accept standard acrylic paint directly, with sealing required for any piece that will be handled or placed outdoors.
For the most permanent, food-safe, and dishwasher-proof results, underglaze applied before kiln firing is in a different category entirely from any surface paint. Start by identifying your surface type using the water drop test, confirm your intended use (decorative, functional, indoor, or outdoor), and select the paint and sealer combination from the comparison table in this guide that matches all three criteria.