How to Paint Ceramic Mugs: A Step-by-Step Guide & Tips

Most people grab the wrong paint for ceramic mugs and wonder why it chips, peels, or washes off after two uses. The paint type, surface preparation, and finishing method together determine whether your design lasts for years or fails after the first hand wash.
Painting ceramic mugs combines surface decoration techniques with practical material knowledge. This guide covers every step from choosing the right paint for glazed and unglazed surfaces, preparing the mug correctly, applying paint with brushes or sponges, adding detail work, sealing the finished surface, and curing the design so it holds up to daily use.
What Kind of Paint Works on Ceramic Mugs?
The right paint for a ceramic mug depends on whether the mug surface is glazed or unglazed, and whether the finished piece will touch food or lips. Using the wrong paint is the single most common reason mug painting projects fail within weeks.
Glazed ceramic mugs have a smooth, glassy surface that repels most standard craft paints. The glaze layer is a fired glass coating that gives paint almost nothing to grip. Unglazed bisqueware mugs have a porous, matte surface with a texture that accepts paint far more readily.
Acrylic Paint for Glazed Mugs
Acrylic craft paint is the most widely available option for decorating glazed mugs. Standard acrylics adhere to glazed surfaces when the mug is properly cleaned and when a sealer or varnish is applied over the finished design.
Standard acrylic paint on a glazed mug is not dishwasher-safe without sealing. Even with a sealer, hand washing is the safest approach for designs that cover areas that contact food or beverages directly.
Key Specifications for acrylic paint on glazed ceramic:
- Surface compatibility: glazed and unglazed ceramic
- Drying time: 20 to 30 minutes per coat at room temperature
- Coats required: 2 to 3 for full opacity on dark glazed surfaces
- Food contact safety: not food-safe without sealing; keep designs away from lip contact areas
- Sealer required: yes, matte or gloss acrylic sealer spray or brush-on formula
Enamel Paint for Dishwasher Resistance
Enamel-based ceramic paints designed specifically for glass and ceramics offer stronger adhesion and better dishwasher resistance than standard acrylics. Brands such as Pebeo Vitrea 160 and DecoArt Americana Multi-Surface Satin are formulated to bond with smooth glazed surfaces after oven curing.
Enamel ceramic paint cured at 325 to 350 degrees Fahrenheit (163 to 177 degrees Celsius) for 30 minutes in a home oven produces a surface that withstands repeated top-rack dishwasher cycles. This cure temperature is well within the range of a standard kitchen oven and does not require a pottery kiln.
Key Specifications for enamel ceramic paint:
- Cure temperature: 325 to 350 degrees Fahrenheit (163 to 177 degrees Celsius)
- Cure time: 30 minutes at full temperature
- Dishwasher resistance after curing: top-rack safe for most formulas
- Coats required: 2 coats with 1-hour drying time between coats
- Food contact safety: check manufacturer AP (Approved Product) certification before applying near lip contact zones
Underglaze and Overglaze Options
Commercial underglaze is a clay-based colorant used by studio potters for decorating bisqueware mugs before glazing and kiln firing. Amaco Velvet underglazes are widely used in studio and classroom settings and fire from cone 06 (1828 degrees Fahrenheit / 998 degrees Celsius) to cone 10 (2381 degrees Fahrenheit / 1305 degrees Celsius).
Underglaze requires a kiln for permanent results. It is not an option for home painters without firing access, but it produces the most durable and food-safe surface possible because the design becomes part of the fired ceramic body.
Overglaze enamels are low-fire paints applied over an already-glazed and fired ceramic surface. They require a third firing at cone 022 (approximately 1083 degrees Fahrenheit / 584 degrees Celsius) to fuse permanently. Overglaze is used in professional porcelain decoration but is outside the scope of most home mug painting projects.
How to Prepare a Ceramic Mug for Painting
Surface preparation determines whether paint adheres for years or peels within days. A mug pulled directly from a store shelf carries invisible oils, dust, and mold-release compounds from manufacturing that prevent paint from bonding to the glaze surface.
The preparation process takes less than 15 minutes but is non-negotiable. Skip it and even the best enamel ceramic paint will lift from the surface within a week of use.
Cleaning the Mug Surface
Wash the mug with dish soap and warm water, then dry it completely. Follow with a wipe-down using 91% isopropyl rubbing alcohol on a lint-free cloth or lint-free cotton pad to remove any remaining oils.
Allow the alcohol to evaporate for at least 5 minutes before touching the mug surface again. Skin oils transfer immediately to a clean glazed surface, so handle the mug only by the handle or with clean cotton gloves from this point forward.
Sanding for Better Adhesion on Glazed Surfaces
Lightly sanding a glazed mug surface with 400-grit wet/dry sandpaper creates microscopic scratches that give paint a mechanical grip on the otherwise smooth glaze. This step is optional for enamel ceramic paints but strongly recommended for standard acrylic paints on heavily vitrified mugs.
Sand in circular motions with light pressure for 60 to 90 seconds over the area to be painted. Wipe away the resulting fine powder with a damp cloth, then clean the surface again with isopropyl alcohol before proceeding.
Using a Primer or Adhesion Promoter
An adhesion promoter spray applied in one thin coat before painting significantly improves acrylic paint bonding on smooth glazed ceramics. Krylon and Rust-Oleum both produce multi-surface adhesion primers suitable for glass and ceramic surfaces.
Apply a single light coat from 8 to 10 inches (20 to 25 centimeters) away. Allow 15 to 20 minutes of dry time before applying paint. A thick primer coat defeats its purpose by creating a soft underlayer that paint can push through when brushed.
What Supplies Do You Need to Paint a Ceramic Mug?
A complete mug painting kit includes the paint, the right brushes for your design style, tape for clean edges, a palette for mixing, and a sealer for finishing. Buying the wrong brush type is the second most common beginner mistake after using the wrong paint.
Brushes for Ceramic Mug Painting
Fine detail brushes with synthetic bristles work best for lettering and intricate designs on curved mug surfaces. Natural bristle brushes absorb too much water with acrylic paint and produce streaky strokes on smooth glazed surfaces.
A basic mug painting brush set should include a flat shader brush (size 6 to 8) for filling large areas, a round detail brush (size 1 to 0) for outlines and fine lines, and a liner brush (size 10/0) for lettering and hairline details.
Masking Tape and Stencils
Low-tack painters tape creates clean geometric borders and protects areas of the mug that should remain undecorated. Press the tape edge firmly to the glazed surface with a fingernail to prevent paint from bleeding underneath.
Adhesive vinyl stencils cut on a Cricut or Silhouette machine allow precise repeatable designs on curved mug surfaces. Vinyl stencils conform to the curve of a mug better than flat paper stencils and produce sharper edges when used with a light sponge-stippling application rather than brush strokes.
Palette, Water Cups, and Other Tools
A stay-wet palette keeps acrylic paint workable for 30 to 60 minutes longer than a standard plastic palette, which is critical when painting a mug in a warm studio. Acrylic paint that starts drying on the palette produces streaky, uneven coverage when applied to the mug surface.
Keep two water cups on hand: one for rinsing brushes and one with clean water for thinning paint. Change the rinse cup when the water turns opaque to prevent contaminating clean colors.
How to Paint a Ceramic Mug Step by Step
The following process works for both glazed store-bought mugs painted with enamel or acrylic paint and for unglazed bisqueware mugs painted with underglaze or craft paint. The preparation steps and the sealing steps differ between the two surface types.
Use the step-by-step visual guide below to track your progress through the full process before beginning.
PROCESS GUIDE
How to Paint a Ceramic Mug: Complete Step-by-Step Process
8 steps covering preparation, painting, and curing. Total time: 2 to 3 hours active work plus overnight drying.
Clean and degrease the mug surface
Wash with dish soap, dry completely, then wipe with 91% isopropyl alcohol on a lint-free cloth. Allow 5 minutes for the alcohol to evaporate before touching the surface.
Sand lightly (glazed mugs only)
Use 400-grit wet/dry sandpaper in circular motions for 60 to 90 seconds on the area to be painted. Wipe dust away with a damp cloth, then clean again with isopropyl alcohol.
Apply adhesion primer if using standard acrylics
Spray one thin coat of adhesion promoter from 8 to 10 inches away. Allow 15 to 20 minutes of dry time before painting. Skip this step if using oven-cure enamel ceramic paint.
Sketch your design lightly with a chalk pencil
Use a white chalk pencil or water-soluble graphite pencil to mark your design directly onto the mug surface. Chalk wipes away with a damp cloth if you make an error and disappears under paint coats.
Apply the first paint coat in thin layers
Apply a thin, even first coat using smooth strokes in one direction. Thin coverage dries faster and produces less brush texture than thick paint. Allow each coat to dry fully (20 to 30 minutes) before applying the next.
Add detail work and second coat
Apply fine outlines, lettering, or accent colors using a size 0 round or 10/0 liner brush after the base coat has dried completely. A second full coat follows the detail work to unify coverage and correct any thin spots.
Allow 24 hours before sealing or curing
Even when paint feels dry to the touch after 30 minutes, the full acrylic film needs 24 hours to reach hardness before a sealer coat is applied. Sealing too early traps solvent vapors and causes the surface to remain tacky or bubble.
Seal with varnish or oven-cure the painted mug
For acrylics: apply 2 to 3 thin coats of matte or gloss acrylic sealer spray. For enamel ceramic paint: place the mug in a cold oven, heat to 325 to 350 degrees Fahrenheit (163 to 177 degrees Celsius), maintain for 30 minutes, then allow the mug to cool completely inside the oven before removing.
How to Sketch a Design on a Round Mug Surface
Working on a curved cylindrical surface is different from painting on a flat canvas. A simple trick is to cut a strip of paper to the mug’s circumference and draw your design flat on the paper before transferring the proportions to the mug with a chalk pencil.
For symmetrical designs such as geometric patterns or repeating motifs, wrap the paper template around the mug and use a pin to prick through the key reference points. Connect the prick marks with chalk pencil lines directly on the mug surface.
How to Apply Paint Evenly on Glazed Surfaces
Thin paint to the consistency of heavy cream before applying to a glazed mug. Add water to acrylic paint one drop at a time on the palette until the paint flows from the brush without dripping. Paint that is too thick drags and lifts on a smooth glazed surface rather than flowing evenly.
Use the side of the brush rather than the tip for filling large areas. This reduces stroke marks and produces a smoother film. Pull strokes in one consistent direction within each section to keep the brush texture uniform.
Painting Lettering on Ceramic Mugs Without Mistakes
Write your text with a chalk pencil in your actual handwriting first, then trace over it with a liner brush loaded with slightly thinned paint. A size 10/0 liner brush holds enough paint in its long bristles to complete full letterforms without reloading mid-stroke.
If a letter goes wrong, remove wet paint immediately with a damp cotton swab before it dries. Dried acrylic paint on a glazed mug surface can be gently scraped off with a wooden toothpick without scratching the glaze, then painted over once the area is clean and dry.
How to Use Enamel Paint on Ceramic Mugs for a Dishwasher-Safe Result
Oven-cure enamel ceramic paint is the closest a home painter can get to a commercially durable mug surface without a pottery kiln. The curing process fuses the enamel film to the glaze surface through heat rather than adhesion alone, producing a bond that standard acrylics cannot achieve at room temperature.
Pebeo Vitrea 160 and DecoArt Americana Glass Paint both carry AP (Approved Product) certification from the Art and Creative Materials Institute (ACMI), confirming they are formulated without toxic materials that would be hazardous in a food-contact context. Always verify the specific formula you purchase carries current AP certification before using it near the rim or interior of a drinking mug.
The Oven Curing Process for Enamel Ceramic Paint
Place the fully painted and dried mug in a cold, unheated oven. Starting from cold prevents thermal shock cracking, which can occur when a ceramic piece is placed into an already-hot oven. Set the oven to 325 to 350 degrees Fahrenheit (163 to 177 degrees Celsius).
Once the oven reaches temperature, maintain for 30 full minutes. Turn off the oven and allow the mug to cool completely inside the oven with the door closed before removing it. This cooling-inside-the-oven step is critical: rapid cooling from a hot surface to room temperature can crack both the enamel film and the ceramic mug itself.
Key Specifications for enamel paint oven curing:
- Starting temperature: cold oven, never pre-heated
- Cure temperature: 325 to 350 degrees Fahrenheit (163 to 177 degrees Celsius)
- Hold time at temperature: 30 minutes minimum
- Cooling method: inside closed oven, power off
- Wait time before use after curing: 72 hours for maximum hardness
- Dishwasher safety: top-rack safe after full cure and 72-hour rest period
Why Enamel Paint Bonds Differently Than Acrylic Paint
Standard acrylic paint dries by water evaporation, leaving a polymer film that sits on top of the glaze surface. The bond is purely mechanical, relying on microscopic surface irregularities to hold the film in place.
Enamel ceramic paint cures by a chemical cross-linking reaction triggered by heat. Above approximately 250 degrees Fahrenheit (121 degrees Celsius), the enamel resin molecules form covalent bonds with each other and with the silica compounds in the ceramic glaze. This is why oven-cured enamel survives dishwasher cycles that strip acrylic paint within 5 to 10 washes.
This cross-linking only occurs at the correct cure temperature. Under-curing at 275 degrees Fahrenheit (135 degrees Celsius) produces partial bonding that feels hard to the touch but fails under repeated thermal cycling in a dishwasher. If the cured surface scratches easily with a fingernail, the mug was under-cured and needs another 30-minute cycle at the correct temperature.
How to Paint Unglazed Bisqueware Mugs
Unglazed bisqueware mugs are porous, matte, and highly absorbent. They accept paint, underglaze, and stain more readily than glazed surfaces but also soak up moisture from brushes rapidly, which makes blending and wet-into-wet techniques more difficult.
Bisqueware mugs fired to cone 06 (1828 degrees Fahrenheit / 998 degrees Celsius) have an absorption rate of approximately 10 to 15%, meaning they will draw significant moisture from a loaded brush within 3 to 5 seconds of contact. This rapid absorption is both a feature and a challenge.
Using Acrylic Paint on Bisqueware
Thin acrylic paint slightly more than you would for a glazed surface, as the bisqueware absorbs the water fraction quickly. Apply 3 to 4 thin coats rather than 2 thicker ones to build full coverage without overloading the porous surface with pigment that cracks as it dries.
Seal a painted bisqueware mug with 3 coats of waterproof matte or gloss spray sealer. The sealer fills the open pores of the bisqueware surface and creates a barrier that prevents moisture from penetrating and lifting the paint from underneath.
Using Underglaze on Bisqueware for Kiln Firing
Underglaze applied to bisqueware produces a permanent, food-safe result after kiln firing. Amaco Velvet underglazes in the LUG series are formulated for cone 05 to cone 10 (1915 to 2381 degrees Fahrenheit / 1046 to 1305 degrees Celsius) and can be applied by brush, sponge, or dipping to bisqueware before a glaze coat is applied.
Apply underglaze in 2 to 3 coats on bisqueware, allowing each coat to dry completely (20 to 30 minutes) before the next. Apply a coat of clear glaze over the dried underglaze decoration before firing. The clear glaze locks the underglaze colors permanently into a smooth, glass-like surface during the glaze firing.
For readers working with bisqueware mugs decorated with underglaze and fired in a studio kiln, our guide on painting glazed and unglazed ceramic surfaces for every context covers the full process from clay selection through glaze application and firing.
Techniques for Decorating Ceramic Mugs Beyond Basic Brushwork
Brushwork produces one type of mark. Sponging, stamping, resist techniques, and layering produce surface effects that brushes alone cannot achieve. Each technique works differently on glazed versus unglazed surfaces and with different paint viscosities.
Sponge Painting for Texture and Gradients
A natural sea sponge loaded with diluted acrylic paint and stippled onto a glazed mug surface produces organic, irregular texture that reads as aged or handmade. Cut a small piece from a natural sea sponge to roughly 2 inches (5 centimeters) square, dampen it slightly, then load sparingly with paint before testing on a ceramic tile before touching the mug.
For a gradient effect, apply the first color across the lower third of the mug using the sponge, then blend the second color from the upper third downward, overlapping in the middle while both applications are still wet. Work quickly because acrylic paint dries within 20 to 30 minutes on a glazed surface and blending becomes impossible once the film begins to set.
Wax Resist Decoration
Wax resist creates areas that repel paint, producing negative-space designs. Apply a thin layer of liquid wax resist or a plain white candle rubbed directly onto the cleaned mug surface to create the resist areas. Paint over the entire surface, then wipe back gently with a damp cloth to reveal the unpainted areas beneath the wax.
Wax resist works best on unglazed bisqueware painted with watercolor-consistency diluted paint. On smooth glazed surfaces, the contrast between waxed and unwaxed areas is subtle because paint adhesion is already limited. Use resist techniques on bisqueware or heavily textured surfaces for the clearest visual effect.
Stamping and Stenciling Repeating Patterns
Foam stamps cut from dense craft foam sheets produce clean repeating motifs on cylindrical mug surfaces when the mug is rolled toward the stamp rather than pressing the stamp onto the curved surface. Rolling the mug against a flat-loaded stamp produces more consistent contact than pressing a flexible stamp against a curved surface.
Load the stamp by pressing it onto a paint-loaded foam applicator pad rather than directly into a paint pool. Even loading produces cleaner impressions with less excess paint at the stamp edges. Test the loaded stamp on paper before applying to the mug to check coverage and pressure.
Painting Geometric Patterns with Tape
Painters tape creates perfectly straight lines on curved mug surfaces when applied along the natural horizontal bands of the cylinder. Run one strip of tape around the mug’s circumference to create a horizontal divide, press both edges down firmly, then apply paint from the tape inward in one direction only.
Remove tape while the paint is still wet (within 10 to 15 minutes of application) by peeling at a 45-degree angle away from the painted edge. Waiting until paint is fully dry causes the tape to pull the paint film with it, especially on smooth glazed surfaces where adhesion is weakest at the edges.
How to Seal and Protect Painted Ceramic Mugs
The sealer coat transforms a fragile painted surface into one that holds up to daily handling and, in some cases, hand washing. Without sealing, painted acrylic designs on glazed mugs begin to chip at edges and high-contact areas within days of regular use.
The right sealer depends on the paint type, the mug’s use context (decorative-only versus functional drinkware), and the level of dishwasher resistance needed.
Spray Sealers for Acrylic-Painted Mugs
A UV-resistant acrylic sealer spray in matte or gloss finish protects painted mugs used as decorative pieces or pencil holders. Krylon Crystal Clear and Rust-Oleum Matte Finish are widely available and compatible with acrylic and enamel paints on ceramic surfaces.
Apply 2 to 3 thin coats from 8 to 10 inches (20 to 25 centimeters) distance, allowing 15 to 20 minutes between coats. Multiple thin coats produce a more durable and even protective layer than a single heavy coat, which runs and produces drips on curved surfaces.
Spray sealer on acrylic-painted mugs is not food-safe and is not intended for surfaces that contact beverages directly. Keep designs and sealer coats at least 1 inch (2.5 centimeters) below the rim and away from the mug interior. For information about what makes a ceramic mug safe for everyday drinking use, see our detailed resource on food safety standards for ceramic mugs and dishes.
Food-Safe Sealers for Functional Drinkware
No air-dry spray or brush-on sealer is permanently food-safe for surfaces in direct contact with beverages. The term “food-safe when dry” on some sealer labels refers to incidental contact, not immersed or repeated liquid contact.
For a functional drinking mug with a truly food-safe painted surface, use oven-cure enamel paint with current AP certification and no decorative elements on the interior or lip contact area. The ceramic mug safety risks associated with improper sealers, lead-containing pigments, and cracked glazed surfaces are covered in our guide on lead glaze risks, cracked mug safety, and vintage ceramic hazards.
Brush-On Resin and Varnish Options
Two-part epoxy resin applied in a thin coat over a fully cured painted mug surface produces the highest-gloss and most physically durable finish available without kiln firing. Epoxy resin seals, levels, and protects painted surfaces against scratching, chipping, and moisture exposure more effectively than spray sealers.
Mix resin components in exact 1:1 or 1:2 ratios as specified by the manufacturer. Off-ratio mixing produces a permanently tacky surface that never fully hardens. Apply within the working time window (typically 20 to 40 minutes for most two-part formulas) and allow 24 to 72 hours of full cure before handling.
How to Avoid the Most Common Mug Painting Mistakes
The differences between a mug painting project that lasts years and one that chips within a week are almost entirely in the preparation and finishing steps, not in the design itself. Most failures are predictable and preventable.
Here is a practical look at the mistakes that ruin painted ceramic mug projects and the specific corrections that fix them before they happen.
Use the table below to match the symptom you see to its root cause and the correct fix.
| Problem Symptom | Root Cause | Correct Fix | Prevention Step | Time to Fix |
|---|---|---|---|---|
| Paint peels off after 1 to 2 washes | Surface not degreased before painting | Remove all paint, clean with isopropyl alcohol, repaint | Wipe mug with 91% isopropyl alcohol before starting | 30 minutes to restart |
| Paint chips at edges and raised areas | No adhesion primer on smooth glazed surface | Sand lightly with 400-grit, clean, apply adhesion primer, repaint | Use adhesion promoter before painting any glazed mug | 2 hours including dry time |
| Paint streaks and brush marks visible | Paint applied too thick in single coat | Thin paint to heavy-cream consistency and apply in thin multiple coats | Always thin acrylic paint before applying to glazed surfaces | Apply 2 to 3 thin coats over 2 hours |
| Sealer coat stays tacky after 24 hours | Sealer applied before paint was fully cured | Allow sealer to off-gas for 72 hours; if still tacky, remove and reapply after full cure | Wait 24 hours after last paint coat before applying sealer | 72-hour cure window required |
| Tape pulls up paint when removed | Tape left on until paint was fully dry | Score tape edge with a craft knife before peeling; repaint lifted areas | Remove tape within 10 to 15 minutes of painting while still wet | 10 minutes of careful removal |
| Enamel paint stays soft after oven cure | Under-cured: temperature too low or hold time too short | Return mug to cold oven, bring to 350 degrees Fahrenheit (177 degrees Celsius), hold 30 minutes | Use oven thermometer to verify actual temperature; controller readings drift | 1 hour including reheat and cool-down |
| Color looks dull or faded after drying | Paint thinned too much; pigment ratio too low | Apply an additional full-strength coat over the dry surface | Thin paint minimally; test color saturation on a ceramic tile first | 30 minutes additional painting |
Why Oven Temperature Accuracy Matters for Enamel Paint
Home oven thermostats are frequently inaccurate by 25 to 50 degrees Fahrenheit (14 to 28 degrees Celsius). A dial set to 350 degrees Fahrenheit may deliver only 300 degrees Fahrenheit, which is below the cross-linking threshold for most enamel ceramic paints.
Place an oven thermometer inside the oven and verify the actual temperature before placing any painted mug inside for curing. This single tool prevents the most common enamel curing failure mode and costs less than five dollars.
Ceramic Mug Paint Comparison: Which Paint Type Is Right for Your Project?
The paint type that produces the best result depends on four factors: the mug surface type (glazed or bisqueware), the intended use (decorative or functional drinkware), whether the finished piece needs to be dishwasher-safe, and whether kiln access is available.
Use the table below to match your project requirements to the correct paint type before purchasing supplies.
| Paint Type | Surface Compatibility | Curing Method | Dishwasher Safe? | Food Contact Safe? | Approx. Cost |
|---|---|---|---|---|---|
| Standard acrylic craft paint | Glazed and bisqueware | Air dry plus spray sealer | No (hand wash only) | No (decorative use only) | $5 to $15 per set |
| Enamel ceramic paint (oven-cure) | Glazed surfaces | Oven 325 to 350 degrees Fahrenheit (163 to 177 degrees Celsius), 30 min | Yes (top-rack after full cure) | Yes if AP-certified and away from lip contact | $12 to $25 per set |
| Underglaze (Amaco Velvet) | Bisqueware only | Kiln firing cone 05 to 10 | Yes (fully dishwasher-safe after firing) | Yes (food-safe after glaze firing) | $8 to $12 per 2 oz bottle |
| Chalk paint | Glazed and bisqueware | Air dry plus wax or sealer | No (decorative only) | No (decorative use only) | $10 to $20 per quart |
| Porcelain paint markers | Glazed surfaces | Air dry or oven-cure per brand | Varies by brand and cure method | Check AP certification per brand | $3 to $8 per marker |
| Overglaze enamel | Fired glazed surfaces | Kiln firing cone 022 (1083 degrees Fahrenheit / 584 degrees Celsius) | Yes (after kiln firing) | Yes (AP-certified formulas) | $15 to $40 per color set |
For readers painting outdoor planters or garden pots with similar acrylic and enamel paint techniques, the weatherproofing requirements differ significantly from indoor mug painting. Our weatherproof painting guide for ceramic planters and outdoor pots covers UV-resistant paint selection and sealing methods for exterior exposure.
For most home painters decorating glazed store-bought mugs as gifts or personal use pieces, oven-cure enamel ceramic paint with AP certification is the best balance of ease, durability, and safety without requiring kiln access.
The following interactive tool helps you match your specific mug surface type and intended use to the most appropriate paint and technique combination.
INTERACTIVE TOOL
Find the Right Paint and Technique for Your Ceramic Mug Project
Answer 2 questions to get a personalized mug painting recommendation.
How to Paint Ceramic Mugs with Paint Markers and Porcelain Pens
Porcelain paint markers are fine-tip markers filled with oil-based enamel paint designed specifically for writing and drawing on smooth ceramic and glass surfaces. They require no palette, no brushes, and no mixing, making them the fastest option for lettering and line-based designs on glazed mugs.
Posca paint markers and Molotow Liquid Chrome markers work on ceramic surfaces but are acrylic-based and require sealing for any durability. True porcelain markers such as Sakura Pen-Touch Opaque or Decocolor Ceramic Pen contain oil-based enamel that can be oven-cured for improved adhesion.
How to Use Porcelain Paint Markers Correctly
Shake the marker vigorously for 30 seconds before first use and press the tip onto a scrap paper surface several times to prime the flow. Uneven or skipping lines during the first few strokes indicate insufficient priming, not a defective marker.
Draw on a cleaned, alcohol-wiped mug surface and allow the marker ink to dry completely undisturbed for 24 hours. For oven-cure formulas, follow the same cold-start oven curing process as enamel paint: 325 to 350 degrees Fahrenheit (163 to 177 degrees Celsius) for 30 minutes. Mistakes in wet marker ink can be removed immediately with isopropyl alcohol on a cotton swab before the ink cures.
Combining Markers with Brush-Applied Paint
Porcelain paint markers excel at fine outlines and lettering that brushes cannot execute cleanly on curved surfaces. Use brush-applied enamel paint for large filled areas and color blocking, then add fine detail, outlines, and text with a fine-tip porcelain marker over the cured paint base coat.
Both the brush-applied enamel and the marker layer must be oven-cured together in the final curing step. Curing the base coat first, then adding markers and curing again for a second cycle at the same temperature, produces no degradation and is the recommended workflow for complex multi-technique decorated mugs.
How to Bake Painted Ceramic Mugs for Durability
Baking painted ceramic mugs in a home oven is safe, straightforward, and dramatically extends the life of enamel-painted designs. The process does not damage the ceramic mug, the paint, or the oven when executed correctly.
The most important rule is to start with a cold oven. A ceramic mug placed into a pre-heated oven experiences sudden thermal shock: the outer surface heats instantly while the interior remains cool, creating differential expansion stress that can crack both the ceramic body and the paint film.
Step-by-Step Oven Baking Process
Place the painted and fully air-dried mug on a ceramic baking tile or a folded layer of aluminum foil on the oven rack. Do not use a baking sheet lined with parchment paper as the paper can scorch at cure temperatures and impart smoke that discolors the paint surface.
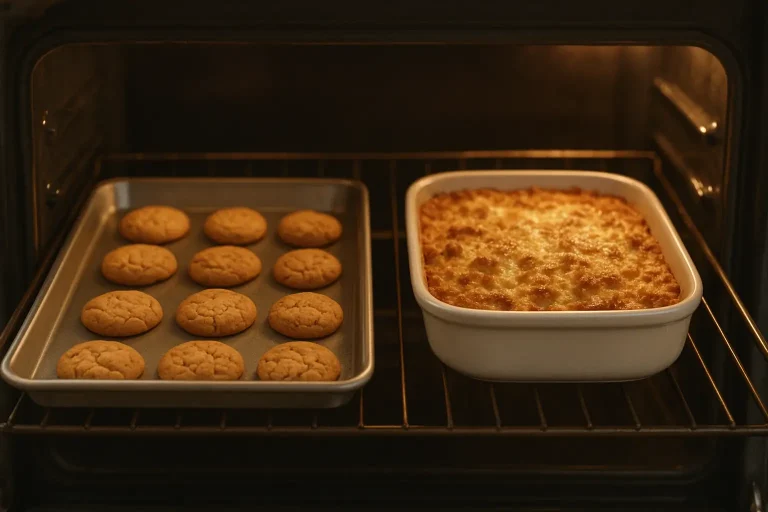
Set the oven to 325 to 350 degrees Fahrenheit (163 to 177 degrees Celsius) and allow it to come to temperature with the mug inside. Once the set temperature is reached, maintain it for 30 minutes. Turn off the oven, leave the door closed, and allow the mug to cool to room temperature completely before removing it. The entire process from cold start to room temperature typically takes 90 to 120 minutes.
For readers curious about the broader safety of ceramic bakeware at elevated temperatures, our resource on safe oven temperatures for ceramic dishes, casseroles, and stoneware covers the thermal limits of different ceramic bodies and glazes in oven use.
What Happens If You Over-Cure Enamel Paint
Enamel ceramic paint exposed to temperatures above 375 to 400 degrees Fahrenheit (191 to 204 degrees Celsius) begins to discolor, yellow at the surface, or produce a matte, chalky appearance instead of the intended gloss finish. Over-curing does not improve adhesion beyond what the correct 30-minute cycle achieves.
If your oven runs hot and you discover the paint has yellowed or dulled after baking, the damage is permanent to that paint layer. The only correction is to remove the affected paint with acetone, clean the surface, and repeat the painting and curing process at a verified correct temperature using an oven thermometer.
Food Safety Considerations When Painting Ceramic Mugs
Painting a ceramic mug that will hold hot beverages introduces food safety considerations that decorative projects do not. High temperatures, repeated liquid contact, and lip contact zones require careful decisions about paint placement and material selection.
The Art and Creative Materials Institute (ACMI) AP (Approved Product) seal on paint packaging certifies that a formula contains no materials at sufficient quantities to be toxic to the user under normal use conditions. AP certification is a useful minimum standard but does not automatically mean a paint is safe for direct food contact in a functional drinkware context.
Where Not to Paint on a Functional Mug
Avoid painting the interior of any mug used for beverages. Paint on the interior contacts liquid directly and continuously, creating conditions where any water-soluble or leachable components migrate into the drink. This applies to all paint types including AP-certified enamel paints.
Keep all decoration at least 1 inch (2.5 centimeters) below the rim on the exterior. The lip contact zone on a standard mug extends approximately 0.75 to 1 inch (2 to 2.5 centimeters) below the rim edge. Designs in this area transfer paint residue directly to the user’s lips with every drink.
The risks associated with lead-containing pigments in older ceramic paints and improperly fired glazes on vintage mugs are distinct from the risks of craft paint. Our detailed guide on lead glaze risks in vintage ceramic mugs covers testing and identification methods for at-risk pieces.
Microwave Safety After Painting
Do not microwave a painted ceramic mug. Metallic pigments in some ceramic paints (gold, silver, and chrome finishes) cause arcing in microwave ovens and can damage the microwave magnetron. Non-metallic acrylic and enamel paints do not arc but may heat unevenly and crack or blister when exposed to rapid microwave heating cycles.
A ceramic mug that was safe to microwave before painting may not be safe after. The paint layer changes the mug’s thermal behavior. For information about which unmarked ceramic mugs and bowls are safe for microwave use, see our guide on microwave safety for ceramic bowls and what markers to look for.
Frequently Asked Questions About Painting Ceramic Mugs
Can you use regular acrylic paint on ceramic mugs without sealing?
Regular acrylic paint on a ceramic mug without a sealer coat will begin to chip and peel within 1 to 3 hand washes. Acrylic paint bonds to smooth glazed surfaces mechanically rather than chemically, meaning the film has no true grip on the glaze and fails quickly under water exposure and abrasion. Always apply 2 to 3 coats of a compatible acrylic spray sealer after full paint cure time (24 hours minimum) to extend the design’s life significantly.
Even with sealing, standard acrylic on a glazed mug is not dishwasher-safe and should be hand-washed gently. For dishwasher resistance, oven-cure enamel ceramic paint is the correct choice.
What is the difference between porcelain paint and enamel ceramic paint?
Porcelain paint and enamel ceramic paint refer to overlapping categories with inconsistent naming across brands. True porcelain paint is an oil-based enamel formula designed for smooth ceramic and porcelain surfaces that cures at 325 to 350 degrees Fahrenheit (163 to 177 degrees Celsius) in a home oven. Enamel ceramic paint is a broader category that includes the same oven-cure formulas plus specialty kiln-fire overglazes that require 1083 degrees Fahrenheit (584 degrees Celsius) and above to fuse permanently.
For home mug painting without a kiln, look for any formula labeled “oven-cure” or “bake to set” with an AP certification. These are the same effective category regardless of whether the label says porcelain, enamel, or glass-and-ceramic paint.
Can I use acrylic paint on a mug that already has a design printed on it?
Acrylic paint applied over factory-printed designs on glazed mugs adheres to the glazed surface the same way it would on a plain mug, as long as the printed area is cleaned with isopropyl alcohol first. Factory-applied decal designs are typically under a protective glaze coating, making the surface as smooth and non-porous as the surrounding glaze. Adhesion primer and the standard cleaning steps apply equally to printed areas.
Be aware that sanding a mug with an existing printed design will damage the print. Skip the sanding step on any area where the original design should remain visible under the new paint.
Why does my enamel paint peel off after curing in the oven?
Enamel paint that peels after oven curing has one of three causes: the mug surface was not cleaned with isopropyl alcohol before painting (invisible oils prevent bonding), the curing temperature was below the minimum cross-linking threshold due to an inaccurate oven thermostat, or the paint was applied over a previous paint layer that itself had poor adhesion. Use an oven thermometer to verify actual cure temperature is between 325 and 350 degrees Fahrenheit (163 to 177 degrees Celsius) before ruling out a thermostat issue.
If the paint bonds well immediately after curing but peels after the first wash, the cure temperature was sufficient but the paint was applied too thick. Thick paint layers develop internal stress during curing that exceeds the adhesion strength of the bond at the glaze interface. Strip the paint, clean the surface, and reapply in thin coats of no more than 1 to 2 millimeters per coat.
Is it safe to drink from a ceramic mug you painted yourself?
A self-painted ceramic mug is safe for drinking use when: oven-cure enamel paint with current AP certification is used, the interior and the top 1 inch (2.5 centimeters) of the exterior near the rim are left unpainted, and the mug is fully cured at the correct temperature and rested for 72 hours before first use. Decorating only the exterior below the rim zone eliminates direct contact between paint and the beverage or lips during normal drinking.
Standard acrylic craft paint is not safe for interior or lip-contact surfaces regardless of sealing. No air-dry sealer creates a permanently food-safe barrier on painted surfaces used for hot beverages. If full interior decoration is desired, underglaze on bisqueware fired in a pottery kiln is the only approach that produces a completely food-safe result. Our full guide on food safety testing for ceramic mugs and dishes covers how to assess any ceramic piece for safe beverage use.
Can I mix different brands of ceramic paint in the same project?
Different brands of enamel ceramic paint can be used on the same mug project as long as both are the same paint type (both oven-cure enamel, or both air-dry acrylic). Mixing an oven-cure enamel base coat with an air-dry acrylic detail coat creates a problem: the enamel curing temperature may degrade the air-dry acrylic layer applied over it, causing bubbling or discoloration. Apply all oven-cure enamel layers first, cure the mug, allow it to cool fully, then apply any air-dry acrylic detail work and seal with spray sealer without oven-curing again.
Do not mix enamel ceramic paint directly with standard acrylic paint on the palette. The different binder chemistries produce an incompatible mixture that fails to cure correctly even at the correct oven temperature.
How long does painted mug decoration last before it needs to be repainted?
Oven-cured enamel ceramic paint maintained with hand washing and kept away from dishwasher exposure typically lasts 3 to 5 years before noticeable fading or surface wear at high-contact areas. Top-rack dishwasher use with oven-cured enamel shortens the expected lifespan to 1 to 2 years before edges begin to show wear. Air-dry acrylic paint with spray sealer on a decorative-only piece (no washing) can last indefinitely; functional use degrades the surface within months without dishwasher exposure.
Repainting a worn decorated mug requires stripping the old paint layer completely with acetone or a paint stripper compatible with ceramic surfaces before starting fresh. Painting over degraded enamel accelerates peeling of the new layer because the old layer provides an unstable foundation.
What is the best way to remove paint from a ceramic mug to start over?
Non-cured acrylic paint on a glazed mug wipes away immediately with isopropyl alcohol or acetone on a cotton ball before it dries. Fully cured acrylic paint responds to 90-minute soaking in warm water with a small amount of dish soap, followed by gentle scrubbing with a plastic scraper. Oven-cured enamel paint requires acetone (nail polish remover) or paint stripper applied on a cloth held against the surface for 5 to 10 minutes before scraping gently.
Never use a metal scraper or steel wool on a glazed ceramic surface. Metal tools leave microscopic scratches in the glaze that are visible under certain light angles and accumulate bacteria over time. A plastic scraper, wooden craft stick, or soft rubber eraser removes lifted paint without damaging the glaze surface underneath.
Can you use oil-based paint on ceramic mugs?
Oil-based paint bonds to glazed ceramic surfaces with reasonable adhesion but dries extremely slowly (24 to 72 hours between coats) and requires mineral spirits for cleanup. Oil-based paint on a ceramic mug is not oven-cureable at home-safe temperatures and is not recommended for functional drinkware because the slow cure process and the solvent-based binder system make achieving food-safe status difficult. Enamel ceramic paint is technically an oil-based system but is specifically formulated for ceramics with a cure cycle that addresses these limitations.
Use oil-based paint on ceramic mugs only for purely decorative pieces with no water exposure, and seal with an oil-compatible topcoat once fully cured (typically 5 to 7 days of air drying).
Do I need to sand the inside of a mug if I am only decorating the outside?
No. Sanding is a surface preparation step that improves mechanical adhesion of paint to the exterior glazed surface. The mug interior requires no preparation for an exterior-only painting project. Avoid getting sanding dust, adhesion primer, or paint inside the mug. Wipe the interior with a clean damp cloth after any surface preparation work before proceeding with painting.
What causes paint to look faded or chalky after oven curing?
Chalky or faded enamel paint after oven curing has two common causes: the oven temperature exceeded 375 degrees Fahrenheit (191 degrees Celsius) and began degrading the resin binder, or the paint was applied in coats that were too thin and lacked sufficient pigment density to produce the full color after the resin contracted during curing. Over-curing is the more common cause in home ovens with inaccurate thermostats running hot.
Verify oven temperature with an oven thermometer, strip the degraded paint with acetone, and reapply in slightly fuller coats (2 coats minimum for all colors) at the correct verified temperature. Transparent and translucent enamel colors always require more coats than opaque formulas to reach full saturation.
Can children safely paint ceramic mugs at home?
Children can safely paint ceramic mugs using AP-certified non-toxic acrylic paint formulas under adult supervision. The painting process itself poses no health risk with non-toxic AP-certified materials. Oven curing should always be performed by an adult: the curing temperatures (325 to 350 degrees Fahrenheit / 163 to 177 degrees Celsius) produce a hot ceramic surface that retains heat for 20 to 30 minutes after removal from the oven.
Avoid products labeled “oil-based” or “requires solvent cleanup” for children’s projects. Water-cleanup acrylic paint formulas with AP certification (Crayola, Liquitex BASICS, Apple Barrel) are appropriate for supervised children’s mug painting. Keep painted mugs decorated by children as display pieces rather than functional drinkware, as consistent food-safe technique requires adult-level attention to paint placement and cure verification.
Creative Ideas for Painted Ceramic Mug Projects
The techniques covered in this guide support a wide range of design styles, from simple color blocking and hand lettering to layered botanical illustrations and geometric patterns. Knowing which technique to match to which design type saves time and produces cleaner results than forcing a single approach across every style.
Personalized Name and Quote Mugs
Personalized lettering mugs are the most popular home mug painting project. They require clean, confident brushwork or a reliable fine-tip paint marker. Practice the full phrase on paper in the same scale before touching the mug, using the paper template method described earlier to match the lettering to the mug’s circumference.
Gold lettering on a dark-glazed mug produces the highest visual impact with minimal skill. Use a fine-tip gold ceramic paint marker on a black or navy blue glazed mug surface cleaned with isopropyl alcohol. The light color on dark background reads clearly without requiring multiple coats or adhesion primer.
Watercolor-Effect Painting on Mugs
A watercolor-style effect on a ceramic mug uses highly diluted acrylic paint applied in transparent, overlapping washes. Thin color-saturated acrylic paint to a watery consistency (approximately 1 part paint to 3 to 4 parts water) and apply in loose, irregular strokes that allow the mug’s surface color to show through.
This technique works best on white or very light-colored glazed mugs where the base color adds luminosity to the transparent washes. The diluted paint requires 3 to 4 thin wash coats to build visible color, and each coat must dry completely before the next to prevent muddy blending. Seal with gloss spray sealer to enhance the depth and translucency of the layered washes.
Geometric and Pattern-Based Designs
Geometric designs using tape masking are the most reliably clean approach for home painters without advanced brushwork skills. Plan your stripe or shape arrangement on paper, mark the mug with chalk pencil reference lines, then apply tape for each color zone before painting. The result looks precision-cut because the tape, not the brush, creates the edge.
Triangular geometric patterns on mugs are created by layering tape strips at angles, painting between the tape strips with solid color, removing tape while wet, then allowing full drying before repositioning tape for the next color section. Each color requires its own complete tape-paint-remove cycle to maintain clean edges between colors.
How to Care for Painted Ceramic Mugs After Finishing
Proper care extends the life of painted mug decoration significantly. The handling rules in the first week after painting and curing have the largest impact on long-term durability, because the enamel or acrylic film reaches its maximum hardness gradually after the initial cure cycle.
Wait 72 hours after the final oven curing or sealing step before first use or washing. This waiting period allows the paint film to reach full cross-linked hardness. Using a mug before this period has elapsed exposes a partially cured surface to abrasion and moisture that degrades adhesion permanently.
Washing Instructions for Painted Mugs
Hand wash enamel-painted mugs with warm (not hot) water and mild dish soap. Avoid abrasive sponges, steel wool, or scrubbing pads on painted areas. The friction from abrasive tools removes the uppermost layers of enamel paint gradually, dulling color and eventually exposing the glaze beneath.
For top-rack dishwasher-safe oven-cured enamel mugs, avoid high-temperature or sanitize cycles that exceed 140 degrees Fahrenheit (60 degrees Celsius). The extended exposure to very hot water and steam in sanitize cycles is more aggressive than standard dishwasher cycles and reduces the adhesion life of enamel paint over time.
Storing and Displaying Painted Mugs
Do not stack painted mugs directly on top of each other in storage. The base of one mug grinding against the painted exterior of another causes progressive micro-scratching and paint loss at contact points. Place a felt disc or a folded paper towel between stacked mugs to prevent surface contact.
Display painted mugs away from direct prolonged sunlight. Ultraviolet exposure gradually bleaches organic pigments in both acrylic and enamel paints over months and years. UV-resistant spray sealers slow this process but do not prevent it entirely. A north-facing display shelf or a cabinet with opaque doors is the best storage environment for preserving painted mug colors.
Painting ceramic mugs at home produces a functional, personal, and creatively satisfying result when the right paint is matched to the surface type, the curing step is executed correctly, and the design is kept away from food-contact zones. Start with an oven-cure enamel paint on a white glazed mug, follow the cold-start oven curing process precisely, and wait the full 72-hour hardening period before use.
Clean and degrease the mug surface before any other step, choose AP-certified paint for any functional piece, and verify your oven temperature with a thermometer before every curing session.