How To Mix Ceramic Glazes: Studio Mixing Vs Ready-Made

Most glaze failures happen before a brush ever touches bisqueware. The decision between mixing your own glazes from raw powders and buying ready-made liquid formulations shapes your entire ceramic process, from cost structure to creative control.
This guide covers the full decision framework for studio mixing versus commercial ready-made glazes at every firing range. It includes material costs per 25-pound bag, equipment requirements, step-by-step mixing procedures, food safety protocols, and troubleshooting for the most common mixing defects that studio potters encounter.
By the Numbers
Ceramic Glaze Mixing — What the Numbers Show
Sources: Digitalfire Reference Library, Mastering Cone 6 Glazes (Hesselberth and Roy), manufacturer price sheets
What Is the Real Difference Between Studio-Mixed and Ready-Made Ceramic Glazes?
Studio-mixed glazes are formulated from raw powdered materials (feldspar, silica, whiting, kaolin, and colorant oxides) weighed on a gram scale and combined with water. Ready-made glazes are pre-formulated liquid suspensions sold in pints or gallons by manufacturers such as Amaco Potters Choice, Mayco, Spectrum, and Laguna.
A studio-mixed glaze is a type of ceramic coating where the potter controls every raw material input, from flux ratio to colorant percentage. Ready-made glaze differs from studio-mixed glaze in formulation transparency, cost per fired piece, and the degree of repeatable control over fired surface qualities.
According to Mastering Cone 6 Glazes by John Hesselberth and Ron Roy, a typical cone 6 gloss base consists of approximately 25-35% feldspar (flux source), 20-30% silica (glass former), 10-15% kaolin or EPK (alumina source and suspender), and 10-20% whiting (calcium flux), with the remaining percentage as additional fluxes like dolomite, talc, or frit.
The mechanism behind glaze melting follows the silica-alumina-flux triangle. Flux materials like calcium carbonate (whiting) lower the melting point of silica from over 3100°F (1700°C) down to cone 6 temperatures (2232°F / 1222°C). Alumina from kaolin acts as a stabilizer. It prevents the molten glaze from running off vertical surfaces during the firing.
This chemical interaction only occurs correctly when the glaze is fired to its designed cone range in the correct kiln atmosphere. If a cone 6 studio-mixed glaze is fired to only cone 04 (1940°F / 1060°C), the flux system never fully activates. The result is a dry, chalky, unmelted surface that wipes off with a finger. Fix it by verifying your kiln reaches the target cone using Orton witness cones placed on every shelf level.
For most first-time glaze mixers, starting with a proven published recipe from a reputable source before attempting original formulations gives the highest probability of a successful first firing.
How Much Does It Cost to Mix Your Own Glazes vs Buy Ready-Made?
Studio-mixed glaze costs $3 to $8 per pound of dry materials at current supplier pricing from Laguna Clay or Sheffield Pottery. Ready-made commercial glazes cost $15 to $35 per pint, which covers roughly 2 to 3 square feet of bisqueware with three brushed coats.
A full 5-gallon bucket of studio-mixed dipping glaze (roughly 40 pounds dry weight plus water) costs $30 to $60 in raw materials. The equivalent coverage from commercial dipping glaze would cost $200 to $400. That is a 5x to 8x cost multiplier for the convenience of a pre-made product.
Use the table below to compare the full cost breakdown between studio mixing and buying ready-made glazes across every relevant dimension.
Cost Comparison
Studio-Mixed vs Ready-Made Glaze — Full Cost Breakdown
All costs in USD, calculated per fired square foot of coverage at cone 6 on stoneware
| Cost Factor | Studio-Mixed Glaze | Ready-Made Glaze |
|---|---|---|
| Raw materials per pound | $3-$8 | $15-$35/pint |
| Equipment startup cost | $150-$400 | $0-$30 |
| Cost per fired sq ft | $0.30-$0.90 | $2.50-$7.00 |
| Time investment per batch | 30-60 minutes | 0 minutes (open and use) |
| Color consistency batch to batch | Dependent on weighing accuracy | High (manufacturer controlled) |
| Best for | Production potters, cost-sensitive studios, custom color development | Beginners, hobbyists, small batch work, teaching studios |
Prices verified at time of publication based on major US ceramics supplier catalogs. Equipment costs include gram scale, sieve, respirator, mixing buckets, and immersion blender.
For production potters firing 50 or more pieces per week, studio mixing pays for its equipment in under 3 months through material savings alone. For hobbyists making fewer than 10 pieces monthly, ready-made glazes remain the more practical choice.
How to Mix Ceramic Glaze from Raw Materials: Step-by-Step Guide
Mixing ceramic glaze from dry materials follows a precise sequence. Weigh each material to within 0.1 gram on a digital scale, add to water in the correct order, screen through an 80-mesh sieve, and adjust specific gravity to 1.45-1.50 for dipping or 1.50-1.60 for brushing.
Every glaze recipe is a percentage formula where all dry materials total 100 grams (or 100 parts). A recipe calling for 25% Custer feldspar means 25 grams of feldspar in a 100-gram dry batch. You multiply all percentages by your target batch size divided by 100.
Step-by-Step Guide
How to Mix a 1,000-Gram Dry Batch of Cone 6 Glossy Base Glaze
7 steps — Estimated time: 45 minutes for first batch, 25 minutes with practice
Weigh Dry Materials on a Calibrated Gram Scale
Place a clean container on a digital gram scale with 0.1g precision. Tare to zero. Weigh each material one at a time into the same container, starting with the largest quantity (usually feldspar) and ending with the smallest (colorants).
Add Dry Materials to Pre-Measured Water
Fill a 5-gallon bucket with 1.5 to 2 liters of clean water. This is roughly 35-40% of the total dry weight. Add the dry materials slowly while stirring to avoid dust clouds.
Mix with Immersion Blender for 2-3 Minutes
Use a dedicated immersion blender (never used for food afterward) to homogenize the slurry. Blend for a full 2-3 minutes. Undissolved lumps of feldspar or silica will show as surface defects after firing.
Screen Through 80-Mesh Sieve
Pour the entire batch through an 80-mesh glaze sieve placed over a second clean bucket. Use a stiff brush to push the slurry through. This catches unmixed particles larger than 0.18 millimeters that would create surface bumps on fired ware.
Check and Adjust Specific Gravity
Use a glaze hydrometer or weigh 100ml of glaze on your gram scale. Target specific gravity of 1.45-1.50 for dipping (145-150 grams per 100ml). Add water in 50ml increments to lower specific gravity if too thick. Let settle and decant water if too thin.
Add Bentonite or Epsom Salts if Settling Occurs
If the glaze settles into a hard-packed layer within 30 minutes, add 1-2% bentonite (by dry weight of the batch) or a saturated Epsom salt solution (1 tablespoon per gallon of glaze). These materials improve suspension without affecting fired color.
Label and Test Before Production Use
Write the recipe name, cone range, date mixed, and target specific gravity on the bucket lid with a permanent marker. Always fire a test tile before glazing production work. Apply the glaze to a vertically oriented test tile to check for running, crawling, or color shifts during firing.
The mixing process works because water penetrates between individual glaze particles, creating a suspension where each microscopic grain of feldspar and silica floats evenly throughout the liquid. Screening forces any agglomerated clumps apart mechanically, ensuring every square millimeter of bisqueware receives the same ratio of flux to silica to alumina. If you skip the screening step, those unmixed clumps melt at a different rate than the surrounding glaze matrix and produce raised bumps or pinhole defects visible after the glaze firing.
For studio potters mixing their first batch, following a published recipe from a trusted source like a complete guide to glaze types and application methods prevents most beginner mixing errors before they reach the kiln.
What Equipment Do You Need to Start Mixing Glazes?
A basic glaze mixing setup requires six essential items: a digital gram scale (0.1g precision, 2000g capacity for $25-$40), an 80-mesh sieve ($15-$25), a dedicated immersion blender ($30-$60), two 5-gallon buckets ($10), a respirator rated for silica dust ($20-$35), and nitrile gloves ($5 per box).
The total equipment investment ranges from $105 to $195 for a safe, functional mixing station. This one-time cost is recovered after mixing roughly 4 to 6 full 5-gallon batches compared to buying equivalent commercial glaze volume.
Key Specifications for the scale: resolution of 0.1 grams minimum (0.01g preferred for small colorant batches), capacity of at least 1000 grams (2000g recommended for full bucket batches), and AC adapter compatibility to prevent auto-shutoff mid-weighing. Key Specifications for the sieve: 80-mesh (180 micron opening), stainless steel construction to resist rust from wet glaze, and 8-inch minimum diameter to process a full batch in under 5 minutes.
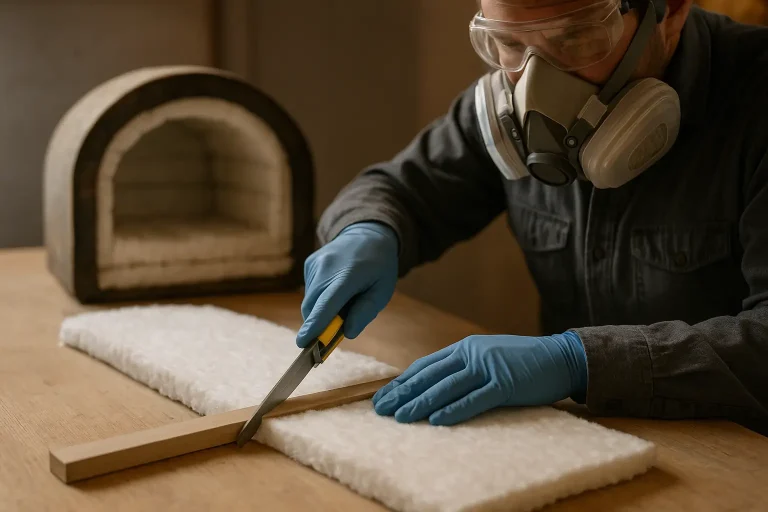
Do not skip the respirator. Dry glaze materials contain crystalline silica particles smaller than 10 microns that embed permanently in lung tissue. According to current OSHA standards, the permissible exposure limit for respirable crystalline silica is 50 micrograms per cubic meter of air averaged over an 8-hour shift. A single scoop of dry feldspar poured carelessly can release thousands of times that concentration directly into your breathing zone. Wear an N95 or P100 respirator from the moment you open any dry material bag until all powders are submerged in water.
For potters deciding which glaze approach fits their studio setup, comparing commercial and studio-mixed glaze pros and cons provides a deeper analysis of long-term cost and creative trade-offs beyond the equipment checklist.
Buying Guide
Before You Buy Glaze Mixing Equipment — Checklist
Check off each point before making your equipment purchases.
Common Myths About Mixing Your Own Ceramic Glazes
Several persistent myths discourage potters from exploring studio mixing despite the cost advantages and creative freedom it provides. Each myth below is paired with the specific data point that disproves it.
Myth vs Fact
Glaze Mixing — Common Myths Debunked
Separating fact from fiction on the most common glaze mixing misconceptions
Myth
Studio-mixed glazes are always less food-safe than commercial glazes.
Fact
Both studio-mixed and commercial glazes achieve food safety through the same mechanism: a properly melted glass surface with no exposed underfired material. A cone 6 gloss base with no toxic colorants (avoiding barium, lithium above 2%, and unfritted lead) fired to maturity with under 1% clay body absorption is food-safe regardless of who mixed it. ASTM C738 leaching tests apply equally to both categories.
Myth
You need a chemistry degree to mix ceramic glazes.
Fact
Following a published recipe from a verified source requires only accurate weighing and screening, not chemistry knowledge. Thousands of production potters mix glazes daily using recipes from books like Mastering Cone 6 Glazes (Hesselberth and Roy) and the Digitalfire Reference Library (Tony Hansen). Formulating original glazes requires understanding the silica-alumina-flux triangle, but recipe mixing requires only a gram scale and attention to procedure.
Myth
Commercial glazes are always more consistent batch to batch.
Fact
Commercial glaze manufacturers do reformulate without notice when raw material sources change. Accounts from production potters document cases where a favorite commercial glaze changed color or surface quality between purchases. A studio-mixed batch made from the same lot of raw materials will be identical every time when weighed to 0.1g precision. You control the supply chain.
Myth
Glaze mixing is too dangerous for a home studio.
Fact
The primary inhalation hazard in glaze mixing is crystalline silica from feldspar and flint, not exotic toxins. A properly fitted P100 respirator reduces silica exposure by over 99.9%. The same silica dust is present when handling any dry clay or when sanding bisqueware. The safety protocol for glaze mixing is identical to the protocol every studio potter already follows for clay handling: respirator on before opening any dry material bag, wet-clean all surfaces after mixing.
Myth
Once you mix your own glazes, you cannot use commercial glazes in the same kiln load.
Fact
Studio-mixed and commercial glazes fire together with zero interaction problems as long as they are rated for the same cone and atmosphere. Both are silicate glass coatings that mature at the same temperature. The only risk is a glaze running onto an adjacent piece, which is a placement issue, not a chemistry incompatibility between commercial and studio-mixed products.
Troubleshooting Studio-Mixed Glaze Problems
Studio-mixed glaze defects fall into predictable categories with specific causes and fixes. Most problems trace back to three root issues: incorrect specific gravity, insufficient screening, or a mismatch between the glaze’s thermal expansion coefficient (CTE) and the clay body.
Why Does My Glaze Crawl Away from the Clay Surface During Firing?
Crawling occurs when the dry glaze layer separates from the bisqueware and pulls back into isolated beads during firing. This happens because the glaze shrinks more than the clay body during the drying phase before the kiln reaches 500°F (260°C).
The primary causes are excessively thick glaze application (over 2mm wet thickness), dusty or oily bisqueware that prevents adhesion, or a glaze with too much raw clay content (over 20% kaolin or ball clay). Raw clay particles shrink significantly as they lose water, pulling the glaze layer apart before it melts. Fix crawling by wiping all bisqueware with a damp sponge before glazing, thinning the glaze to specific gravity 1.40-1.45, and reducing clay content in the recipe below 15%.
What Causes Pinholes in Fired Glaze Surfaces?
Pinholes are tiny craters where gas bubbles burst through the glaze surface during firing but the glass did not have enough time or fluidity to heal over before cooling. The mechanism is outgassing: carbonates and sulfates in the clay body or glaze decompose during firing, releasing CO2 and SO2 gas that must escape through the molten glaze layer.
This condition occurs when the kiln climbs too quickly through the 1500°F to 1900°F (815°C to 1038°C) range where most gas release happens, or when the glaze has insufficient flux to become fully fluid at the peak temperature. Slowing the firing rate to 150°F per hour through the critical outgassing zone and adding a 10-15 minute hold at peak temperature gives bubbles time to break and the glass time to flow back together.
Why Does My Glaze Settle into a Rock-Hard Layer at the Bottom of the Bucket?
Hard-packing occurs when glaze particles settle under gravity and the water layer sits on top. This is caused by insufficient clay content (under 8% kaolin or ball clay) or lack of a suspension agent like bentonite. Clay platelets carry a slight electrical charge that keeps them suspended. When there are too few platelets, heavier particles like feldspar and silica sink immediately.
The fix is adding 1-2% bentonite by dry weight (1-2 grams per 100-gram batch) or 0.5% Epsom salts dissolved in hot water. Bentonite swells in water and creates a gel structure that physically traps heavier particles. Do not exceed 2% bentonite as it increases drying shrinkage of the glaze layer and can cause crawling.
Quick Reference
Ceramic Glaze Mixing — Key Terms Explained
Quick reference for the terms used throughout this guide
The ratio of a liquid’s density to the density of water. Water has a specific gravity of 1.00. Dipping glazes target 1.45-1.50, meaning they are 45-50% denser than water.
A material that lowers the melting temperature of silica. Common cone 6 fluxes include whiting (calcium carbonate), dolomite (calcium magnesium carbonate), talc, and frits like Ferro 3124.
A screen with 80 openings per linear inch (180 micron openings). This is the standard for glaze mixing because it catches particles large enough to create surface defects while allowing the glaze slurry to pass through without excessive effort.
A measurement of how much a material expands when heated. Glaze CTE must be slightly lower than the clay body CTE. A mismatch causes crazing (glaze CTE too high) or shivering (glaze CTE too low).
A highly plastic volcanic clay added at 1-2% to glaze recipes to prevent settling. It absorbs up to 15 times its weight in water and creates a gel suspension that holds heavier particles in place.
A glaze defect where the dry or melting glaze pulls away from the clay body, creating bare exposed patches. Caused by excessive glaze thickness, dusty bisqueware, or too much raw clay in the glaze recipe.
A small pyramid of ceramic material formulated to bend at a specific temperature and time combination (heat work). Orton cone 6 bends at 2232°F (1222°C) at a 270°F/hour ramp rate. Witness cones verify actual kiln conditions.
A pre-melted and ground glass used as a flux in glaze recipes. Frits like Ferro 3124 and 3134 provide consistent, predictable melting behavior because they are already glass rather than raw minerals that decompose during firing.
Understanding how different ceramic colorants and oxides behave across firing ranges is essential before modifying any glaze recipe with metallic oxides for custom color development.
Frequently Asked Questions About Mixing Ceramic Glazes
Can I mix glazes from different brands in the same kiln load?
Quick Answer: Yes. Commercial glazes from different manufacturers and studio-mixed glazes fire together without chemical interaction problems when all are rated for the same cone and kiln atmosphere. The only physical risk is one glaze running onto an adjacent piece.
All ceramic glazes are silicate glass coatings. At peak temperature, each glaze particle melts independently and bonds to its own clay body surface. There is no vapor transfer or cross-contamination between different glaze brands in the same kiln atmosphere at standard electric kiln temperatures.
Place a drip tray or waster slab under any piece glazed with a new or untested recipe to protect kiln shelves from running. Fire test tiles of unfamiliar combinations together before committing full production loads.
Why does my studio-mixed glaze look different after firing than the recipe photo?
Quick Answer: Color differences between your result and a published recipe photo are usually caused by kiln atmosphere variations, cooling rate differences, clay body color underneath, or application thickness differences, not the recipe itself.
Iron oxide produces celadon green in reduction firing but amber-brown in oxidation. A 2mm glaze thickness produces deeper color than a 1mm application of the same glaze. Clay body iron content bleeds through translucent glazes, making the same recipe look warmer on iron-bearing stoneware than on white porcelain.
Match the recipe author’s stated firing conditions (cone, atmosphere, cooling rate) as closely as possible. Apply glaze to a test tile made from your actual clay body before assuming the recipe is incorrect.
What happens if I use a cone 10 glaze recipe in a cone 6 electric kiln?
Quick Answer: A cone 10 glaze fired to cone 6 will be severely underfired. The surface will be dry, chalky, and porous because the flux system designed to melt silica at 2381°F (1305°C) never reaches activation temperature at 2232°F (1222°C).
Cone 10 glazes use feldspar as the primary flux. Feldspar does not begin significant melting until above cone 8 (2280°F / 1249°C). At cone 6, the feldspar particles remain largely intact as unmelted grains embedded in a partially fused matrix. The result has the texture of fine sandpaper and zero functional durability.
Do not attempt to salvage a cone 10 recipe for cone 6 use by refiring. The underfired glaze cannot be removed. The piece must be discarded or used for non-functional decorative purposes only.
Is it cheaper to mix my own dipping glaze or buy commercial dipping glaze?
Quick Answer: Mixing your own dipping glaze costs $30-$60 for a 5-gallon bucket. The equivalent commercial dipping glaze costs $200-$400. Studio mixing is 5 to 8 times less expensive per fired square foot after the initial equipment purchase.
The cost gap widens dramatically with volume. A production potter using 20 gallons of dipping glaze monthly saves approximately $600-$1,200 per month by mixing from dry materials rather than buying pre-mixed commercial dipping formulations.
The primary non-monetary trade-off is time. Each 5-gallon batch requires 30-45 minutes of weighing, mixing, and screening. For potters who value their studio time above material cost savings, commercial dipping glazes remain a valid choice.
Do I need a dedicated studio space for glaze mixing?
Quick Answer: No. Glaze mixing requires a 4-square-foot work surface with water access and ventilation, not a separate room. A garage corner, basement workbench, or outdoor covered area with a hose connection is sufficient for mixing up to 5-gallon batches.
The critical requirements are: a flat waterproof surface (Formica or stainless steel), nearby water for cleanup, adequate light to read the scale display, and ventilation that moves airborne dust away from your breathing zone. A box fan pointed out an open window placed behind your mixing station creates effective directional airflow.
Never mix dry glaze materials in a carpeted room or anywhere with upholstered furniture. Silica dust settles into fabric and becomes a long-term inhalation hazard every time someone sits down or walks across the room.
How long does mixed glaze last in a sealed bucket?
Quick Answer: Properly stored studio-mixed glaze in a sealed bucket with water covering the surface lasts indefinitely. Potters regularly use glaze batches that are 5 to 10 years old with no degradation in fired quality after remixing.
Over months of storage, glaze will settle into a hard-packed layer. This is normal and not a sign of spoilage. Mix thoroughly with an immersion blender, screen through 80-mesh again to break up any dried crust particles, and check specific gravity before use. Add water in small increments to restore the original working consistency.
The only failure mode for long-term storage is complete evaporation leaving a dried solid block. Even then, the dry material can be reweighed, crushed, and rehydrated if you know the original batch weight and water ratio. Keep a label on every bucket with the recipe name, cone, and original dry batch weight.
Why does my glaze bubble during application on bisqueware?
Quick Answer: Bubbling during application is caused by air trapped in the porous bisque surface being displaced by glaze water too quickly. The bisqueware draws water from the glaze via capillary action, and the displaced air has no escape route through the thickening glaze film.
This is most common on highly porous bisqueware fired below cone 04 (1940°F / 1060°C) or on thick-walled pieces where the interior clay holds a large air reservoir. Pre-dampening the bisqueware with a wet sponge 5 minutes before glazing fills surface pores with water, which displaces air slowly before the glaze is applied.
If bubbles still form, gently blow on the wet glaze surface immediately after dipping. The air bubbles will pop and the glaze will flow back together before drying.
Can I add mason stains to ready-made commercial glazes?
Quick Answer: Yes. Mason stains and prepared body stains can be mixed into commercial ready-made glazes at 5-15% by weight to create custom colors without formulating from scratch. The stain must be thoroughly blended with a small amount of glaze first to create a slurry before incorporating into the full batch.
Not all commercial glazes respond equally to stain additions. Glossy transparent bases accept stains most predictably. Opaque or matte commercial glazes may shift texture or opacity when stain is added because stains contain their own flux and alumina components that alter the base glaze chemistry.
Always test on a vertically oriented tile. Some stains increase glaze fluidity and cause running on vertical surfaces that the unmodified commercial glaze would not have done. Start at 5% stain and increase only after confirming the fired result at that percentage.
Is glaze mixing safe for someone with asthma or respiratory sensitivity?
Quick Answer: Glaze mixing carries elevated risk for anyone with pre-existing respiratory conditions. The fine silica dust from dry materials is a known respiratory irritant and long-term exposure causes silicosis. If you have asthma, the additional airway stress from even minor dust exposure can trigger symptoms.
A properly fitted P100 half-face respirator worn from the moment any dry bag is opened until all materials are wet provides excellent protection. However, respirators increase breathing resistance, which some asthma patients find uncomfortable or triggering. Wet-mixing all materials (pre-weighing into sealed containers, then adding water before any agitation) can eliminate nearly all airborne dust.
Consult your physician before setting up a mixing station. Some potters with respiratory sensitivity choose to use only commercial pre-mixed glazes and avoid all dry material handling as their permanent safety boundary.
What is the difference between a glaze recipe in parts and a recipe in percentages?
Quick Answer: A parts recipe lists materials in relative units (300 parts feldspar, 200 parts silica, 100 parts whiting). A percentage recipe normalizes all materials so they total 100 (50% feldspar, 33% silica, 17% whiting). Percentages allow scaling to any batch size by multiplying each percentage by the target total divided by 100.
To convert a parts recipe to percentages, add all parts together to get the total, then divide each individual part by the total and multiply by 100. A recipe with 300+200+100=600 total parts becomes 300/600=50%, 200/600=33%, 100/600=17%.
Always convert parts recipes to percentages before scaling to your batch size. Percentage recipes also make it immediately clear if the recipe respects the silica-alumina-flux balance that prevents common glaze defects.
How do I know if my glaze is food-safe after mixing?
Quick Answer: A studio-mixed glaze is food-safe when three conditions are met: it fires to full maturity with a smooth, uncrazed glass surface, the clay body has under 1% absorption after firing, and the glaze contains no toxic metals (lead, cadmium, soluble barium above 0.1%, or lithium above 2%).
The most reliable at-home test is the lemon slice test. Place a fresh lemon slice on the fired glazed surface for 24 hours, then remove and check for any color change, surface etching, or dulling of the glaze. A durable, properly melted glaze shows zero change. Surface etching indicates the glaze is being attacked by mild acid and may leach metals into acidic foods.
For absolute certainty, send a fired test sample to a lab for ASTM C738 leaching analysis. This test costs $50-$100 and measures actual metal extraction under standardized acidic conditions. Commercial glaze manufacturers perform this testing on their products, but studio potters rarely do unless selling functional ware at scale.
Can I mix glazes without an immersion blender?
Quick Answer: Yes. A stiff wire whisk and 5 minutes of manual mixing can replace an immersion blender for small batches under 500 grams dry weight. For full 5-gallon bucket batches, manual mixing is physically demanding and less effective at breaking up feldspar lumps.
Without mechanical blending, the screening step becomes even more critical. Pour the mixture through the 80-mesh sieve at least twice, using a stiff bristle brush to push the slurry through each time. Any lumps that survive double-screening are small enough to melt uniformly during firing.
A drill-mounted paint mixer attachment ($8-$15) is a lower-cost alternative to a dedicated immersion blender. It provides adequate mixing power for 5-gallon batches but creates more splashing and requires careful speed control to avoid whipping air into the glaze.
Making the Decision That Fits Your Studio
Studio mixing saves $3 to $6 per fired square foot over ready-made glazes and gives you complete control over color, surface, and material sourcing. Ready-made glazes eliminate the equipment investment and learning curve, getting you from bisqueware to glaze firing in the shortest possible time.
Most experienced production potters eventually mix at least some of their own glazes, starting with simple gloss bases and expanding into custom color development as their confidence with raw materials grows. Start with one proven published recipe, invest in a quality gram scale and respirator, and fire a test tile before committing any production work to a new batch.