How to Apply Ceramic Glaze: Brushing, Dipping, Spraying & Pouring

Ceramic glaze is not paint. It is a glass coating that melts and fuses to the clay body at temperatures above 1,800°F (982°C).
How you apply that coating determines whether you get a smooth, even surface or a pitted, crawling mess that ruins hours of work. Most glaze failures start before the pot ever enters the kiln.
This guide covers all four core application methods: brushing, dipping, spraying, and pouring. For each method, you will learn the exact specific gravity targets, application thickness in millimeters, bisque preparation requirements, and the common mistakes that cause crawling, pinholing, and uneven coverage.
By the Numbers
Glaze Application — Key Specifications at a Glance
Sources: Mastering Cone 6 Glazes (Hesselberth & Roy), Digitalfire Reference Library (Tony Hansen), Orton Foundation
What Makes Glaze Application Different From Painting
Glaze is not a surface coating that sits on top of the clay. During firing, glaze melts into a viscous liquid that chemically bonds with the clay body through a silica-alumina interface layer.
This means every application decision you make affects the fired result. The thickness of application determines whether the glaze flows, crawls, or crystallizes correctly. Too thin and the glaze appears dry and underfired. Too thick and it runs off the pot onto the kiln shelf.
According to Clay and Glazes for the Potter by Daniel Rhodes, the silica in glaze reacts with alumina from the clay body during the peak of the firing cycle. This reaction creates a transitional layer roughly 0.1mm thick that locks the glaze to the pot.
If your application is uneven, that transitional layer forms inconsistently. Areas with insufficient glaze never develop a proper glassy surface. Areas with excessive glaze blister and crawl because gases cannot escape through the thickened melt.
In plain terms: a brushstroke you see on wet glaze will not simply even out in the kiln. The kiln reveals every application error, not hides it.
Getting the application right is the single most controllable factor in glaze success or failure.
How to Prepare Bisqueware Before Applying Glaze
Bisque firing converts raw clay into a porous ceramic state that absorbs water from wet glaze. This porosity is what makes glaze application possible on a vertical surface.
The bisque temperature directly affects how much glaze your pot absorbs. Bisque fired to cone 04 (1940°F / 1060°C) produces a harder, less absorbent surface than bisque fired to cone 06 (1828°F / 998°C).
According to Orton Foundation firing standards, cone 06 bisque leaves roughly 12-15% porosity in most stoneware bodies. Cone 04 bisque reduces that to approximately 8-10% porosity.
The lower the bisque temperature, the faster the clay absorbs water from the glaze. That sounds helpful for quick application but creates problems with uneven absorption on thin and thick sections of the same pot.
Begin every glazing session by wiping all bisqueware with a clean, damp sponge. This removes shop dust, skin oils from handling, and any kiln wash residue from the bisque firing.
Dust on the bisque surface prevents glaze from making direct contact with the clay. The result is crawling: bare clay patches where the glaze pulled away during firing.
Let the damp pot dry completely before applying glaze. A wet pot cannot absorb glaze properly. Test dryness by touching the surface: it should feel room temperature, not cool from residual moisture.
For functional ware like mugs and bowls, apply a wax resist to the foot ring and any area that contacts the kiln shelf. Keep wax at least 3mm from the bottom edge to allow for glaze movement during firing.
Key Specifications:
- Bisque temperature: cone 06-04 (1828-1940°F / 998-1060°C)
- Porosity after bisque: 8-15% depending on cone and clay body
- Wax resist gap from bottom: minimum 3mm
- Drying time after sponging: 30-60 minutes at room temperature
Clean bisqueware with proper porosity control is the foundation of every successful glaze application.
How to Apply Ceramic Glaze by Brushing
Brushing is the most accessible application method for home studios and beginners. It requires no large buckets of glaze, no spray equipment, and no specific gravity measurement for pre-mixed commercial brushing glazes.
Commercial brushing glazes from brands like Amaco Potter’s Choice and Mayco contain organic gum additives (CMC gum or Veegum T) that thicken the glaze for brushability and slow drying time for smoother application.
Key Specifications for Amaco Potter’s Choice cone 6 brushing glazes:
- Firing range: cone 5-6 (2167-2232°F / 1186-1222°C)
- Compatible clay: mid-fire stoneware and porcelain
- Application: 3 coats brushing at full strength
- Food safety: AP certified, lead-free
What Brush Types Work Best for Ceramic Glaze
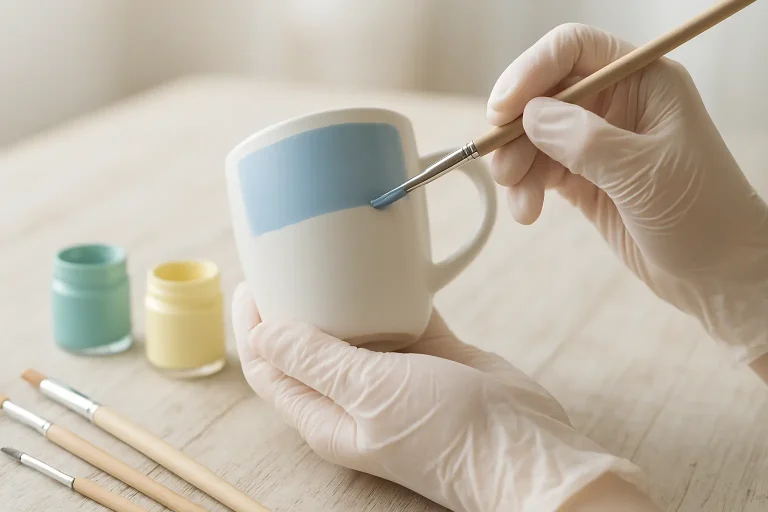
Use a soft, wide hake brush (Japanese goat-hair brush) for smooth, even coverage on flat surfaces. A 25-40mm wide hake brush holds enough glaze to cover a mug body in 2-3 strokes.
For detailed work and tight curves, use a soft synthetic round brush size 6-10. Stiff bristle brushes leave visible stroke marks that the kiln will preserve.
Do not use foam brushes. Foam applies glaze too thinly and introduces air bubbles that become pinholing defects on the fired surface.
Hake brushes work because the extremely fine hair releases glaze gradually rather than in a single wet deposit. This reduces the chance of drips and uneven buildup.
How Many Coats of Brushed Glaze Are Needed
Apply three full coats of commercial brushing glaze for complete opaque coverage at cone 6. Each coat must dry to a matte touch before the next coat is applied.
The first coat soaks into the bisque immediately and appears thin and translucent. The second coat builds body and starts to look opaque when dry. The third coat provides the final thickness needed for a smooth fired surface.
Apply each coat in a perpendicular direction to the previous one. If coat one goes vertically, brush coat two horizontally. This cross-hatching technique eliminates thin spots and ensures even distribution.
Drying time between coats is typically 5-15 minutes depending on studio humidity and bisque porosity. Test dryness by lightly touching an inconspicuous area: if your finger leaves no glaze residue, the coat is ready for the next layer.
Total fired thickness for three brushed coats should be approximately 1.5-2mm. A pin tool pushed through wet glaze to the clay surface confirms thickness. Scrape away a small test patch to measure if needed.
How to Avoid Brush Marks in Fired Glaze
Brush marks in wet glaze become permanent surface texture after firing. The kiln does not smooth them out because the viscous glass melt holds its shape during cooling.
Thin each coat slightly with water if the glaze drags on the brush. A glaze that flows onto the bisque with minimal friction levels itself naturally. Add water in 5% increments (roughly 1 teaspoon per 100ml of glaze) and test on a scrap tile.
Work quickly with a fully loaded brush. Reload before the brush begins to drag or skip. The moment you feel the brush pull against the pot surface, stop and reload: dragging a nearly dry brush creates the deepest stroke marks.
Glaze applied by brushing on a banding wheel while rotating the pot produces the smoothest result. Hold the brush stationary and let the wheel rotation do the work.
For brushing glazes on functional ware, three perpendicular coats on a banding wheel give the most professional fired finish without spray equipment.
How to Apply Ceramic Glaze by Dipping
Dipping produces the most uniform glaze thickness of any method. It is the standard technique in production pottery studios because one quick immersion coats the entire piece in 1-3 seconds with consistent 2mm thickness.
This happens because the porous bisque surface draws water from the glaze slurry at a predictable rate. The longer the dip, the thicker the glaze deposit. But thickness is primarily controlled by specific gravity (the density of the liquid glaze relative to water), not dip duration.
According to the Digitalfire Reference Library by Tony Hansen, a dipping glaze at specific gravity 1.45 deposits approximately 1.5mm of glaze after a 3-second dip on cone 04 bisque. At specific gravity 1.50, the same dip deposits roughly 2mm.
How to Mix and Maintain Dipping Glaze Specific Gravity
Specific gravity is the single most important number in dipping glaze application. It measures how much solid glaze material is suspended in the water.
Measure specific gravity with a glaze hydrometer before every dipping session. The target is 1.45-1.50 for most cone 6 dipping glazes on bisqueware fired to cone 06-04.
To mix dipping glaze from powder: weigh 1000g of dry glaze and add water gradually until the hydrometer reads 1.48. This is your starting point. Sieve the mixed glaze through an 80-mesh screen to break up lumps and ensure uniform consistency.
Water evaporates from the dipping bucket over time, raising specific gravity. A glaze that was 1.48 last week may be 1.58 today. Check and adjust with water before every use.
If specific gravity exceeds 1.55, the glaze goes on too thick and will crawl or blister. If below 1.40, the coat is too thin and fires translucent or dry. The fix is adding water to lower specific gravity or letting water evaporate to raise it.
Dipping Technique: How to Submerge and Withdraw the Pot
Submerge the pot in one smooth motion using glaze tongs or your fingers gripping an unglazed foot ring. Do not hesitate or double-dip: a single 2-3 second immersion is the target.
Hesitation during dipping creates a visible tide line where the glaze had more contact time with the bisque. This line will be darker and thicker after firing.
Withdraw the pot and let excess glaze drain back into the bucket for 5-10 seconds. Rotate the piece slowly to encourage even drainage and prevent drips from accumulating on one side.
Shake the pot once firmly to remove the last drip hanging from the bottom edge. That single drip, if left untouched, becomes a thick bead that fuses to the kiln shelf during firing.
For pots too large to dip in one motion, dip one side, rotate, and dip the other with a slight overlap. The overlap area will be slightly thicker. Plan the overlap to fall on a less visible part of the form.
After dipping, let the pot dry for 1-2 hours before handling. Wet dipped glaze is fragile. A fingerprint pressed into it will remain visible after firing.
Dipping is a type of immersion application that delivers uniform 2mm thickness when specific gravity and dip duration are controlled. The method works because bisque porosity draws water from the slurry at a fixed rate, leaving glaze solids deposited evenly on the surface.
Step-by-Step Guide
How to Dip Glaze a Mug — Step by Step
5 steps · Total time: approximately 3 minutes per mug (plus drying)
Check specific gravity before you start
Lower the hydrometer into the glaze bucket. Read the value at the liquid surface line. Target 1.45-1.50. Adjust with water if too high, or let water evaporate if too low.
Grip the mug by the waxed foot ring
Use glaze tongs or clean fingers on the waxed base. The wax prevents glaze from sticking to the foot. Hold firmly enough to control the mug during full immersion.
Submerge completely in one smooth motion
Push the mug under the glaze surface without hesitation. Hold submerged for 2-3 seconds. Do not move the mug while submerged: stillness produces the most even deposit.
Withdraw and drain for 5-10 seconds
Lift the mug out smoothly. Rotate it slowly to encourage even runoff. Watch the bottom edge: when drips slow to one every 2 seconds, the draining is complete.
Shake once and set aside to dry
Give one firm downward shake to remove the final drip. Set the mug on a clean surface without touching the glazed body. Let dry for 1-2 hours before loading into the kiln.
Consistent specific gravity makes dipping the most repeatable application method. Measure it every session.
How to Apply Ceramic Glaze by Spraying
Spraying applies glaze as a fine mist using compressed air. This method gives you complete control over thickness and allows thin, even coats on complex forms that would trap glaze in dipping or show brush marks from hand application.
A HVLP spray gun (high volume, low pressure) or an airbrush running at 30-40 psi atomizes glaze slurry into droplets approximately 0.1-0.3mm in diameter. These droplets land on the bisque surface and coalesce into a uniform film.
This atomization is what makes spraying unique. Instead of a solid liquid layer (dipping) or a brushed deposit, the glaze arrives as thousands of tiny dots that merge on contact. The result is the smoothest possible unfired surface.
What Equipment Do You Need for Spraying Glaze
You need a compressed air source capable of 30-50 psi sustained output, a spray gun with a 1.4-2.0mm nozzle, and a spray booth or outdoor area with proper ventilation.
A dedicated spray booth with exhaust fan captures overspray before it fills your studio air. Glaze overspray contains silica dust: inhaling it causes silicosis, a permanent lung disease.
Always wear a respirator rated for silica dust (N95 minimum, P100 preferred) when spraying glaze. Do not rely on a dust mask: the fine glaze mist passes through standard dust masks easily.
Key Specifications for spraying setup:
- Compressor: 5+ gallon tank, 30-50 psi output
- Spray gun nozzle: 1.4-2.0mm for glaze slurry
- Glaze dilution: thin to specific gravity 1.35-1.45 (thinner than dipping)
- Distance from pot: 8-12 inches (20-30cm)
- Number of passes: 3-5 light passes for full coverage
How to Thin Glaze for Spraying
Dipping glaze is too thick for spraying. It clogs the nozzle and spits instead of misting. Thin the glaze to specific gravity 1.35-1.45 for most spray guns.
This means adding roughly 10-15% more water than a standard dipping glaze. Mix thoroughly and sieve through 80-mesh to remove any lumps that could clog the gun.
Test spray on newspaper before spraying your pot. The spray pattern should be a fine, even mist without spitting or dripping. If the gun spits, the glaze is too thick. If the glaze runs down the pot on contact, it is too thin.
Spray Technique for Even Coverage
Hold the spray gun 8-12 inches from the pot surface. Closer than 8 inches deposits too much glaze too fast, causing runs. Farther than 12 inches allows droplets to dry before landing, producing a sandy texture.
Move the gun in steady horizontal passes, overlapping each pass by 50%. Start spraying before the pot enters the spray path and stop after the pot clears it. This prevents a heavy deposit at the edges where the gun starts and stops.
Place the pot on a banding wheel and rotate it slowly while spraying. This combination of banding wheel rotation and overlapping horizontal passes produces the most uniform sprayed coat possible.
Apply 3-5 light passes rather than one heavy pass. Light passes allow each layer to set up slightly before the next lands, preventing runs. The total fired thickness should still be 1.5-2mm.
Spraying differs from dipping in that the glaze is applied incrementally rather than all at once. This makes it ideal for layering multiple glazes, creating gradients, and applying glaze to large sculptural forms that cannot be dipped.
Spraying uses compressed air to atomize glaze, producing the smoothest possible unfired surface. The respiratory protection required for spraying is non-negotiable due to airborne silica.
How to Apply Ceramic Glaze by Pouring
Pouring glaze over a pot is the preferred method for large vessels that cannot be dipped and for creating controlled drips, runs, and layered effects. It is also the fastest way to glaze the interior of bowls, vases, and narrow-necked forms.
The technique is simple: fill a container with glaze, pour it over or into the pot, and let the excess drain away. Control comes from how quickly you pour, how much glaze you apply, and how you rotate the piece during drainage.
How to Pour Glaze Inside a Vessel
For interior glazing, fill the vessel roughly 1/3 full with glaze. Rotate the pot while tipping it to coat all interior surfaces evenly.
Pour the excess glaze out in one smooth motion while continuing to rotate. A hesitation here creates a thick line inside the rim where glaze pooled during the pour.
For narrow-necked vases and bottles, this is often the only practical method. A wide-mouth funnel helps direct glaze into the opening without dribbling down the exterior.
How to Pour Glaze Over the Exterior
Place the pot upside down on a support that lifts it above your glaze catch basin. Use a prop stick or kiln post that fits inside the pot’s opening.
Pour glaze from a pitcher or ladle starting at the top (now the bottom, since the pot is inverted) and let it flow downward. Rotate the pot or walk around it while pouring to hit all sides.
Work quickly: the first contact area absorbs glaze immediately. If you pour slowly, the starting point gets a thicker deposit than the finishing point. A complete pour should take 5-10 seconds for a medium vase.
Catch all runoff in a container below. Strain the captured glaze back into your main bucket to avoid waste. Expect to recover 60-70% of poured glaze for reuse.
How to Create Controlled Drips and Layered Effects
Pouring excels at creating intentional drip patterns. Apply a base coat by dipping or brushing, then pour a contrasting glaze from the rim, letting it run down in controlled streams.
Control drip length by varying your pour height. Pouring from close range (2-3 inches) produces short, thick drips. Pouring from higher (6-10 inches) produces long, thin runs that travel farther down the pot.
Use a squeeze bottle for precise drip placement. Squeeze bottles give you pinpoint control over where drips start and how much glaze flows in each stream.
The viscosity of the glaze determines how far each drip travels. Thinner glaze (lower specific gravity) runs farther. Thicker glaze creates shorter, more textured drips. For pouring-specific effects, specific gravity between 1.40-1.48 gives good flow without becoming watery.
Pouring is a type of directional application that uses gravity to move glaze across the surface. It works best when you embrace the organic, flowing results rather than trying to achieve the mechanical uniformity of dipping or spraying.
Method Comparison
Brushing vs Dipping vs Spraying vs Pouring — Side by Side
Use the table below to match your production volume, studio setup, and desired surface quality to the right application method.
| Feature | Brushing | Dipping | Spraying | Pouring |
|---|---|---|---|---|
| Equipment cost | $10-30 (brushes) | $30-80 (bucket, tongs, hydrometer) | $150-500 (compressor, spray gun, booth) | $10-40 (pitcher, catch basin) |
| Speed per pot | 5-15 minutes | 10-30 seconds | 2-5 minutes | 30-60 seconds |
| Surface quality | Good; visible brush texture possible | Excellent; smoothest single-coat finish | Best; atomized mist eliminates texture | Good; organic flow patterns |
| Glaze volume needed | Minimal (pint jar) | Large (1-5 gallon bucket) | Moderate (quart to gallon) | Moderate (quart to gallon) |
| Best for | Small batches, beginners, detail work | Production pottery, uniform coverage | Complex forms, gradients, layering | Large vessels, interiors, drip effects |
| Health and safety concern | Low (minimal airborne dust) | Low (liquid contact only) | High (respirator, ventilation required) | Low (splash risk only) |
| Thickness control | By number of coats | By specific gravity and dip time | By number of passes | By pour speed and glaze viscosity |
| Our verdict | Best for beginners and small studios | Best for production and consistency | Best for complex forms and layering | Best for large vessels and interiors |
Costs are approximate for basic equipment. Spraying costs reflect entry-level compressor and spray gun. Production setups cost more at every method tier.
How to Choose the Right Glaze Application Method for Your Work
The best application method depends on three factors: your production volume, your form complexity, and your studio setup. Match the method to your specific situation rather than choosing based on what other potters use.
For beginners making fewer than 10 pots per week, brushing commercial glazes is the logical starting point. The equipment cost is under $30, you can use small jars of multiple colors, and you learn glaze behavior through hands-on application.
For production potters making 50-100 pieces per firing cycle, dipping is the clear choice. Once specific gravity is dialed in, every pot gets identical 2mm coverage in seconds. The time savings alone justifies the cost of 5-gallon glaze buckets.
For sculptural work with deep texture, sharp angles, and irregular surfaces, spraying is the only method that reaches all surfaces evenly. Brushing misses crevices. Dipping traps glaze in recesses. Spraying reaches everywhere.
For large platters, vases over 12 inches tall, and forms too big for any bucket, pouring is the practical solution. It uses less stored glaze than a full dipping bucket and handles scale that the other methods cannot match.
Many experienced potters combine methods. Dip the interior, pour the exterior, brush a different glaze on the rim. The methods are not mutually exclusive: they are tools to use in combination for the result you need.
For the typical home studio potter firing cone 6 electric, brushing commercial glazes on a banding wheel gives the best combination of color variety, ease of use, and fired quality without requiring dedicated glaze buckets or spray equipment.
Quick Reference
Glaze Application — Key Terms Explained
Quick definitions for the technical terms used throughout this guide
The density of liquid glaze relative to water (water = 1.0). Measured with a hydrometer. Controls how thick the glaze deposit will be during dipping.
Clay that has been fired once to a low temperature (cone 06-04), making it porous and ready to absorb glaze. Also called bisque.
A glaze defect where the molten glaze pulls away from the clay body, leaving bare patches. Caused by dust, oil, or excessive glaze thickness.
Small holes in the fired glaze surface where gas bubbles burst but the glaze did not heal over. Caused by air trapped during application or gases from the clay body.
A material in glaze (like calcium, sodium, or potassium compounds) that lowers the melting point of silica. Without flux, silica would not melt at kiln temperatures.
The point during firing when clay becomes dense and non-porous. A vitrified clay body has under 1% absorption and is food-safe without glaze.
A pyrometric device that measures heat work (temperature + time) in a kiln. Cone 6 = approximately 2232°F (1222°C). Not an ice cream cone.
A liquid wax applied to bisqueware to prevent glaze from sticking to those areas. Used on foot rings and kiln shelf contact points.
The match between glaze and clay body thermal expansion rates. Poor fit causes crazing (glaze cracks) or shivering (glaze flakes off).
Common Glaze Application Mistakes and How to Avoid Them
Applying Glaze Too Thickly
The most common beginner mistake is thinking more glaze equals better coverage. Glaze thicker than 2mm (about the thickness of two credit cards) will crawl, blister, or run off the pot during firing.
This happens because thick glaze traps gases from the clay body underneath a sealed glass surface. The gases push upward, creating blisters and bare spots. Thin glaze allows gases to escape before the surface seals.
Test glaze thickness with a pin tool. Push the needle through the wet glaze to the clay surface. If the glaze layer is thicker than the diameter of two stacked pin tool tips, it is too thick.
Skipping the Bisque Cleaning Step
Dust and skin oils are invisible on bisqueware. They are also the most common cause of crawling. A 30-second wipe with a damp sponge eliminates this variable entirely.
Handle bisqueware by the foot ring only after cleaning. Every finger touch deposits oil that glaze will reject. This is why production potters handle pots like evidence at a crime scene: edges only, never the glazing surface.
Not Checking Specific Gravity Before Dipping
Water evaporates from open glaze buckets continuously. A glaze mixed to 1.48 specific gravity in January can be 1.55 by March in a heated studio. That increase changes glaze thickness enough to cause crawling.
Check specific gravity at the start of every glazing session. This takes 30 seconds and prevents hours of rework or ruined pots. Write the reading in a studio notebook to track changes over time.
Re-dipping or Touching Up Wet Glaze
Once glaze has dried on the pot surface, do not attempt to fix a thin spot by dabbing on more wet glaze. The wet glaze re-wets the dried layer and creates a boundary line that will be visible after firing.
If a dipped pot has a thin spot, let it dry completely. Then sand the entire surface lightly with fine-grit sandpaper and re-dip the whole piece. The only invisible fix is a complete re-coat.
Glaze defects from application errors are almost always visible after firing. The fix is prevention through clean bisque, correct specific gravity, and proper technique.
Troubleshooting Glaze Application Problems
Problem: Glaze Crawls Away From the Clay Body
Crawling is bare clay exposed where glaze pulled back during firing. The root cause is almost always dirty bisque, excessive glaze thickness, or both.
Fix it by wiping every pot with a damp sponge before glazing. Reduce glaze thickness by lowering specific gravity (add water) or reducing the number of brushed coats. For persistent crawling, bisque fire 1 cone hotter to reduce clay porosity.
Problem: Fired Glaze Shows Pinholing
Pinholes are tiny craters in the fired glaze surface. They form when gas bubbles rise through the molten glaze but the glaze does not flow back together before cooling.
Application-related pinholes come from air trapped in brush strokes or from spraying with too much air pressure. Brush more slowly with a fully loaded brush. Reduce spray gun pressure to 30 psi and hold the gun closer to the pot.
According to Mastering Cone 6 Glazes by John Hesselberth and Ron Roy, pinholes can also result from the clay body releasing gases. Bisque firing 50°F hotter than your usual schedule helps burn out organic materials more completely.
Problem: Glaze Runs and Fuses to the Kiln Shelf
A glaze run onto the kiln shelf ruins both the pot and the shelf. The cause is glaze applied too thickly on the lower portion of the pot or glaze allowed to drip down during drying.
After application, check the bottom of every pot for glaze drips. Wipe them off with a damp sponge before loading the kiln. Keep glaze at least 3mm above the waxed foot ring.
For any pot that you suspect might run, place it on a kiln cookie (a small bisque-fired plate) on the kiln shelf. The cookie catches any drips and saves your shelf.
Problem: Uneven Glaze Coverage After Firing
Thin, translucent patches next to normal coverage areas mean the glaze was applied unevenly. In brushing, this comes from inconsistent coat overlap. In dipping, it means the pot was not fully submerged or was removed too quickly.
For brushing, use the cross-hatching method described earlier and check coverage under bright raking light. Wet glaze is translucent; thin spots look darker and more transparent than properly coated areas.
For dipping, ensure the entire pot goes under the glaze surface. Stir the glaze bucket thoroughly before dipping: settled solids at the bottom produce thin glaze at the top of the bucket.
Application defects appear in the kiln because the firing process reveals every variation in thickness. Understanding glaze fit and thermal expansion helps identify whether a defect came from application or from a mismatch between glaze and clay body.
How Does Glaze Chemistry Affect Application Method Choice
The chemical composition of a glaze directly influences which application method works best. High-clay-content glazes (like shinos and celadons) settle quickly in the bucket and require constant stirring for dipping. Low-clay-content glazes stay suspended longer but may need gum additives for brushing.
Glaze materials that are coarse or gritty (like unmilled feldspar or granular rutile) cannot be sprayed through fine nozzles without clogging. These glazes are better applied by dipping or pouring.
Glazes with high raw clay content (above 15% kaolin or ball clay) shrink significantly as they dry on the pot surface. This shrinkage causes cracking in thick applications. Brush these glazes in thin coats or use dipping with a slightly lower specific gravity to prevent cracking.
Mechanism: clay particles in the glaze slurry absorb water and swell during application. As water evaporates, the clay shrinks. If the glaze layer is too thick, shrinkage stress exceeds the glaze’s green strength, causing cracks that become crawling defects in the kiln.
This only occurs when glaze clay content exceeds roughly 15% and application thickness exceeds 2.5mm. The condition for cracking is wet glaze thickness that cannot accommodate the drying shrinkage.
If your glaze cracks during drying, the result is a network of fine lines in the unfired surface. Fix it by applying thinner coats or reducing clay content in the glaze recipe. The fired result of unfixed drying cracks is crawling.
For a deeper technical reference on glaze formulation and chemistry, the complete guide to ceramic glaze types and application science covers flux systems, colorant oxide behavior, and the silica-alumina-flux triangle in detail.
Myth vs Fact
Glaze Application — Common Myths Debunked
Separating fact from fiction on the most common glaze application misconceptions
✗ Myth
Thicker glaze always produces a better, more durable surface.
✓ Fact
Glaze thicker than 2mm traps gases and crawls or blisters. A properly applied 1.5-2mm coat at correct specific gravity is more durable than an excessively thick coat because it contains fewer defects. Fired glaze hardness (6-7 Mohs) comes from the glass structure, not the thickness.
✗ Myth
Brush marks in wet glaze will smooth out during firing.
✓ Fact
Glaze melts to a viscous liquid at cone 6, not a free-flowing liquid. Surface texture present in the unfired glaze persists through firing. Cross-hatching brush coats and using a banding wheel are the only reliable ways to eliminate brush marks.
✗ Myth
You do not need to clean bisqueware if it looks clean.
✓ Fact
Invisible skin oils from handling are the leading cause of crawling. A 30-second sponge wipe eliminates this variable. The time saved skipping this step is never worth the risk of losing pots in the glaze firing.
✗ Myth
Any glaze can be brushed, dipped, or sprayed equally well.
✓ Fact
Glazes formulated for brushing contain gum additives that make them brushable. Dipping glazes lack these additives and drag on the brush. A dipping glaze can be adapted for brushing by adding 1-2% CMC gum solution, but commercial brushing glazes are pre-formulated for that purpose.
✗ Myth
Spraying glaze does not require a respirator if done outdoors.
✓ Fact
Glaze overspray contains respirable silica particles under 10 microns that remain airborne for hours. Even outdoors, wind can carry these particles back to your breathing zone. A P100 respirator is mandatory for spraying glaze in any location. Silicosis is permanent and preventable.
✗ Myth
Dipping glaze specific gravity does not change over time.
✓ Fact
Water evaporates from open glaze buckets at roughly 1-3% per week depending on studio temperature and humidity. A glaze at 1.48 can reach 1.55 in two to four weeks. Check specific gravity before every glazing session: the 30-second measurement prevents ruined kiln loads.
Frequently Asked Questions About Applying Ceramic Glaze
Can I mix glazes from different brands for brushing application?
Quick Answer: Yes, but only glazes rated for the same firing temperature (cone). Mixing a cone 6 Amaco glaze with a cone 6 Mayco glaze is safe and common. Never mix cone 6 and cone 10 glazes: the cone 10 glaze will not melt at cone 6 (2232°F / 1222°C) and produces a dry, chalky surface.
Mix small test batches first. Combine glazes in a separate container at measured ratios (write them down). The mixed glaze may behave differently than either parent glaze because flux chemistry changes when formulations combine.
Test the mixture on a vertical test tile before committing to finished work. Some glaze combinations produce unexpected colors, alter surface texture, or change fluidity. Document successful mixes so you can repeat them.
Why does my glaze rub off as powder after brushing but before firing?
Quick Answer: The glaze lacks sufficient gum binder to adhere to the bisque surface in the unfired state. Commercial brushing glazes contain CMC gum or Veegum T. Dipping glazes do not, which is why they powder off when brushed.
Add 1-2% CMC gum solution to a dipping glaze to make it brushable. Dissolve CMC gum powder in hot water (1 teaspoon per cup of water), let it hydrate for 24 hours, then add the solution to your glaze. This gives the glaze enough green strength to resist rubbing off.
Alternatively, use a glaze formulated specifically for brushing. Amaco Potter’s Choice and Mayco Stroke and Coat are pre-gummed and tested for brush application right out of the jar.
Is sprayed glaze as food-safe as dipped or brushed glaze?
Quick Answer: Food safety depends on glaze chemistry and proper firing, not application method. A well-formulated lead-free glaze fired to full maturity is food-safe whether sprayed, dipped, or brushed. The application method does not change the glaze’s chemical composition.
The concern with spraying is incomplete coverage on functional surfaces. Sprayed glaze can be thinner on interior surfaces of mugs and bowls if the spray pattern does not reach all areas. Ensure full coverage by rotating the pot on a banding wheel during spraying and checking the interior with a mirror and flashlight.
For food-contact surfaces, verify that your specific glaze is labeled food-safe by the manufacturer. Look for AP (Approved Product) certification from ACMI on commercial glazes. Not all glazes are food-safe regardless of application method.
How do I glaze a pot that is too large for my glaze bucket?
Quick Answer: Pouring is the standard method for oversized work. Pour glaze over the exterior while the pot rests on a catch basin. Rotate the pot continuously during the pour for even coverage. Expect to use more glaze than dipping because much of it runs off.
For the interior, pour glaze in through the opening, swirl to coat all surfaces, and pour the excess out. Two interior pours (letting the first dry slightly before the second) ensure complete coverage on large forms.
Spraying is an alternative for large work if you have spray equipment. The pot stays stationary on a banding wheel while you apply multiple light passes. This uses less glaze than pouring and gives more even coverage on complex large forms.
What is the difference between underglaze and glaze in application?
Quick Answer: Underglaze is a colored slip applied to greenware or bisqueware for decoration. It contains no flux or insufficient flux to form a glass surface on its own. A clear glaze must be applied over underglaze to create a glossy, sealed surface.
Underglaze can be brushed, sponged, sprayed, or trailed onto the clay surface. It fires to a matte finish at any temperature but remains porous without a glaze coating on top. Glaze provides the glassy, impermeable surface that makes the piece functional.
Apply underglaze to bisqueware, let it dry, then apply clear glaze over it by dipping, brushing, or spraying. The two layers fire together in a single glaze firing. The underglaze design remains visible through the transparent glaze.
Can I apply glaze to greenware instead of bisqueware?
Quick Answer: Yes, this is called single firing or once firing. Glaze is applied to bone-dry greenware and both the clay body and glaze mature in a single firing. This requires glazes formulated for raw glazing and clay bodies with low drying shrinkage.
Raw glazing is riskier than glazing bisqueware because bone-dry clay is fragile and absorbs water from the glaze quickly. If the clay absorbs too much water too fast, it swells and cracks. Single-fire glazes are formulated with lower water content and faster drying properties.
For beginners, stick with bisque-and-glaze firing. The bisque stage removes all organic materials from the clay and creates a durable, absorbent surface that makes glaze application much more forgiving.
How do I fix a glaze drip that dried on the kiln shelf contact area?
Quick Answer: Scrape the dried glaze drip off with a fettling knife held flat against the foot ring. Work carefully to avoid chipping the bisque. Wipe the area with a barely damp sponge to remove glaze dust.
Never leave a glaze drip on the foot ring before firing. The drip will melt and fuse the pot to the kiln shelf during firing. Removing a pot that is fused to a shelf usually destroys both the pot and the shelf.
After scraping, check that the foot ring is clean and smooth. Any glaze residue, even a thin smear, will stick to the shelf. Waxing the foot ring before glazing prevents drips from adhering in the first place.
Why does my dipping glaze bubble when I stir it?
Quick Answer: Bubbles come from air trapped in the glaze slurry during mixing. Organic gum additives in brushing glazes also create foam when agitated. Bubbles that reach the pot surface during dipping create pinholes in the fired glaze.
Let the glaze bucket sit for 10-15 minutes after vigorous stirring. The bubbles will rise to the surface and pop. Dip pots after the foam layer has dissipated. If you are in a hurry, spray the foam surface with a fine mist of rubbing alcohol: this breaks surface tension and pops bubbles instantly.
Persistent bubbling may indicate the glaze has begun to ferment (bacteria growth in the organic gums). Add a few drops of household bleach to the glaze bucket if you notice a sour smell combined with excessive foaming.
How long can I store mixed glaze before it needs to be discarded?
Quick Answer: Properly stored glaze in a sealed container lasts indefinitely. The water may evaporate, the solids may settle into a hard layer, but the glaze can be reconstituted by adding water and mixing thoroughly. Commercial and studio-mixed glazes do not expire chemically.
Organic gum additives (CMC gum) can degrade over months, especially in warm studios. If a brushing glaze becomes thin and watery despite no water being added, the gum has broken down. Add fresh CMC gum solution to restore brushability.
Store glaze in airtight containers away from freezing temperatures. Freezing causes some glaze materials to precipitate out of suspension. A basement or interior closet maintains consistent temperature better than a garage or unheated studio space.
Do I need to wear gloves when applying glaze?
Quick Answer: Gloves are recommended for dipping and pouring, optional for brushing. Wet glaze contains soluble metal oxides (cobalt, copper, manganese) that can be absorbed through skin. Cobalt carbonate is a known skin sensitizer and suspected carcinogen.
Nitrile gloves provide a barrier that latex gloves do not: latex breaks down when exposed to some glaze solvents. Change gloves if glaze gets inside them. Wash hands thoroughly after any skin contact with wet glaze.
Dry glaze on bisqueware is not a significant skin absorption risk. The hazard is primarily during mixing and application when glaze is wet. For brushing small pieces, clean technique (glaze the pot, not your fingers) is sufficient for occasional studio use.
Can I thin commercial brushing glaze with water?
Quick Answer: Yes, add water in small increments (5% by volume or roughly 1 teaspoon per 100ml). Commercial brushing glazes are formulated thicker than dipping glazes. If the glaze drags on your brush or leaves heavy stroke marks, it needs thinning.
Too much water dilutes the gum binder and causes the glaze to powder off after drying. If you over-thin, let the jar sit open for a day to evaporate excess water, then retest. The correct brushing consistency is like heavy cream: it flows off the brush smoothly but does not drip.
Test thinned glaze on a scrap tile before using it on finished work. Some glazes change color or opacity when thinned beyond the manufacturer’s intended range.
Conclusion
Glaze application is the step where all your throwing, trimming, and bisque firing work either succeeds or fails. The four methods (brushing, dipping, spraying, and pouring) each solve different problems in the studio. Match the method to your pot, your volume, and your equipment.
Clean bisqueware, correct specific gravity for dipping, cross-hatched brush coats, proper respirator use for spraying, and drip management for pouring are the techniques that separate professional results from kiln shelf disasters. A glaze hydrometer and a damp sponge are the two most cost-effective tools in any glazing studio.
Test every new glaze on a vertical test tile before committing to finished work. The kiln reveals every application choice. Get the application right, and the glaze does the rest.