How to Remove Ceramic Coating From a Car Safely at Home

Ceramic coating does not come off with a car wash, a clay bar, or even heavy-duty detailing spray. It bonds chemically to your car’s clear coat, and removing it requires either abrasive polishing or a dedicated chemical solvent designed to break that bond.
This guide covers every proven removal method: machine polishing with cutting compound, wet sanding for heavily contaminated coatings, chemical ceramic coating removers, and when professional decontamination is the only realistic option.
What Is Ceramic Coating and Why Is It Hard to Remove?
Ceramic coating is a liquid polymer, typically silicon dioxide (SiO2) or titanium dioxide (TiO2), that cross-links with a car’s clear coat at the molecular level after application. Once cured, it forms a semi-permanent glass-like layer with a hardness rating of 9H on the pencil hardness scale.
That hardness is exactly what makes it difficult to remove. Standard wash products, paint decontamination sprays, and iron removers do not touch a properly cured ceramic layer. You need either mechanical abrasion or a chemical that disrupts the SiO2 bond specifically.
The coating’s thickness ranges from 1 to 5 microns per layer. That is thin enough to be invisible but thick enough to deflect abrasive compounds unless you use a cutting pad with a polishing machine at the correct speed.
According to published formulation data from coating manufacturers including Gtechniq and CarPro, most consumer-grade ceramic coatings reach full cure hardness within 24 to 72 hours at room temperature. Professional-grade coatings marketed as 10H or higher require full cure periods of 7 to 14 days and are measurably harder to remove than single-layer consumer products.
How to Tell If Your Ceramic Coating Is Still Active Before You Remove It
Attempting to remove a coating that has already failed on its own wastes time and risks cutting into the clear coat. Check the coating’s status before choosing a removal method.
The Water Bead Test
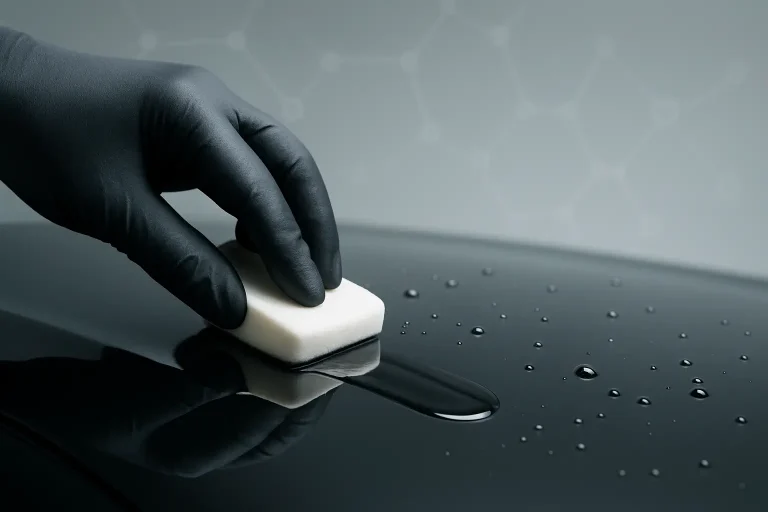
Pour a small amount of water onto a clean, dry panel. An active ceramic coating causes water to bead into tight, round droplets that roll off the surface immediately. A failed or degraded coating produces flat, spreading water sheets with no beading behavior.
Test at least three panels: hood, roof, and one door. Coating wear is uneven, and some panels degrade faster than others due to UV exposure and washing frequency.
The Slickness Test
Run a clean, dry microfiber towel across a panel after washing. An active ceramic coating produces a distinct slick, almost frictionless feel. A degraded coating feels rough or drags slightly, similar to uncoated paint.
If both tests show degradation across all panels, the coating may have already failed enough that light paint correction removes it without aggressive cutting. If the coating is still partially active, you need a full removal protocol.
The Polish Response Test
Apply a small amount of automotive cutting compound to a 12-inch test section using a medium cutting pad by hand. Work it for 60 seconds and wipe clean. Inspect the surface under a detailing light or direct sunlight.
If the polish leaves a visible improvement (reduced swirls, improved gloss), the coating has degraded significantly and standard machine polishing will remove it. If the surface looks identical after polishing, the coating is still fully active and you need a more aggressive approach.
Method 1: Machine Polishing with a Cutting Compound
Machine polishing with a heavy cutting compound on a cutting foam pad is the most widely used ceramic coating removal method for consumer-grade coatings. It removes the coating through controlled abrasion while leveling the clear coat beneath it.
This method works on ceramic coatings up to approximately 2H hardness on the pencil scale. For professional 9H or 10H coatings from brands like Gyeon Quartz or IGL Coatings, you may need to combine machine polishing with wet sanding on severely bonded areas.
What You Need
- A dual-action or rotary polisher (rotary cuts faster but has higher risk of burn-through)
- A heavy cutting foam pad or wool cutting pad (80mm to 130mm diameter)
- A heavy-cut polishing compound (Meguiar’s M105, 3M Fast Cut, or Sonax ProfiLine Cut)
- A paint thickness gauge to monitor clear coat depth
- Multiple microfiber polishing removal towels
Step-by-Step Process
The following visual guide breaks down the machine polishing removal process from prep through final inspection.
STEP-BY-STEP GUIDE
How to Remove Ceramic Coating by Machine Polishing
7 steps. Estimated total time: 4 to 8 hours depending on vehicle size and coating hardness.
Wash and decontaminate the paint surface
Wash the car with a pH-neutral shampoo to remove loose dirt. Follow with an iron remover spray to dissolve embedded iron particles that would clog the polishing pad during the removal pass.
Measure clear coat thickness
Use a paint thickness gauge on every panel before starting. Clear coat on factory paint is typically 100 to 150 microns. You need at least 80 microns remaining to safely polish. Record the baseline so you can monitor removal during the process.
Apply cutting compound to the pad
Apply 4 to 6 pea-sized drops of heavy cutting compound directly onto the cutting pad. Do not spread it dry. Prime the pad by working it at low speed (setting 1 on a dual-action polisher) on the panel surface before increasing speed.
Work in 18-by-18-inch sections at 1,200 to 1,800 OPM
Set the dual-action polisher to 1,200 to 1,800 orbits per minute. Work each section with 4 to 5 overlapping passes using moderate downward pressure. Do not let the compound dry completely before wiping off.
Wipe and inspect under direct light
Wipe the section clean with a fresh microfiber towel and inspect using a detailing LED light held at a low angle. If water beading is still present after wiping, or if the surface still has a glassy slickness, repeat the polishing pass on that section.
Follow with a medium polish pass to restore clarity
After removing the coating, switch to a medium polish compound and a softer finishing pad. This removes the micro-scratches left by the heavy cut and restores paint clarity before you apply a new protection layer.
Re-measure clear coat and confirm removal
Re-check paint thickness across all panels. A normal machine polishing removal removes 3 to 8 microns of clear coat. If thickness has dropped below 80 microns on any panel, stop and consult a professional before proceeding with any additional polishing.
Machine polishing is safe for most factory paint jobs when performed with a dual-action polisher at the correct speed settings. The risk increases significantly with rotary polishers, which generate more heat and cut faster but can burn through clear coat on curved panels if held in one position too long.
For most car owners removing a consumer-grade single-layer coating, a dual-action polisher with M105 or an equivalent heavy cutting compound on a 100mm orange cutting pad at 1,500 OPM completes the job in 4 to 6 hours on a mid-sized sedan.
Method 2: Wet Sanding for Thick or Professional-Grade Coatings
Wet sanding removes ceramic coating faster than machine polishing and is the correct approach for thick, professional-grade 9H or 10H coatings that do not respond to compound polishing alone. It is also the right method when the existing coating has developed severe water spots, staining, or contamination that has etched into the coating layer itself.
Wet sanding carries a higher risk of clear coat damage than machine polishing. It is not recommended for vehicles with factory paint thinner than 100 microns or for painters who have not practiced the technique on scrap panels first.
Wet Sanding Grit Progression for Ceramic Coating Removal
Use the table below to match your starting grit to the condition and thickness of the ceramic coating before you buy sandpaper.
| Coating Condition | Starting Grit | Follow-Up Grit | Finishing Grit | Post-Sand Polish |
|---|---|---|---|---|
| Lightly degraded, 1-2 layers | 2000 | 2500 | 3000 | Medium polish |
| Active 9H coating, good condition | 1500 | 2000 | 2500 | Heavy cut then medium |
| Multiple layers, heavy contamination | 1200 | 1500 | 2000 | Heavy cut then two-stage finish |
| Water-etched or stained coating | 1500 | 2000 | 3000 | Medium polish, finishing glaze |
| Professional 10H, fully cured | 1000 | 1500 | 2000 | Three-stage machine polish |
Always wrap wet sanding paper around a rubber sanding block to distribute pressure evenly. Never sand with bare fingers. The goal is flat, consistent pressure across the panel, not concentrated pressure on ridges or body lines.
Keep the surface and the sandpaper wet throughout the process. Use a spray bottle with clean water or a 50/50 water and isopropyl alcohol mix. Dry sanding ceramic coating generates heat that clogs the sandpaper within 30 seconds and can damage the clear coat through thermal stress.
Method 3: Chemical Ceramic Coating Removers
Chemical ceramic coating removers are alkaline or solvent-based products designed to soften and break the SiO2 bond without mechanical abrasion. They are useful as a pre-treatment before machine polishing or as a standalone method on very lightly cured coatings applied within the past 30 days.
Products like Koch Chemie Cito Polish, CarPro Essence, and Gyeon Q2M Prep are marketed partly for this purpose. These products are not miracle removers. They do not dissolve a fully cured 9H coating on contact. They lower the surface energy of the cured coating, making it more responsive to subsequent machine polishing.
How Chemical Removers Work
A ceramic coating’s SiO2 network is chemically resistant to most acids and mild alkalines. Strong alkaline solutions at a pH above 12 begin to hydrolyze the siloxane bonds that hold the coating together, converting some of the glass-like network back into soluble silicate compounds.
This hydrolysis only occurs at high concentration and with sufficient dwell time. A diluted all-purpose cleaner at pH 9 to 11 will not remove a cured ceramic coating regardless of contact time. You need a dedicated high-alkaline product or a solvent-based coating prep spray designed specifically to disrupt the coating’s cross-linked structure.
Application Protocol for Chemical Removers
- Wash the vehicle thoroughly and dry completely before application.
- Apply the chemical remover to one panel at a time using a microfiber applicator pad.
- Allow a dwell time of 3 to 5 minutes. Do not let it dry on the surface.
- Agitate with a soft-bristle detailing brush using circular strokes for 30 to 60 seconds.
- Rinse thoroughly with clean water and dry before inspecting.
- Follow immediately with machine polishing using a medium cutting compound.
Chemical removers work best as a softening step, not a standalone solution. Plan to follow every chemical treatment with at least one machine polishing pass to physically remove the softened coating material.
Do not use chemical removers on matte or satin paint finishes. High-alkaline products can alter the surface texture of matte clear coats permanently, producing shiny patches that cannot be corrected without professional respray.
Method 4: Clay Bar and Iron Remover for Surface Contamination
A clay bar and iron remover will not remove a cured ceramic coating, but they are the correct first step before any polishing method. Contamination on the surface of the coating (iron fallout, mineral deposits, tar spots) loads polishing pads and reduces cutting efficiency during mechanical removal.
Run a detailing clay bar across every panel after washing. The clay bar glides smoothly over a clean, contamination-free surface. Resistance or dragging indicates embedded contamination in the coating surface that needs to be cleared before polishing begins.
Follow with a dedicated iron fallout remover spray applied to wet paint. Iron removers turn purple on contact with ferrous particles, showing you exactly where contamination is concentrated. Allow 3 to 5 minutes dwell time, then rinse thoroughly.
This decontamination step adds 30 to 60 minutes to the total removal process but measurably improves polishing pad life and cutting efficiency in every subsequent step.
When to Use a Professional Detailer Instead of DIY Removal
Professional removal is the correct choice in four specific situations. Attempting DIY removal in any of these scenarios risks permanent clear coat damage that costs more to repair than professional detailing would have cost.
Situation 1: Clear Coat Thickness Below 100 Microns
Factory paint on some Asian-market vehicles, particularly older models, measures as low as 80 to 90 microns total paint depth. Ceramic coating removal by machine polishing on paint this thin removes 5 to 10 microns per pass. Two passes puts you at or below the minimum safe thickness for protection against stone chips and UV degradation.
Measure paint thickness with a gauge before starting any polishing work. If any panel reads below 100 microns, contact a professional detailer who can use less aggressive pads and compounds calibrated to thin paint systems.
Situation 2: Professional-Grade Multi-Layer Coatings
Multi-layer professional installations from brands like Ceramic Pro Gold, Gtechniq Crystal Serum Ultra, or IGL Coatings Kenzo involve 3 to 5 layers of coating applied in succession, with total coating thickness reaching 8 to 12 microns. These coatings require a rotary polisher with a heavy wool cutting pad and multiple compound passes. This is beyond the skill level of most car owners without professional training.
Situation 3: Matte, Satin, or Wrapped Finishes
Machine polishing removes the micro-texture that creates the matte or satin appearance. Even one polishing pass on a matte finish produces permanent shiny patches. Vinyl wraps are destroyed by machine polishing. Chemical removers at high alkalinity can also affect wrapped surfaces. These finishes require professional chemical removal using products specifically formulated for matte-compatible decontamination.
Situation 4: The Previous Coating Was Applied Over Paint Defects
If a ceramic coating was applied over swirl marks, scratches, or oxidation without correcting the paint first, removing the coating reveals the original defects underneath. Removing the coating and correcting the paint in a single session requires a two-stage polishing protocol that adds significant time and complexity beyond a basic removal job.
How Long Does Ceramic Coating Removal Take?
Total removal time depends on vehicle size, coating type, and method. The table below gives realistic time estimates for each combination.
Use the table below to plan your removal session and confirm you have enough compound, pads, and microfiber towels before starting.
| Vehicle Size | Consumer Coating (1 layer) | Professional Coating (2-3 layers) | Wet Sanding Method | Pads Needed |
|---|---|---|---|---|
| Compact car | 3 to 5 hours | 6 to 8 hours | 4 to 6 hours | 4 to 6 cutting pads |
| Mid-size sedan or SUV | 5 to 7 hours | 8 to 12 hours | 6 to 9 hours | 6 to 8 cutting pads |
| Full-size truck or van | 7 to 10 hours | 12 to 16 hours | 9 to 12 hours | 8 to 12 cutting pads |
| Sports car (complex curves) | 6 to 9 hours | 10 to 14 hours | Not recommended | 6 to 10 cutting pads |
| Professional detail estimate | $150 to $300 | $300 to $600 | $400 to $700 | N/A |
These time estimates assume a single operator working continuously without interruption. Add 25 to 30 percent to every estimate for a first-time operator still learning machine pressure and speed settings.
What to Do Immediately After Removing Ceramic Coating
Freshly polished paint with no coating is fully exposed to UV radiation, water spotting, and surface contamination. You have a window of approximately 24 to 48 hours before environmental damage begins accumulating on unprotected paint.
After completing the removal process, your first step is a panel wipe-down with an isopropyl alcohol (IPA) panel wipe at 70 to 99% concentration. This removes polishing oil residue left by the compound and creates a clean, oil-free surface that is essential for any new coating or sealant to bond correctly.
If you plan to apply a new ceramic coating immediately, follow the manufacturer’s preparation protocol exactly. Most professional ceramic coating systems require the paint surface to be at room temperature (between 60°F and 80°F / 15°C to 27°C), fully dry, and free from any contamination or polish residue before application begins.
If you are not recoating immediately, apply a paint sealant or synthetic wax within 24 hours of removal. This gives the paint temporary protection while you plan and prepare for the next protection step. Our complete breakdown of ceramic coating types and professional application steps covers what to apply next and how to choose the right coating for your paint condition and budget.
Common Mistakes That Damage Paint During Ceramic Coating Removal
Ceramic coating removal is a technically demanding process, and certain errors cause clear coat damage that requires professional correction to fix. The following mistakes account for the majority of post-removal paint failures reported by car detailing communities and professional shops.
Using Too Much Pressure with a Rotary Polisher
A rotary polisher held at one position for more than 3 seconds while running at 2,000 RPM or above generates enough heat to burn through clear coat. Burn-through appears as a dull, cloudy patch that does not respond to further polishing. The only fix is professional wet sanding followed by a complete repaint of the affected panel.
If you use a rotary polisher, keep the machine moving at all times. Use a constant side-to-side motion at 2 to 3 inches per second and never pause in one spot.
Skipping Paint Thickness Measurement
Starting to polish without measuring clear coat thickness is the single most avoidable error in DIY ceramic coating removal. Thin factory paint, repaired panels, and vehicles with previous heavy polishing history can already be near the minimum safe thickness before removal begins.
A paint thickness gauge costs $30 to $150 and provides the information you need to decide whether DIY removal is safe or whether you need a professional to proceed more carefully.
Using a Dirty or Loaded Polishing Pad
A polishing pad loaded with removed ceramic coating residue no longer cuts effectively. Instead, it redistributes the removed material as micro-scratches across the paint surface. Change cutting pads every 12 to 18 square feet of panel area, or clean them with a pad cleaning spur every 4 to 6 passes.
Polishing in Direct Sunlight
Polishing in direct sunlight heats the paint surface above 100°F (38°C) in summer conditions. Heat causes cutting compound to dry faster than intended, reducing cut time and increasing the risk of compound residue bonding to the paint before you can wipe it off. Work in a shaded garage or under a canopy at all times.
Not Following Up with a Finishing Polish
Heavy cutting compound leaves micro-scratches of 5 to 20 microns deep across the entire painted surface. These scratches are visible as haziness or reduced gloss under direct light. Always follow a cutting compound pass with a medium or fine polish using a softer finishing pad to restore clarity before applying any new protection.
Skipping the finishing polish and applying a new ceramic coating directly over cut marks locks those scratches permanently under the new coating layer.
Can You Partially Remove Ceramic Coating in One Area?
Partial removal of ceramic coating in a single panel or localized area is possible but produces a visible transition line where the polished section meets the intact coating. This is called a “coating edge” and is visible under direct sunlight as a slight difference in gloss or reflective depth between the two areas.
Partial removal is acceptable in two situations. The first is spot repair of a section where the coating failed or was damaged by a paint chip repair or panel respray. The second is correcting a single panel with severe water spot etching without removing the rest of the vehicle’s intact coating.
For whole-vehicle recoating, always remove the coating from every panel, including door jambs, mirrors, and rocker panels. A vehicle with new coating on some panels and old coating on others shows inconsistent gloss and depth that is more visible than the original condition.
Understanding how to preserve a ceramic coating once it is reapplied will save you from repeating this removal process prematurely. Our guide on washing techniques that protect ceramic coating during routine maintenance covers pH-neutral shampoo selection, contact wash method, and drying tools that extend coating lifespan by 2 to 3 years.
Cost Comparison: DIY vs Professional Ceramic Coating Removal
Use the table below to compare the total cost of DIY removal against professional detailing, including equipment you will reuse on future projects.
| Item | DIY First Time | DIY Subsequent | Professional (Mid-Size) | Professional (Large) |
|---|---|---|---|---|
| Dual-action polisher | $80 to $250 | $0 (owned) | Included | Included |
| Cutting compound (32 oz) | $20 to $45 | $20 to $45 | Included | Included |
| Cutting pads (set of 6) | $30 to $60 | $15 to $30 | Included | Included |
| Paint thickness gauge | $30 to $150 | $0 (owned) | Included | Included |
| Microfiber towels (10 pack) | $15 to $25 | $15 to $25 | Included | Included |
| Labor cost | $0 | $0 | $150 to $400 | $300 to $600 |
| Total estimated cost | $175 to $530 | $50 to $100 | $150 to $400 | $300 to $600 |
For first-time removal on a single vehicle, DIY costs are roughly equivalent to professional removal once you account for equipment purchases. The economic case for DIY improves significantly on the second and third removal because polisher, gauge, and pad investment is already paid for.
For professional-grade multi-layer coatings or vehicles where paint thickness is already marginal, professional removal produces better results and lowers the risk of clear coat damage that costs $300 to $600 per panel to correct professionally.
Removing Ceramic Coating from Specific Surfaces Beyond the Paint
Ceramic coating is applied not just to body panels but to glass, wheels, trim, and plastic. Each surface responds differently to removal methods, and the approach that works safely on clear coat can permanently damage glass or plastic components.
Glass Surfaces
Ceramic coating on automotive glass (windshield, side windows, rear glass) is removed with a glass-safe polishing compound and a non-abrasive glass polishing pad. Do not use the same cutting compound and cutting pad you used on paint. Automotive cutting compounds contain abrasives too coarse for glass and cause micro-scratching visible as haze in direct sunlight.
Use a dedicated glass polishing compound with a wool glass polishing pad at 1,000 to 1,200 OPM. Test a 4-inch section before doing the full glass surface. Glass ceramic coatings are thinner and softer than paint coatings and typically require only one or two passes to remove fully.
Alloy Wheels
Wheel ceramic coatings are removed with a medium polishing compound applied by hand with a foam applicator or with a light cutting pad on a 75mm mini polisher. Wheels have complex curved surfaces and tight spoke areas that do not accommodate full-size polishing pads safely.
Iron fallout remover used before polishing is particularly important on wheels. Brake dust embeds into wheel coating aggressively and clogs polishing pads faster on wheels than on any other surface.
Plastic Trim and Rubber Seals
Never machine polish plastic trim or rubber seals. Polishing compounds cause bleaching and surface degradation on most unpainted plastic and rubber compounds. For ceramic coating on plastic trim, use a dedicated plastic coating remover or a 70% isopropyl alcohol solution applied with a microfiber cloth. Rub gently in a linear motion and wipe clean immediately.
Once the coating is removed from trim, apply a plastic trim restorer to prevent fading from UV exposure before applying any new coating or trim dressing.
How to Know When Ceramic Coating Removal Is Complete
Confirming full removal before applying new protection is essential. Applying a new ceramic coating over a partially removed old coating causes bonding failures, visible high spots, and uneven gloss within weeks of application.
Use three confirmation tests after completing the removal process across all panels.
The first test is the water sheet test. Pour water over a clean, dry panel. Fully polished paint with no coating shows a sheet of water that clings to the surface rather than beading. Any beading at all indicates active hydrophobic coating is still present in that area.
The second test is the IPA wipe test. Wipe a polished panel with a 70% isopropyl alcohol solution on a clean microfiber cloth. Let it evaporate for 30 seconds. No streaking, no beading, and no water marks after evaporation confirms the panel is coating-free and ready for new protection.
The third test is the light reflection test. Inspect each panel under a detailing LED light at a 15-degree angle. A fully polished surface with no coating residue shows consistent, even reflection across the entire panel. Bright or cloudy patches indicate compound residue, remaining coating, or clear coat scratches that need a finishing polish pass before recoating.
Proper surface preparation before applying a new ceramic layer matters as much as the coating itself. If you are also planning to update other protective coatings in your home, our guide on preserving ceramic cookware coatings between uses covers a related principle: proper surface maintenance extends the life of any ceramic-based protective layer significantly.
Frequently Asked Questions About Removing Ceramic Coating From a Car
Can you remove ceramic coating with a clay bar alone?
A clay bar does not remove a cured ceramic coating. Clay bars remove surface contamination sitting on top of the coating, such as iron fallout, tar spots, and mineral deposits. The SiO2 polymer network of a cured ceramic coating is chemically bonded to the clear coat at a level below what a clay bar’s mechanical action can reach. You need machine polishing or wet sanding to physically abrade the coating off the paint surface.
Does WD-40 or any household product remove ceramic coating?
No household product reliably removes a cured automotive ceramic coating. WD-40, acetone, paint thinner, and vinegar do not have the alkaline strength or the specific solvent chemistry needed to break the siloxane bonds in a cured SiO2 coating. Using acetone or paint thinner on your car’s paint will damage the clear coat without removing the coating. Stick to dedicated automotive cutting compound and machine polishing.
How many microns of clear coat does machine polishing remove during ceramic coating removal?
A single machine polishing pass with a heavy cutting compound and a foam cutting pad removes approximately 3 to 5 microns of clear coat on a dual-action polisher at 1,200 to 1,800 OPM. A complete two-pass removal session (one cutting pass, one finishing pass) removes a total of 6 to 10 microns. Factory clear coat averages 100 to 150 microns, so a single removal cycle uses approximately 5 to 10 percent of the total clear coat depth.
Can I use a hand polishing technique instead of a machine polisher?
Hand polishing alone will not remove a fully cured ceramic coating on a 9H or professional-grade product. The mechanical energy required to abrade through the cross-linked SiO2 matrix is significantly higher than a human hand can generate consistently over a full vehicle. You can remove a very lightly degraded or failed coating by hand with heavy cutting compound in some cases, but expect 3 to 4 times the time and effort compared to machine polishing, with inconsistent results across panels.
Is ceramic coating removal safe to do at home without a garage?
Polishing in direct sunlight causes cutting compound to dry and harden before it can be worked properly. It also heats the panel surface above safe polishing temperature. You need a shaded workspace with ambient temperature between 60°F and 85°F (15°C to 30°C) and low humidity. An open-sided carport, a shaded driveway early in the morning, or an indoor space with good ventilation are all acceptable alternatives to a full garage.
What happens if I apply a new ceramic coating over an old one without removing it?
A new ceramic coating applied over an existing intact coating bonds to the old coating’s surface rather than directly to the clear coat. The adhesion strength is significantly weaker than a direct-to-clear-coat bond. The result is premature peeling, visible coating separation in 6 to 12 months, and uneven surface texture that catches light differently across the panel. Always remove the old coating fully and verify removal with the IPA wipe test before applying any new coating product.
Can ceramic coating removal damage the underlying base coat?
Machine polishing removes only the clear coat layer, not the underlying base coat, as long as clear coat thickness stays above 50 to 60 microns. The base coat and clear coat are separate paint layers, with the clear coat acting as the sacrificial protective layer. The risk of reaching the base coat is real only if the clear coat was already very thin before removal began, or if polishing is repeated aggressively multiple times without monitoring thickness between sessions.
How do I remove ceramic coating from painted plastic bumpers?
Painted plastic bumpers are coated at the factory with flexible clear coat that is softer and thinner than the clear coat on metal body panels. Use a light cutting compound with a soft foam pad at low speed (under 1,200 OPM) and limit passes to two per section. Aggressive cutting on flexible bumper surfaces causes compound heat buildup that melts and blurs the clear coat. Measure paint thickness on bumpers specifically before starting since it is consistently lower than on metal panels.
Does removing ceramic coating also remove any paint protection film underneath it?
Machine polishing directly on paint protection film (PPF) will damage the film. PPF is a thermoplastic urethane layer that polishing abrasives cut through very quickly. If a ceramic coating was applied over PPF, polishing to remove the coating will also cut into the film and potentially require a full PPF replacement. Have a professional assess the panel stack (PPF plus ceramic coating) before any polishing work begins to determine whether the coating can be removed chemically rather than mechanically.
How soon after removing ceramic coating can I apply a new one?
After completing polishing and the IPA panel wipe, the surface needs at least 1 to 2 hours to fully degas and release any remaining solvent vapors from the polishing compound. Most professional ceramic coating manufacturers specify a minimum surface temperature of 60°F (15°C) and maximum humidity of 70% at time of application. Applying in a climate-controlled garage immediately after the surface preparation is acceptable, but check your specific product’s technical data sheet for exact conditions, as requirements vary between brands.
Will removing ceramic coating affect my car’s resale value?
Removing a deteriorated or heavily contaminated ceramic coating and replacing it with a fresh layer typically increases resale value compared to leaving a visually degraded coating in place. A properly executed removal and recoat session using a professional-grade product like Gtechniq Crystal Serum Light or Gyeon Quartz Q2 adds documented protection history that buyers value. The risk to resale value comes only from removal that damages the clear coat, which is why paint thickness measurement before starting is essential.
If your ceramic coating is still performing well on your current vehicle, maintaining it correctly is far more cost-effective than removal and reapplication. Our detailed walkthrough of maintaining ceramic coating through the correct contact wash method shows which products and techniques preserve the hydrophobic layer longest without compromising the coating’s bond to the clear coat.
The Right Approach Depends on Your Coating, Your Paint, and Your Skill Level
Ceramic coating removal is achievable at home for most consumer-grade coatings using a dual-action polisher, a heavy cutting compound, and a paint thickness gauge to keep the process safe.
Professional-grade multi-layer coatings, vehicles with thin clear coat, matte finishes, or paint protection film underneath the coating require professional assessment before any polishing begins. The cost of professional removal is lower than the cost of clear coat repair if the job goes wrong.
Measure before you polish. Monitor thickness throughout. Follow every cutting pass with a finishing polish. And always confirm removal with the IPA wipe test and the water sheet test before applying any new protection layer.