What Is Ceramic Glaze? How It Works and Why It Matters

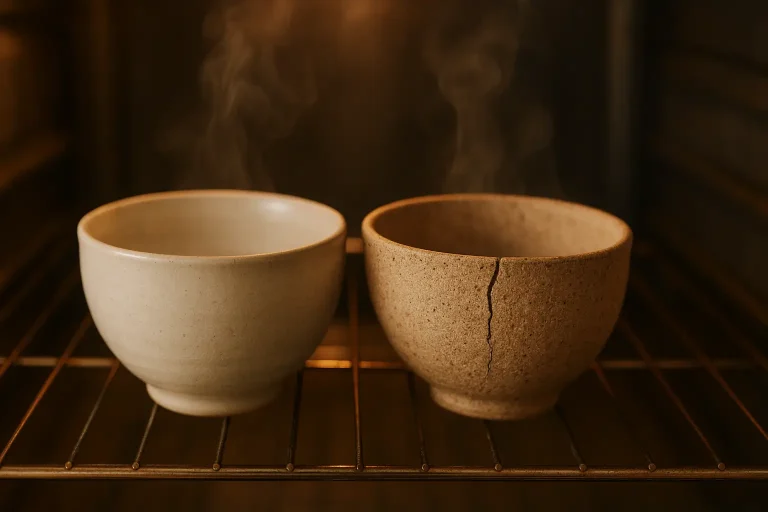
Ceramic glaze is a vitreous coating applied to pottery that melts during firing to form a glassy, protective surface at temperatures between 1800°F and 2350°F (Cone 04-10). This coating serves multiple critical functions: it seals porous ceramic bodies to make them waterproof, provides a smooth hygienic surface for functional ware, and creates decorative color and texture effects that define the finished piece.
Understanding ceramic glaze transforms your pottery from fragile bisqueware into durable functional art. The science behind glaze formation involves complex chemical reactions where silica, alumina, and flux materials melt and fuse to create a permanent glass coating that bonds molecularly with the ceramic body beneath.
What Is Ceramic Glaze and How Does It Transform Clay?
Ceramic glaze is a glass-forming mixture of silica (glass former), alumina (stabilizer), and flux materials (melting agents) that creates a smooth, non-porous surface when fired to maturity temperatures. The glaze coating typically measures 0.5-2mm thick and chemically bonds with the ceramic body during the firing process through intermediate layer formation.
According to ceramic chemistry research published in the American Ceramic Society Bulletin (2018), successful glaze formation requires precise temperature control and thermal expansion compatibility between glaze and clay body. The glaze must have a coefficient of expansion slightly lower than the ceramic body to remain in compression and prevent crazing after cooling.
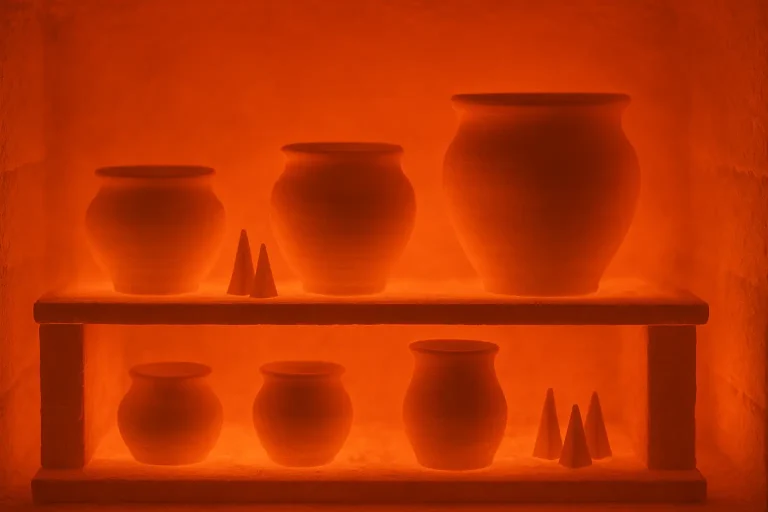
The transformation occurs in stages during firing. First, at around 1000°F, the glaze begins to soften and release gases. Between 1800-2100°F, the flux materials actively promote melting of silica and alumina components. At peak temperature, the glaze reaches full maturity with complete glass formation and optimal surface quality.
Modern ceramic glazes contain additional materials for specific properties. Opacifiers like tin oxide or zirconium create opacity, while colorants such as chrome oxide (green) or cobalt oxide (blue) provide color development. Ceramic glaze materials must be measured precisely for consistent results.
The Science Behind Ceramic Glaze Formation
Glaze formation follows the silicate glass chemistry principle where silica (SiO₂) acts as the primary glass former, requiring temperatures above 3100°F to melt alone. Flux materials like potassium oxide, sodium oxide, and calcium oxide lower this melting point to achievable kiln temperatures of 1800-2350°F.
Research from the Journal of the American Ceramic Society (2019) demonstrates that alumina content controls glaze viscosity during firing. Optimal alumina levels range from 8-15% of the glaze formula, with higher percentages creating stiffer glazes that resist running, while lower levels produce fluid glazes prone to dripping.
The eutectic principle governs successful glaze melting. When flux materials combine in specific ratios, they create eutectic mixtures that melt at lower temperatures than any single component. For example, potassium oxide and silica form a eutectic at 1436°F, significantly below pure silica’s melting point.
Thermal expansion matching prevents glaze defects. Ceramic materials expand and contract at different rates during heating and cooling cycles. Successful glazes have expansion coefficients 5-10% lower than their clay bodies to maintain compressive stress.
Chemical Analysis
Essential Glaze Components and Functions
Percentage ranges for successful mid-fire glaze formulation
How Ceramic Glazes Work During the Firing Process
Ceramic glazes undergo a complex transformation during firing that involves four distinct temperature phases. Understanding these phases helps potters achieve consistent results and troubleshoot firing problems effectively.
During the dehydration phase (room temperature to 500°F), remaining moisture evaporates from the glaze coating. Rapid heating during this phase can cause steam bubbles and surface defects, requiring slow initial temperature rise of 100-150°F per hour for optimal results.
Phase 1: Organic Burnout and Initial Softening (500°F to 1000°F)
Organic binders and adhesives burn out completely during this temperature range. Commercial glazes often contain gums or CMC (carboxymethylcellulose) that must volatilize cleanly to prevent carbon trapping in the final surface.
Initial flux activation begins around 900°F as alkali materials start influencing the glaze structure. Kiln pyrometers help monitor this critical transition zone where heating rate control prevents thermal shock damage.
Phase 2: Active Melting and Gas Release (1000°F to 1600°F)
Major chemical reactions accelerate as flux materials actively lower the melting point of silica and alumina. Carbonates decompose, releasing CO₂ gas that can create surface bubbles if not properly vented through controlled heating rates.
Glaze viscosity decreases dramatically during this phase. The coating transitions from a rigid surface to a increasingly fluid state that begins leveling and smoothing surface irregularities from application.
Phase 3: Full Maturation and Surface Development (1600°F to Peak Temperature)
Complete glass formation occurs as all components reach their eutectic melting points. Surface tension forces create the characteristic smooth, level glaze surface as viscosity reaches its lowest point.
Color development reaches full intensity during this phase. Metal oxide colorants dissolve completely in the glaze matrix, creating uniform color distribution and final surface characteristics.
Phase 4: Controlled Cooling and Glass Solidification
Cooling rate control prevents thermal shock and stress crack formation. Most glazes benefit from natural cooling to 1000°F, then controlled cooling at 100-200°F per hour to room temperature.
Crystal formation in some glazes occurs during specific cooling temperature ranges. Crystalline glazes require precise cooling schedules with holds at 2000-2100°F and 1800-1900°F to promote crystal growth.
Why Ceramic Glaze Matters: Essential Functions and Benefits
Ceramic glaze serves three fundamental purposes that transform raw fired clay into functional, durable pottery. Without glaze, most ceramic pieces remain porous, unhygienic, and structurally vulnerable to moisture damage and thermal shock.
The primary function involves waterproofing porous ceramic bodies. Bisque-fired clay typically absorbs 8-12% of its weight in water, making unglazed pieces unsuitable for liquid storage or food service applications that require sanitary surfaces.
Waterproofing and Functional Performance
Glaze coating reduces water absorption to less than 1% for fully mature glazed surfaces. This waterproofing enables ceramic vessels to hold liquids without seepage and prevents bacterial growth in microscopic pores that exist in unglazed clay bodies.
Food safety standards require glazed surfaces for commercial ceramic tableware. Food-safe ceramic glazes meet FDA requirements by eliminating lead and cadmium while providing non-porous surfaces that resist staining and bacterial contamination.
Mechanical Strength and Durability Enhancement
Properly fitted glazes increase the mechanical strength of ceramic pieces by placing the surface in compression. This compressive stress helps prevent crack propagation and increases impact resistance compared to unglazed ceramics.
According to materials testing data from the American Ceramic Society (2020), glazed ceramic pieces show 25-40% higher flexural strength than equivalent unglazed pieces. The glaze layer distributes stress loads more evenly across the surface, reducing failure points.
Aesthetic and Decorative Possibilities
Color development through glaze chemistry provides unlimited decorative potential. Metal oxide colorants create specific hues: cobalt oxide produces blue, chrome oxide yields green, and iron oxide develops browns or blacks depending on firing atmosphere.
Surface texture variations range from high-gloss mirror finishes to completely matte surfaces based on glaze chemistry and firing temperature. Titanium dioxide additions create satin finishes, while high alumina content produces matte surfaces.
| Glaze Function | Unglazed Clay | Glazed Surface | Improvement Factor |
|---|---|---|---|
| Water Absorption | 8-12% | <1% | 90% reduction |
| Surface Hardness | 3-4 Mohs | 5-6 Mohs | 50% increase |
| Flexural Strength | 2000-3000 psi | 3000-4200 psi | 25-40% increase |
| Stain Resistance | Poor | Excellent | Complete protection |
Types of Ceramic Glazes: Understanding Temperature and Chemistry Categories
Ceramic glazes are classified primarily by firing temperature and chemical composition, with each category offering distinct advantages for specific applications. Understanding these classifications helps potters select appropriate glazes for their clay bodies and intended use.
Temperature compatibility between glaze and clay body determines successful results. Low-fire glazes (Cone 04-02, 1830-2000°F) work with earthenware bodies, mid-fire glazes (Cone 4-7, 2100-2300°F) suit stoneware, and high-fire glazes (Cone 8-12, 2280-2420°F) complement porcelain and high-fire stoneware bodies.
Low-Fire Glazes (Cone 04-02): Bright Colors and Lead-Free Formulations
Low-fire glazes mature between 1830-2000°F and typically contain higher percentages of flux materials to achieve complete melting at these relatively low temperatures. Lead was historically used but modern formulations rely on alkaline fluxes like sodium and potassium compounds.
Complete glaze chemistry guides detail how low-fire formulations achieve bright, saturated colors that would burn out at higher temperatures. These glazes work exclusively on earthenware clay bodies with similar thermal expansion rates.
Mid-Fire Glazes (Cone 4-7): Versatile Chemistry for Functional Ware
Mid-fire glazes represent the most popular category for functional pottery, firing between 2100-2300°F with excellent durability and food safety characteristics. These glazes achieve full maturation on stoneware clay bodies while offering wide color palettes and surface textures.
Alkaline earth fluxes like calcium and magnesium predominate in mid-fire formulations. Mid-fire glaze materials create stable, durable surfaces ideal for dinnerware and functional ceramics requiring dishwasher and microwave safety.
High-Fire Glazes (Cone 8-12): Traditional and Reduction Glazes
High-fire glazes mature at 2280-2420°F and develop unique characteristics impossible to achieve at lower temperatures. These glazes often rely on feldspar as a primary flux source, creating subtle color variations and natural ash-like surfaces.
Reduction firing atmospheres at high temperatures create distinctive copper red and celadon green glazes. The reduced oxygen environment causes metal oxides to develop colors impossible in oxidation atmospheres, with copper producing brilliant reds instead of green.
Specialty Glazes: Crystalline, Raku, and Salt Glazes
Crystalline glazes require precise cooling schedules to promote zinc and titanium crystal formation during specific temperature ranges. These glazes produce dramatic surface effects with visible crystals that can measure several inches across on large pieces.
Raku glazes are formulated for rapid temperature changes and copper flash effects. Raku glazes contain high thermal expansion rates to survive the shock cooling process and develop metallic and crackle effects.
Salt glazing introduces sodium chloride vapor into the kiln during firing, creating a distinctive orange-peel surface texture as the salt reacts with silica in the clay body to form sodium silicate glass.
Ceramic Glaze Application Methods: Achieving Even Coverage
Proper glaze application determines the final quality and appearance of fired ceramic pieces. The three primary application methods (dipping, brushing, and spraying) each require specific techniques and offer distinct advantages for different pottery forms and production requirements.
Glaze consistency must be adjusted for each application method using specific gravity measurements. Ceramic hydrometers measure glaze density: dipping requires 1.45-1.50 specific gravity, brushing needs 1.42-1.48, and spraying works best at 1.40-1.45 specific gravity.
Dipping: Fast Coverage for Production Work
Dipping provides the most even glaze coverage for round, symmetrical forms and enables rapid production glazing. The bisque piece is immersed completely in glaze for 3-8 seconds depending on clay body porosity and desired thickness.
Proper dipping technique requires steady, confident movement. Hold the piece with tongs or fingers at the base, immerse completely, lift smoothly without hesitation, and allow excess glaze to drain for 10-15 seconds before setting aside to dry.
Glaze thickness from dipping typically measures 1.5-2.5mm when applied to properly fired bisque (Cone 08-04). Thicker application results from longer immersion time or higher specific gravity, while thinner coverage comes from quick dips or diluted glaze.
Brushing: Precision Control for Detailed Work
Brush application allows precise control over glaze placement and thickness, making it ideal for decorative effects, glaze combinations, and pieces too large for dipping. Ceramic glaze brushes with soft bristles prevent scratching bisque surfaces while holding adequate glaze volume.
Apply glaze in three overlapping coats for even coverage. The first coat seals the porous bisque, the second provides base coverage, and the third ensures uniform thickness and color development. Allow each coat to dry completely (30-60 minutes) before applying the next layer.
Brush strokes should overlap by 50% to prevent streaking and thin spots. Work systematically from top to bottom, maintaining wet edges to avoid hard lines between sections.
Spraying: Professional Results for Large Pieces
Spray application produces the most uniform glaze coverage possible and works effectively for large sculptures, architectural pieces, and production pottery requiring perfect surface quality. This method requires proper ventilation and safety equipment due to airborne particles.
Spray gun setup requires 20-30 PSI air pressure with the glaze diluted to 1.40-1.45 specific gravity. Hold the gun 6-8 inches from the piece and apply light, overlapping passes rather than attempting full coverage in single coats.
Professional spray booths with downdraft ventilation capture overspray and protect the potter from silica dust inhalation. Ceramic spray booths provide necessary safety features for regular spray glazing work.
Troubleshooting Common Ceramic Glaze Problems
Glaze defects result from specific causes related to clay body preparation, glaze application, or firing schedule problems. Understanding these relationships enables potters to diagnose issues and implement effective solutions for consistent results.
The most common glaze defects include crawling, crazing, shivering, pinholing, and color variations. Each defect has identifiable causes and proven solutions based on ceramic chemistry principles and firing physics.
Crawling: When Glaze Pulls Away from Clay Body
Crawling occurs when glaze coating retreats from areas of the bisque surface, creating bare clay spots surrounded by thick glaze ridges. This defect results from contamination on the bisque surface that prevents glaze adhesion during firing.
Common causes include fingerprints, dust, kiln wash particles, or incomplete burnout of organic matter. Clean bisque pieces thoroughly with a damp sponge before glazing, and handle only with clean hands or tongs to prevent oil contamination.
Glaze application too thick (over 3mm) can also cause crawling as the heavy coating flows away from vertical surfaces during firing. Measure application thickness with a pin tool and maintain 1.5-2.5mm for optimal results.
Crazing: Stress Cracks in Fired Glaze
Crazing appears as fine crack networks in the glaze surface caused by thermal expansion mismatch between glaze and clay body. The glaze has higher expansion than the clay body, creating tension that eventually causes cracking.
According to ceramic materials research (Journal of the American Ceramic Society, 2019), successful glaze fit requires the glaze expansion coefficient to be 5-10% lower than the clay body. Higher differences cause crazing, while lower differences can cause shivering.
Solutions include adding silica to reduce glaze expansion, substituting high-expansion fluxes (potassium, sodium) with lower-expansion materials (calcium, magnesium), or switching to a clay body with lower expansion rate.
Pinholing and Bloating: Gas Escape Problems
Pinholing creates small holes in the fired glaze surface caused by gas bubbles escaping during firing. These defects occur when organic matter burns out too rapidly or when glaze melts before gas release is complete.
Slow bisque firing (especially 800-1400°F range) ensures complete organic burnout before glaze firing. Kiln controllers enable precise firing schedules with extended holds at 1000°F and 1400°F for thorough gas release.
Glaze application too thick traps gases beneath the surface. Reduce application to 2mm maximum and ensure even coverage without drips or thick accumulations that prevent gas escape.
Color Variation and Firing Atmosphere Effects
Uneven color development results from inconsistent kiln atmosphere, improper glaze mixing, or temperature variations within the kiln chamber. Understanding ceramic materials science helps identify whether problems stem from chemistry or firing issues.
Copper-bearing glazes show dramatic atmosphere sensitivity: oxidation firing produces green colors while reduction creates reds and purples. Iron oxide glazes shift from rust colors in oxidation to black or dark brown in reduction atmospheres.
| Defect | Primary Cause | Solution | Prevention |
|---|---|---|---|
| Crawling | Surface contamination | Clean bisque thoroughly | Handle with tongs only |
| Crazing | High glaze expansion | Add silica to glaze | Test thermal expansion |
| Pinholing | Trapped gases | Slow fire, thin application | Proper bisque schedule |
| Color variation | Kiln atmosphere | Consistent firing | Monitor with pyrometric cones |
Ceramic Glaze Safety and Health Considerations
Ceramic glaze materials include potentially toxic substances that require proper handling, storage, and application procedures to protect potter health and ensure food-safe finished ceramics. Understanding these safety requirements prevents both acute exposure risks and long-term health problems.
Silica dust represents the primary health hazard in ceramic studios. Chronic inhalation of crystalline silica particles can cause silicosis, an irreversible lung disease. Proper ventilation and dust control measures are essential during glaze mixing, application, and kiln loading activities.
Toxic Materials in Ceramic Glazes
Several glaze materials require special handling due to toxicity concerns. Lead compounds, once common in glazes, are now restricted for functional ware due to leaching potential. Barium carbonate, cadmium compounds, and chromium oxide also present health risks during handling.
According to health standards established by OSHA and NIOSH, exposure limits for ceramic materials are strictly regulated. NIOSH-approved dust masks provide minimum respiratory protection during dry mixing and cleanup operations.
Modern glaze formulations emphasize non-toxic alternatives. Zinc oxide replaces lead as a flux in many applications, while tin oxide and zirconium silicate provide opacity without barium compounds. These substitutions maintain glaze performance while improving safety profiles.
Studio Ventilation and Dust Control
Adequate ventilation systems capture airborne particles before they can be inhaled. Spray glazing requires downdraft ventilation with 100-150 feet per minute air velocity across the work surface to effectively remove overspray particles.
Wet mixing methods minimize dust generation compared to dry blending. Add water to dry glaze materials slowly while stirring to prevent dust clouds. Ceramic glaze mixers with enclosed mixing chambers further reduce airborne particles.
Regular studio cleaning with HEPA-filtered vacuum systems removes accumulated dust that can become airborne during normal activities. Damp mopping floors and wiping surfaces prevents re-suspension of settled particles.
Food Safety and Glaze Formulation
Functional pottery requires glazes that meet FDA standards for food contact surfaces. Lead content must remain below 0.1 ppm for flatware and 0.5 ppm for hollow ware when tested using acetic acid leaching protocols.
Glaze maturity affects leaching characteristics significantly. Underfired glazes may contain soluble materials that can leach into food and beverages. Pottery firing fundamentals ensure glazes reach proper maturity temperature for food safety.
Commercial glaze manufacturers provide food safety documentation for their products when properly fired. Studio-formulated glazes require independent testing to verify food safety compliance, particularly when using colorants or specialty materials.
Advanced Ceramic Glaze Techniques and Effects
Advanced glazing techniques create unique surface effects impossible to achieve with single glaze applications. These methods require precise timing, temperature control, and understanding of glaze interaction chemistry to produce consistent results.
Multiple glaze layering, resist techniques, and atmospheric effects during firing open creative possibilities beyond standard solid-color glazing. Each advanced technique builds upon fundamental glaze knowledge while introducing additional variables that affect final outcomes.
Multiple Glaze Layering and Interaction Effects
Layering compatible glazes creates new colors and surface textures through interaction zones where glazes blend during firing. The lower glaze must mature at the same temperature or slightly lower than the upper layer to prevent crawling and other defects.
Glaze interaction depends on flux compatibility and thermal expansion matching. Glaze test tiles help document successful combinations and firing temperatures before applying techniques to finished work.
Popular layering combinations include matte glazes over glossy bases (creating satin effects), metallic glazes over dark backgrounds (enhancing metallic development), and contrasting colors that create gradient transitions in overlap zones.
Resist Techniques: Wax, Latex, and Paper Methods
Resist materials prevent glaze adhesion to selected areas, creating patterns and exposing clay body surfaces or underlying glaze layers. Each resist type offers distinct advantages for different pattern requirements and application methods.
Hot wax resist provides the most durable protection during glaze application. Applied with brushes to leather-hard or bisque surfaces, wax burns out cleanly during firing without affecting surrounding glaze. Ceramic wax resist maintains sharp pattern edges and works with all application methods.
Latex resist peels off after glaze application, making it ideal for complex patterns requiring precise edges. Paper resists create geometric patterns and work effectively with spray application to create sharp-edged designs.
Atmospheric Effects: Reduction, Salt, and Soda Firing
Alternative firing atmospheres create unique glaze effects impossible in standard oxidation firings. Reduction atmospheres (limited oxygen) cause metal oxides to develop different colors, while salt and soda firing introduce sodium vapor that reacts with clay surfaces.
Reduction firing requires gas kilns with controlled damper and air inlet adjustments. Copper glazes develop brilliant reds, iron creates rich blacks and browns, and chrome produces deep emerald greens in reduction atmospheres.
Salt firing introduces rock salt (sodium chloride) into the kiln at peak temperature, creating distinctive orange-peel surface textures. The sodium vapor combines with silica in clay bodies and glazes to form sodium silicate glass with characteristic flash patterns and color variations.
Frequently Asked Questions About Ceramic Glaze
What temperature should I fire ceramic glaze?
Fire ceramic glazes to their specific maturity temperature range: low-fire glazes mature at Cone 04-02 (1830-2000°F), mid-fire glazes at Cone 4-7 (2100-2300°F), and high-fire glazes at Cone 8-12 (2280-2420°F). The glaze must be compatible with your clay body’s firing temperature to prevent thermal expansion problems.
Use pyrometric cones to verify actual temperature reached in your kiln. Digital controllers measure air temperature, while cones measure the heat work effect on ceramic materials. Pyrometric cones provide the most accurate indication of proper glaze maturation.
How thick should I apply ceramic glaze?
Apply ceramic glaze 1.5-2.5mm thick measured with a pin tool for optimal results. Thicker applications (over 3mm) may run or crawl during firing, while thinner coats (under 1mm) produce weak color and incomplete coverage.
Glaze thickness varies by application method: dipping at 1.45-1.50 specific gravity typically produces 2mm thickness, brushing requires three coats for equivalent coverage, and spraying builds thickness gradually through multiple passes. Test application on sample tiles to verify proper thickness before glazing finished work.
Can I put ceramic glaze over another glaze?
Yes, you can layer compatible glazes if both mature at the same temperature and have similar thermal expansion characteristics. The base glaze should be completely dry before applying the second layer, and both glazes must reach maturity during the same firing cycle.
Test glaze combinations on sample tiles first, as interactions can create unexpected colors and surface effects. Some glazes are specifically formulated for layering, while others may crawl or create defects when combined. Document successful combinations with photos and firing records for future reference.
Why is my ceramic glaze crawling away from the clay?
Glaze crawling occurs when the glaze coating pulls away from contaminated areas on the bisque surface during firing. Common causes include fingerprints, dust, kiln wash particles, or oil residue that prevents proper glaze adhesion.
Clean bisque pieces thoroughly with a damp sponge before glazing and handle only with clean tongs or tools. Avoid touching glazed surfaces with fingers, and ensure your glazing area remains dust-free. Excessive glaze thickness (over 3mm) can also cause crawling as the heavy coating flows away from vertical surfaces.
What causes ceramic glaze to crack after firing?
Glaze cracking (crazing) results from thermal expansion mismatch between the glaze and clay body. The glaze has higher expansion than the clay body, creating tension stress that eventually causes the characteristic craze line network in the fired surface.
Solutions include adding silica to the glaze formula to reduce expansion, substituting high-expansion fluxes (potassium, sodium) with lower-expansion materials (calcium, magnesium), or switching to a clay body with higher expansion rate. Test modifications on small samples before changing large glaze batches.
How do I fix pinholes in my ceramic glaze?
Pinholes form when gases escape through the glaze surface during firing, creating small holes or crater defects. Causes include incomplete organic burnout during bisque firing, too-rapid temperature rise, or excessively thick glaze application that traps gases.
Prevent pinholes by bisque firing slowly through the 800-1400°F range for complete carbon burnout, applying glaze no thicker than 2.5mm, and using firing schedules with holds at 1000°F and 1400°F during glaze firing. Clean bisque thoroughly to remove dust and debris that can create gas pockets under the glaze.
Is it safe to use ceramic glaze on dishes?
Modern commercial ceramic glazes are safe for functional pottery when properly fired to maturity temperature and formulated without lead or cadmium. Food-safe glazes meet FDA standards with lead content below 0.1 ppm for flatware and 0.5 ppm for hollow ware.
Always verify food safety documentation from glaze manufacturers and fire to the specified maturity temperature. Underfired glazes may contain soluble materials that can leach into food. Studio-formulated glazes require independent testing to ensure food safety compliance.
Can I refire ceramic glaze if it didn’t turn out right?
Yes, you can refire glazed pieces to correct underfiring, but overfired glazes cannot be reversed. If glazes appear dull, rough, or show incomplete melting, a second firing to proper temperature often corrects these issues.
Remove any crawled or defective glaze areas by grinding before refiring, and clean the piece thoroughly. Some glazes develop different colors or surface effects during multiple firings, so test the process on sample pieces first. Document original firing temperature and proposed refire temperature to avoid overfiring.
What’s the difference between glaze and underglaze?
Ceramic glaze forms a glassy, waterproof coating during firing, while underglaze provides color decoration beneath a clear protective glaze layer. Glazes contain flux materials that melt during firing, whereas underglazes are essentially ceramic stains that remain matte unless covered with clear glaze.
Underglazes can be applied to greenware or bisque and survive both bisque and glaze firing temperatures. They provide precise color control and detailed decoration capability, then receive clear glaze application for waterproofing and surface protection. Ceramic underglazes offer stable colors that don’t run during firing.
How long does ceramic glaze take to dry before firing?
Ceramic glaze typically requires 4-24 hours drying time before firing, depending on glaze thickness, humidity levels, and application method. Brushed glazes dry faster (4-8 hours) than dipped pieces (8-24 hours) due to thinner, more even application.
Glazed pieces are ready for firing when the surface appears completely dry without any shiny or wet areas. Test dryness by touching an inconspicuous area lightly (dry glaze won’t transfer to your finger). Rushing the drying process can cause steam bubbles and surface defects during firing, so allow adequate time for complete moisture evaporation.
Why did my ceramic glaze turn out a different color than expected?
Glaze color variations result from kiln atmosphere differences, temperature variations, clay body interaction, or glaze application thickness changes. Copper glazes are particularly sensitive, producing green in oxidation atmospheres and red in reduction conditions.
Other factors include iron content in clay bodies (causing color shifts), underfiring or overfiring (affecting color development), and glaze thickness variations (thicker applications often show darker, more saturated colors). Keep detailed firing records including atmosphere, peak temperature, and cooling schedule to identify patterns in color development.
Can I mix different brands of ceramic glazes together?
Mixing different glaze brands is possible but requires testing for compatibility. Glazes with different maturity temperatures, thermal expansion rates, or flux systems may not combine successfully and could cause crawling, crazing, or other defects.
Test small batches first by mixing 50:50 ratios and firing sample tiles to your target temperature. Document successful combinations with photos and mixing ratios for future use. Some manufacturers specifically design their glazes to be intermixable within their product line, while others warn against mixing with competitor products.
How do I store unused ceramic glaze?
Store unused ceramic glaze in airtight containers to prevent water evaporation and contamination. Plastic storage containers with tight-fitting lids work well for most glazes, while glass jars suit smaller quantities.
Stir stored glazes thoroughly before use, as heavy materials settle over time. Add water gradually if the glaze has thickened, checking specific gravity to maintain proper consistency. Label containers with glaze name, firing temperature, and date mixed. Most glazes remain usable indefinitely when properly stored and maintained.
What happens if I use the wrong firing temperature for my glaze?
Using incorrect firing temperatures prevents proper glaze maturation and causes various defects. Underfiring results in rough, matte surfaces, incomplete color development, and potential food safety issues due to soluble materials remaining in the glaze matrix.
Overfiring causes glazes to become overly fluid, leading to running, loss of surface texture, and possible color changes or burning out of volatile colorants. Severe overfiring can cause glazes to run off pieces entirely or stick to kiln shelves. Always match glaze firing temperature to the manufacturer’s specifications and verify with pyrometric cones.
Understanding ceramic glaze transforms raw clay into durable, functional pottery through controlled chemical reactions at specific temperatures between 1830-2420°F. Proper application techniques, thermal expansion compatibility, and firing schedules determine successful results that combine waterproofing, strength enhancement, and aesthetic appeal in finished ceramic work.
Master the fundamentals of glaze chemistry, application methods, and troubleshooting common defects to achieve consistent, professional-quality results in your ceramic practice. Comprehensive glaze guides and ceramic science resources provide deeper technical knowledge for advancing your glazing skills and expanding creative possibilities in functional and sculptural ceramics.