How Are Ceramics Made? Sintering Forming & Industrial Firing

Most people think ceramics are simply shaped clay that has been dried and painted. The truth is that every ceramic object, from a coffee mug to a jet engine turbine blade, is the product of a precise sequence of forming, drying, and high-temperature firing that transforms raw mineral particles into one of the hardest, most chemically stable materials on earth.
This guide covers every stage of ceramic manufacturing: raw material preparation, forming methods (wheel throwing, slip casting, extrusion, pressing, and tape casting), drying, bisque firing, glaze application, glaze firing, and sintering, including the industrial processes used to produce advanced technical ceramics.
What Are Ceramics Made From? Raw Materials and Their Role in the Final Product
Ceramics are made from inorganic, non-metallic minerals, primarily clay minerals (kaolinite, illite, montmorillonite), silica (SiO2), feldspar, and alumina (Al2O3), which are combined, shaped, and fired at temperatures between 1,800°F (982°C) and 3,000°F (1,649°C) to form a hard, vitrified structure. The specific mineral blend determines every fired property: strength, porosity, color, thermal resistance, and food safety.
Clay minerals are phyllosilicates, which means they consist of layered silicon-oxygen sheets bonded to aluminum-oxygen sheets. This layered structure is what gives wet clay its plasticity. Water molecules slide between the layers, allowing the clay mass to deform without cracking.
Silica is the glass-forming oxide in both clay bodies and glazes. During firing, silica particles dissolve into the flux melt and recrystallize on cooling as a glassy matrix that binds the clay particles together. Without sufficient silica, a fired ceramic is weak and porous.
Feldspar is the primary flux in most clay bodies and many glaze recipes. It melts between cone 8 and cone 10 (2305°F to 2381°F / 1263°C to 1305°C) and fills the spaces between clay and silica particles with a glassy phase. This glass phase is what makes high-fired ceramics impermeable to liquids.
Alumina (Al2O3) is the refractory stabilizer. It raises the melting point of a glaze or clay body, prevents deformation at high temperatures, and increases hardness in the fired piece. Industrial technical ceramics, such as alumina crucibles and kiln furniture, are composed of 85 to 99.5% pure Al2O3.
According to Daniel Rhodes in Clay and Glazes for the Potter, the ratio of silica to alumina to flux (the Seger unity molecular formula) determines whether a glaze melts into a glossy, matte, or crystalline surface at a given temperature. A glaze with a high silica-to-alumina ratio (above 10:1) tends toward a glossy melt. A lower ratio (below 7:1) produces a matte surface because undissolved alumina crystals scatter light.
Common ceramic raw material categories and their fired functions are listed below. Use the table below to identify which raw material controls which property in your clay body or glaze.
| Raw Material | Primary Oxide | Role in Clay Body | Role in Glaze | Fired Effect |
|---|---|---|---|---|
| Kaolin (EPK) | Al2O3 + SiO2 | Plasticity, white body color | Suspending agent, alumina source | White, vitrified at cone 10+ |
| Silica (Flint/Quartz) | SiO2 | Structural filler, glass former | Glass network former | Hardness, gloss, CTE modifier |
| Potassium Feldspar | K2O + Al2O3 + SiO2 | Flux, vitrification | Flux, melt provider | Dense, glassy matrix |
| Whiting (CaCO3) | CaO | Flux in high-fire bodies | Primary flux (cone 6-10) | Matte surface at high ratios |
| Grog (fired clay) | Al2O3 + SiO2 | Reduces shrinkage, adds texture | Not used in glaze | Thermal shock resistance |
| Alumina (Al2O3) | Al2O3 | Refractory filler in technical ceramics | Matte surface, stabilizer | High hardness, high-temp stability |
The particle size distribution of these raw materials controls sintering speed. Finer particles have more surface area, which increases the rate of solid-state diffusion during firing and produces a denser fired body at a lower peak temperature. Industrial ceramics manufacturers routinely mill raw materials to sub-micron particle sizes to achieve full density below 2,900°F (1,593°C).
Understanding your raw materials before forming is the first step to predicting fired results rather than discovering them after the kiln cools.
How Is Ceramic Clay Prepared Before Forming?
Raw ceramic clay is prepared by mixing dry mineral ingredients with water to a specific plasticity index, then de-airing and conditioning the mass to remove air pockets and align clay particles for consistent workability. Commercial prepared stoneware clay bodies arrive ready to wedge and use, but understanding the preparation process helps potters troubleshoot workability problems and mix custom bodies.
The preparation sequence for a typical studio clay body follows these stages: raw material weighing, dry blending, water addition, mixing or pugging, de-airing, and aging. Each stage affects the plasticity and workability of the final product.
Wedging: Aligning Particles and Removing Air Pockets
Wedging is the hand-compression technique that aligns clay platelets in parallel layers, removes trapped air bubbles, and creates a uniform consistency throughout the clay mass before throwing or handbuilding. A clay mass with unaligned particles or air pockets will tear during throwing and may explode in the kiln during firing because trapped moisture has no escape path.
Two wedging methods are standard in studio practice. Ram’s head wedging uses a rhythmic push-rock motion that folds the clay repeatedly without introducing new air. Spiral wedging (also called “shell wedging”) uses a rotating push-down motion that creates a spiral cross-section through the clay mass, which potters use to confirm complete particle alignment.
The minimum wedging time for a 5-pound ball of reclaimed clay is 100 to 150 push-fold cycles, or roughly 3 to 5 minutes of continuous work. Commercial de-airing pugmills perform this function mechanically under vacuum, extruding consistently de-aired clay logs at production volumes that hand wedging cannot match.
Industrial Clay Preparation: Slip Casting Versus Plastic Forming Compounds
Industrial ceramic manufacturers prepare clay in two distinct forms depending on the forming method. Plastic clay bodies (for pressing and extrusion) are mixed to 20 to 25% moisture content by weight. Casting slips (for slip casting) are mixed to 35 to 45% moisture content with deflocculants such as sodium silicate and soda ash, which reduce viscosity without adding excess water.
Deflocculants work by coating clay particles with a negative ionic charge, causing them to repel each other and flow freely. This is why 1 gram of sodium silicate per 1,000 grams of dry clay can transform a stiff paste into a pourable liquid. Adding more deflocculant than the optimal amount (typically 0.1 to 0.3% by dry weight) reverses the effect and causes flocculation, making the slip thick and unpourable.
Proper clay preparation is not a preliminary step to be rushed. It is the foundation of every forming, drying, and firing decision that follows.
What Are the Main Methods for Forming Ceramics?
Ceramics are formed by six primary methods: wheel throwing, handbuilding (coil, slab, and pinch), slip casting, ram pressing, extrusion, and tape casting. Each method is suited to specific shapes, production volumes, wall thicknesses, and material types. Choosing the wrong forming method for a given shape produces dimensional inconsistency, stress concentrations, and higher rates of kiln failures.
The following section covers each method with the technical specifications and material requirements that determine whether it is the right process for a given application.
Use the table below to match your forming goals to the appropriate method before investing in equipment or tooling.
| Forming Method | Clay Moisture Content | Best Shape Type | Production Volume | Minimum Wall Thickness | Skill Level |
|---|---|---|---|---|---|
| Wheel Throwing | 20-25% | Radially symmetrical | Low to medium | 3-4 mm | Intermediate |
| Slab Building | 18-22% | Angular, flat-walled | Low | 5-6 mm | Beginner to intermediate |
| Slip Casting | 35-45% | Complex, thin-walled | Medium to high | 2-3 mm | Beginner (setup intensive) |
| Ram Pressing | 14-18% | Flat or shallow forms | High (industrial) | 4-5 mm | Industrial |
| Extrusion | 22-28% | Consistent cross-section | Medium to high | 3 mm | Beginner to industrial |
| Tape Casting | Solvent-based slurry | Thin flat sheets (substrates) | High (industrial) | 0.05-1 mm | Industrial |
Wheel Throwing: How Centrifugal Force and Compression Create Form
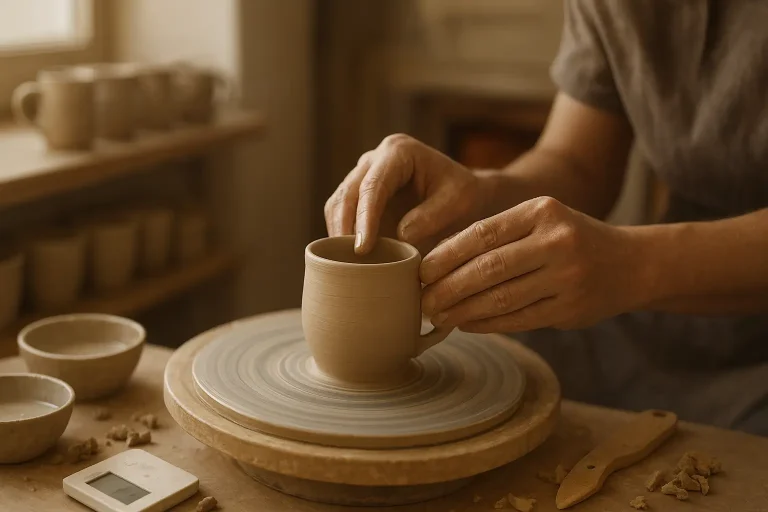
Wheel throwing uses centrifugal force and hand compression to pull clay upward into a cylindrical or curved vessel form. The pottery wheel (a horizontal rotating disc called a wheel head) spins at 20 to 300 RPM. The potter centers the clay mass on the spinning wheel head, compresses it to remove eccentricity, opens the base with a downward push, and then pulls the walls upward by applying outward pressure from inside and inward compression from outside simultaneously.
The wall thickness at the time of throwing is typically 3 to 4 times the desired fired wall thickness, because the clay must be compressed and stretched without tearing. A standard 10-ounce mug requires roughly 1.25 to 1.5 pounds (560 to 680 grams) of clay. The fired mug after 10 to 12% shrinkage will stand approximately 3.5 to 4 inches (89 to 102 mm) tall from a thrown height of 4 to 4.5 inches (102 to 114 mm).
A direct-drive electric pottery wheel with a 1/2 HP motor handles clay weights up to 15 pounds for studio use. Production potters working with 25 to 50-pound clay balls use 1 to 1.5 HP motors (Brent Model C or Shimpo RK-Whisper) that maintain consistent torque under load without motor lag.
Handbuilding: Coil, Slab, and Pinch Methods
Handbuilding encompasses three techniques, each suited to different shapes and scales. Pinch building is the simplest and most direct method. The potter pushes a thumb into a clay ball and rotates the ball while pinching the walls thinner. Coil building stacks rolled cylinders of clay (coils) on top of each other, blending each coil into the previous one to create a continuous wall. Slab building uses flat sheets of clay (rolled to a consistent thickness with a slab roller) that are cut, shaped, and joined with slip to form angular or geometric structures.
The critical challenge in slab building and coil building is joining clay pieces at the same moisture content. Joining a wet coil to a leather-hard wall creates a stress boundary at the join line. During drying, the wet coil shrinks more than the leather-hard wall, pulling the join apart. All pieces must be brought to the same moisture level (typically soft leather-hard) before joining, and every join must be scored with a serrated rib or needle tool and coated with slip before pressing together.
Slip Casting: Producing Complex Forms with Plaster Molds
Slip casting is the process of pouring deflocculated liquid clay (casting slip) into a porous plaster mold, waiting for the plaster to absorb moisture from the slip and build up a clay wall of the desired thickness, then draining the excess slip and allowing the cast to stiffen before releasing it from the mold. This method produces forms with complex undercuts, consistent wall thickness, and fine surface detail that throwing cannot achieve.
Casting slip is deflocculated with sodium silicate (0.2 to 0.3% by dry clay weight) and soda ash (0.1 to 0.15% by dry clay weight). These deflocculants allow the slip to flow at 40% moisture content instead of the 55 to 60% moisture that would be required without deflocculants. Less water means less shrinkage during drying and fewer drying cracks in the cast piece.
Wall thickness in slip casting is controlled by pour time. A 4 to 5-minute pour time in a standard plaster mold produces a 4 to 5 mm wall in a medium-density casting slip. Plaster molds have a finite life span of approximately 50 to 100 pours before the surface detail degrades and the absorption rate decreases from absorbed clay particles clogging the plaster pores.
Industrial Forming: Ram Pressing, Extrusion, and Tape Casting
Ram pressing forces semi-dry clay (14 to 18% moisture) into a rigid die under hydraulic pressure of 500 to 5,000 psi (3.4 to 34 MPa) to produce tiles, plates, and sanitaryware at rates of 300 to 600 pieces per hour. The high pressure compacts the clay particles tightly, reducing fired porosity compared to cast or thrown pieces fired to the same temperature. Ram-pressed tile typically achieves under 0.5% water absorption after firing to cone 06 (1828°F / 998°C).
Extrusion forces plastic clay through a shaped die to produce uniform cross-sections: pipes, tubes, structural bricks, and extruded coils for studio use. A studio clay extruder with interchangeable dies produces handles, coils, and hollow tubes at consistent dimensions that hand-rolling cannot match. Industrial extruders operate continuously at extrusion pressures of 200 to 2,000 psi (1.4 to 13.8 MPa).
Tape casting is an exclusively industrial process used to produce ceramic substrates for electronic components, fuel cells, and multilayer capacitors. A ceramic slurry (alumina or zirconia powder in an organic solvent with binders and plasticizers) is cast onto a moving carrier film through a doctor blade set to a gap of 0.05 to 1 mm. After solvent evaporation, the resulting tape is flexible enough to be cut, stacked, and laminated before firing to near-theoretical density.
The forming method you choose sets the dimensional tolerances, wall thickness, and drying stress pattern for everything that follows. Getting this decision right prevents the majority of drying and firing failures downstream.
How Does Ceramic Drying Work, and Why Does It Cause Cracks?
Ceramic drying removes mechanically held water (the water between clay particles) through evaporation without firing. The clay body shrinks as this water leaves, typically 5 to 8% linear shrinkage from wet to bone-dry for standard stoneware. Cracks form when one part of a piece dries and shrinks faster than an adjacent part, creating tensile stress at the boundary that exceeds the unfired clay’s green strength.
Clay shrinkage during drying occurs in two stages. In the first stage (the plastic-to-leather-hard transition), evaporation removes surface water and the clay particles move closer together. This is the stage where most shrinkage occurs. In the second stage (leather-hard to bone-dry), the remaining water in the smallest pores evaporates, and little additional shrinkage occurs because the particles are already in contact.
The three most common drying crack locations are rim cracks on thrown forms (the thin rim dries faster than the thick base), join cracks on slab-built or coil-built pieces (different wall thicknesses dry at different rates), and S-cracks through the base of thrown cylinders (caused by insufficient compression of the base during throwing).
Controlled drying means slowing the rate of moisture loss for the fastest-drying sections. Covering a piece loosely with plastic sheeting slows drying to 24 to 72 hours for most studio-scale work. Industrial drying tunnels control humidity and air velocity precisely, drying large sanitaryware pieces over 8 to 24 hours without generating differential moisture gradients above 5% between surface and core.
Pieces thicker than 1 inch (25 mm) in cross-section require extremely slow drying, sometimes 7 to 14 days at controlled humidity, before they are bone-dry enough to load safely into a kiln. Loading a wet piece into a kiln that heats above 212°F (100°C) converts residual moisture to steam, which has no exit path and shatters the piece.
What Happens During Bisque Firing?
Bisque firing converts greenware (bone-dry, unfired clay) to a permanent, porous ceramic state by heating to cone 06 (1828°F / 998°C) or cone 04 (1940°F / 1060°C) in an oxidation atmosphere. The fired piece is called bisqueware. It is hard enough to handle without breaking, porous enough to absorb glaze, and chemically stable enough to withstand glaze application without dissolving.
Three chemical reactions occur during bisque firing in sequence. Below 572°F (300°C), the remaining mechanically held water and hygroscopic water evaporate. Between 572°F and 1292°F (300°C and 700°C), chemically combined water (hydroxyl groups bonded within the clay mineral structure) is driven off. This is the critical range: if the kiln heats too fast here, steam pressure from the chemically combined water fractures the piece from the inside. The maximum safe ramp rate through this range is 100 to 200°F per hour (55 to 110°C per hour) for standard stoneware and 50 to 100°F per hour (28 to 55°C per hour) for thick sculptural work.
Between 1063°F and 1148°F (573°C and 620°C), quartz inversion occurs. Quartz crystals in the clay and silica shift from alpha-quartz to beta-quartz structure, causing a sudden 0.45% volume expansion. On cooling, the reverse occurs. This inversion is abrupt and creates stress in any piece that is not cooled slowly through this range. The safe cooling rate through quartz inversion is no faster than 100°F per hour (55°C per hour). Rapid cooling through this range causes dunting, a network of fine cracks visible on the surface after the kiln opens.
Above 1300°F (704°C), organic materials in the clay (carbonates, sulfates, iron compounds) oxidize and burn off. This is why bisque firing requires an oxidation atmosphere: organic burnout needs free oxygen in the kiln. Reducing the atmosphere during bisque traps carbon in the clay body, which can later cause blistering and bloating during glaze firing.
Key Specifications for a standard bisque firing schedule:
- Ramp 1: 50-100°F/hr (28-55°C/hr) from room temperature to 250°F (121°C) with kiln lid propped for moisture escape
- Ramp 2: 150-200°F/hr (83-111°C/hr) from 250°F to 1063°F (121°C to 573°C)
- Ramp 3: 100°F/hr (55°C/hr) through quartz inversion (1063°F to 1148°F / 573°C to 620°C)
- Ramp 4: 200-300°F/hr (111-167°C/hr) from 1148°F to peak cone 06 (1828°F / 998°C)
- Hold at peak: 15 to 30 minutes for even heat distribution
- Cool: do not open kiln above 300°F (149°C)
Orton pyrometric witness cones placed on every shelf confirm that the kiln controller’s temperature reading matches actual heat work at each level. Electronic controllers calibrated to within 5°F (3°C) of the thermocouple reading can still show a 30 to 50°F (17 to 28°C) variation from top to bottom shelf in a poorly loaded kiln.
A correctly bisque-fired piece has zero moisture, a water absorption rate of 15 to 20% (meaning it will readily absorb glaze), and enough particle-to-particle bonding to resist handling without fracturing.
How Is Glaze Applied to Bisqueware?
Glaze is applied to bisqueware by dipping, brushing, spraying, or pouring. Each method produces a different coating thickness and surface texture. The correct application method for a given glaze depends on the glaze’s specific gravity, the bisqueware’s absorption rate, and the desired surface effect in the final fired piece.
Glaze specific gravity is the ratio of glaze weight to an equal volume of water. A specific gravity of 1.45 means the glaze is 45% heavier than water by volume. Most commercial dipping glazes perform correctly at a specific gravity of 1.45 to 1.50. A glaze hydrometer measures specific gravity in seconds. Without this measurement, every dipping session produces a different coating thickness.
Dipping: The Most Consistent Application Method
Dipping submerges bisqueware in a bucket of glaze for 3 to 5 seconds, withdrawing it and allowing the bisque to absorb the liquid and leave a solid coating. The standard target coating thickness for dip-applied glaze is 1.5 to 2 mm wet, which fires down to approximately 0.5 to 1 mm. A pin tool pushed through the wet glaze coating to the clay surface measures this thickness directly.
The piece must be bone-dry bisqueware at room temperature. Warm bisqueware absorbs glaze faster, producing a thicker coat. The inside of a vessel is glazed first (by pouring glaze in, swirling, and pouring out), allowed to dry for 5 to 10 minutes, then the outside is dipped. Glaze the foot ring last with a brush or mask it with wax resist to prevent glaze from fusing the piece to the kiln shelf during firing.
Brushing: Control at the Cost of Consistency
Brushing glaze onto bisqueware gives the most control over where glaze is applied but is the hardest method to achieve consistent thickness. Commercial brushing glazes (such as Amaco Velvet Underglazes and Amaco Potters Choice) are formulated with CMC gum or other viscosity modifiers to flow evenly from a brush.
Key Specifications for Amaco Potters Choice cone 6 brushing glazes:
- Firing range: cone 5 to 6 (2167°F to 2232°F / 1186°C to 1222°C)
- Application: 2 to 3 coats, allowing each coat to dry fully (15 to 20 minutes) before the next
- Compatible clay: mid-fire stoneware and porcelain
- Food safety: AP certified, lead-free after proper firing
- Price range: approximately $10 to $18 per 16-ounce jar
Most brushing glazes require 3 full coats to reach the correct fired thickness. Applying fewer coats produces a thin, underfired-looking surface even when the kiln reaches the correct temperature. The glaze layer is simply too thin to develop the correct melt depth.
Spraying: Even Coverage on Complex Forms
Spraying applies glaze as a fine mist using an airbrush or gravity-feed spray gun at 25 to 40 psi (172 to 276 kPa). Spraying gives the most even coverage on textured, carved, or complex three-dimensional surfaces where dipping creates drips and brushing leaves brush marks. The major risk is overspray inhalation. Spraying must be done inside a dedicated spray booth with ventilation and the potter must wear a fitted respirator rated for particulates (minimum N95, preferably a half-face respirator with P100 filters).
Glaze application is the most technique-sensitive step in the pottery process because errors made here cannot be corrected after firing. Correct specific gravity, clean bisqueware, and consistent application thickness are the three variables that separate reliable fired results from kiln surprises.
How Does Glaze Firing Work? Cone Temperatures, Vitrification, and Melt Chemistry
Glaze firing heats glazed bisqueware to a specific cone target temperature, melting the glaze materials into a glassy coating that fuses permanently to the clay body. The fired glaze is not a coating on top of the clay. It is a glass layer that partially dissolves into the clay surface and is chemically bonded to it. This is why fired glaze cannot be removed without destroying the clay body beneath it.
The cone number identifies the amount of heat work (a combination of temperature and time) required to melt a specific pyrometric cone. Orton cone 6 melts at 2232°F (1222°C) at a ramp rate of 270°F per hour (150°C per hour). Firing faster requires a higher temperature to achieve the same heat work. Firing slower requires a lower temperature. This is why two kilns programmed to the same peak temperature can produce different results if their ramp rates differ.
You can find a full breakdown of how temperature affects different clay bodies and firing ranges in this complete guide to pottery firing temperatures for earthenware, stoneware, and porcelain.
What Happens Inside the Kiln During Glaze Firing
Between 1000°F and 1800°F (538°C and 982°C), the glaze materials begin softening and the first low-melting compounds (frit, alkaline fluxes) start to flow. Gases from late-burning organics in the clay must escape through the partially melted glaze at this stage. If the glaze seals over too quickly (a risk with low-fire fritted glazes), these gases are trapped, causing pinholes and blistering in the fired surface.
Between 1800°F and the peak cone temperature, the full glaze melt occurs. The flux oxides (calcium, potassium, sodium, magnesium) dissolve silica and alumina into a unified glass melt. The viscosity of this melt determines how much the glaze moves on the surface. A low-viscosity melt (high alkali flux, low alumina) produces a fluid glaze that can run off vertical surfaces. A high-viscosity melt (high alumina, high silica) produces a matte surface that does not move.
During the cooling phase, the glaze transitions from liquid to glass. The thermal expansion coefficient (CTE) of the cooling glaze must be close to the CTE of the clay body. CTE measures how much a material expands per degree of temperature change. If the glaze has a higher CTE than the clay body, it contracts more on cooling, and the glaze goes into tension, causing crazing (a network of fine cracks). If the glaze has a lower CTE than the clay body, the clay contracts more and compresses the glaze, causing shivering (glaze flaking off in sheets under compression).
According to John Britt in The Complete Guide to Mid-Fire Glazes, the ideal glaze-clay CTE relationship places the glaze in slight compression (glaze CTE slightly lower than clay CTE). A glaze under slight compression is stronger and more resistant to crazing than a neutral-fit glaze.
Use the table below to match firing cone targets with temperature equivalents, clay body types, and key material outcomes.
| Cone Number | Temperature (°F) | Temperature (°C) | Compatible Clay Bodies | Typical Absorption After Firing | Kiln Type |
|---|---|---|---|---|---|
| Cone 06 | 1828°F | 998°C | Earthenware, terra cotta | 5-15% (not vitrified) | Electric, gas |
| Cone 04 | 1940°F | 1060°C | Earthenware, low-fire stoneware | 3-10% | Electric, gas |
| Cone 6 | 2232°F | 1222°C | Mid-fire stoneware, porcelain | 0.5-2% (near vitrified) | Electric, gas |
| Cone 10 | 2381°F | 1305°C | High-fire stoneware, porcelain | Under 1% (vitrified) | Gas, wood, electric (specialty) |
| Cone 10 Reduction | 2381°F | 1305°C | High-fire stoneware, celadon porcelain | Under 0.5% | Gas, wood only |
| Cone 14 | 2552°F | 1400°C | Porcelain, technical ceramics | Under 0.1% | Gas, electric (industrial) |
Firing temperature is not the only variable that controls fired results. The rate at which the kiln reaches peak temperature, the atmosphere inside the kiln (oxidation or reduction), and the cooling rate all affect the final glaze color, surface texture, and clay body density. If you want to understand how electric kilns manage these variables for home studio firing, our electric kiln guide for beginners covers everything from loading patterns to controller programming.
What Is Sintering in Ceramics, and How Does It Work?
Sintering is the process by which ceramic powder particles bond together at high temperature through solid-state diffusion, without the material fully melting. At the atomic level, atoms at the contact points between adjacent particles migrate across the grain boundaries, forming necks between particles, eliminating pore space, and increasing the density of the ceramic body. The result is a hard, dense, strong material that did not require melting to form its final structure.
Sintering is the fundamental densification mechanism in all ceramic firing. When a potter fires stoneware to cone 10 (2381°F / 1305°C), the clay body sinters (the clay and silica particles bond without fully melting) while the feldspar flux component melts and fills remaining pore space with a glassy phase. The combination of sintered clay particles and glassy matrix is what produces a vitrified, impermeable ceramic body.
The Three Stages of Sintering
Stage 1 (initial stage): Necks form between adjacent particles at the contact points. Overall linear shrinkage is less than 3%. Density increases by approximately 5% from the green-body density. This stage begins at roughly 50% of the material’s melting point in absolute temperature (Kelvin). For alumina (Al2O3), which melts at 3722°F (2050°C), initial sintering begins above approximately 1832°F (1000°C).
Stage 2 (intermediate stage): Pore channels between particles close and become isolated spherical pores. Linear shrinkage increases to 5 to 15%. Most of the densification occurs here. Grain boundaries migrate as individual crystals grow larger (grain growth). Controlled grain growth is desirable; uncontrolled grain growth (exaggerated grain growth) weakens the sintered body by creating very large grains with weak boundaries.
Stage 3 (final stage): Isolated pores shrink and are absorbed into the grain boundaries or eliminated entirely. Linear shrinkage reaches its maximum (10 to 20% for typical clay bodies). The sintered body approaches its theoretical maximum density (above 95% of theoretical density for fully sintered technical ceramics). Holding the kiln at peak temperature (soaking) allows sintering to complete in the densest areas and allows slower-sintering regions to catch up.
According to M.N. Rahaman in Ceramic Processing and Sintering, the driving force for sintering is the reduction of surface energy. A powder compact has enormous total surface area (particles of 1-micron diameter have approximately 2 square meters of surface area per gram). Forming bonds between particles converts surface area into grain boundary area, which has significantly lower energy. The system moves toward lower total energy by densifying.
Factors That Control Sintering Rate and Final Density
Particle size is the most powerful lever in sintering. Halving the particle diameter quadruples the surface area and roughly doubles the sintering rate at the same temperature. This is why advanced technical ceramics manufacturers invest in high-energy ball milling to reduce powders to sub-micron particle sizes before pressing and firing. A ball mill used to prepare fine ceramic powders can reduce particle size from 50 microns to under 1 micron with 2 to 8 hours of milling, depending on powder hardness and mill design.
Temperature has an exponential effect on sintering rate. A 10% increase in absolute temperature (Kelvin) can double or triple the sintering rate. This explains why high-fire stoneware fired to cone 10 (2381°F / 1305°C) is far denser than the same clay body fired to cone 6 (2232°F / 1222°C). The 149°F (83°C) difference represents approximately 4% of the absolute temperature scale, which produces a disproportionate increase in atomic diffusion rate.
Atmosphere affects sintering in iron-bearing ceramics. In oxidation, iron exists as Fe2O3, which is a refractory compound with a high melting point. In reduction, Fe2O3 converts to FeO, which is an active flux that lowers the effective sintering temperature of the clay body. This is why reduction-fired high-fire stoneware often shows denser, more vitrified clay bodies than oxidation-fired pieces fired to the same nominal temperature.
Sintering is the process that separates clay from ceramic. Until sintering occurs, a dried clay object will dissolve in water. After sintering, it will not.
What Is the Difference Between Oxidation and Reduction Firing?
Oxidation firing supplies excess oxygen to the kiln atmosphere, allowing iron and other metal oxides in the clay and glaze to retain their fully oxidized form (Fe2O3, CuO, MnO2). Reduction firing restricts oxygen supply, creating a carbon-monoxide-rich atmosphere that strips oxygen atoms from metal oxides, converting them to lower-oxidation-state compounds (Fe2O3 to FeO, CuO to Cu2O) that have completely different colors and physical behaviors in the glaze melt.
Electric kilns fire in full oxidation because they generate heat from resistive elements without combustion. Gas kilns and wood kilns produce combustion atmospheres that the potter can shift toward reduction by restricting the air-to-fuel ratio. Our guide to gas kiln firing, setup, and maintenance covers how to introduce and sustain reduction at different stages of a firing.
How Reduction Changes Glaze Color: The Iron Oxide Mechanism
In oxidation, iron oxide (Fe2O3) in a glaze produces tan, amber, brown, and rust red colors. In reduction, Fe2O3 loses one oxygen atom per two iron atoms to become ferrous oxide (FeO). FeO functions differently from Fe2O3 in a glaze melt: it is an active flux that lowers the viscosity of the melt and scatters light at a wavelength the eye reads as blue-green. This is the chemical basis of celadon glazes.
This conversion from Fe2O3 to FeO only occurs when the kiln atmosphere contains more carbon monoxide (CO) than oxygen (O2) at temperatures between cone 012 (1598°F / 870°C) and cone 8 (2305°F / 1263°C). Reduction introduced below cone 012 has no effect on glaze color because the glaze has not yet begun to soften. Reduction introduced above cone 8 is too late because the glaze surface has begun to seal, trapping insufficient FeO in the melt.
If reduction is introduced too early (below cone 012) or the atmosphere is not consistently maintained through the critical cone range, the result is a patchy surface with areas of amber-brown oxidation mixed with blue-green reduction. There is no fix after firing. The piece must be refired in a correctly controlled reduction cycle from scratch.
Body Reduction Versus Glaze Reduction
Body reduction changes the clay body color by converting iron in the clay from Fe2O3 (which produces buff, tan, or red colors) to FeO (which produces gray, blue-gray, or spotted “flashing” effects). Body reduction is introduced early in the firing, typically between cone 012 and cone 08, when the clay particles are still porous and accessible to the kiln atmosphere. After the glaze melts and seals the clay surface, the atmosphere can no longer penetrate to affect clay body color.
Glaze reduction is introduced later, between cone 04 and cone 6 in a mid-fire reduction cycle, or between cone 06 and cone 8 in a high-fire reduction cycle, after body reduction is complete. The sequence matters: body reduction first, then glaze reduction, then a clean oxidation finish period (the “clearing” period) at the last 50°F (28°C) before peak temperature. The clearing period allows surface blemishes from carbon trapping to heal without undoing the reduction color effects in the glaze body.
Oxidation and reduction are not aesthetic preferences. They are chemical environments that produce fundamentally different materials. You cannot achieve celadon in an electric kiln with a celadon recipe, regardless of how accurate your temperature control is.
What Is Raku Firing, and How Does the Process Differ from Conventional Firing?
Raku firing is a low-temperature process (cone 06 to cone 04, approximately 1828°F to 1940°F / 998°C to 1060°C) in which pieces are removed from the kiln while red-hot, placed in a combustion chamber with organic material (newspaper, sawdust, or leaves) to create post-firing reduction, and then quenched in water or allowed to cool in the open air. The result is a clay body that remains porous (5 to 15% water absorption), a glaze with carbon-black metallic effects from the post-firing reduction, and crackled glaze surfaces from thermal shock.
Raku works chemically because the rapid removal from the kiln at 1800°F (982°C) and immediate exposure to combustible organic material creates a highly localized reduction atmosphere. Carbon from the burning organics is drawn into the hot, still-fluid glaze cracks and unglazed clay surface. This carbon trapping produces the characteristic black craze lines and black clay body color of traditional raku work.
The clay body used for raku must withstand severe thermal shock: the piece goes from room temperature to 1900°F (1038°C) in 15 to 30 minutes, then is transferred while red-hot to a metal container. Standard stoneware bodies crack under this thermal stress. Raku clay bodies are formulated with 30 to 50% grog (fired clay aggregate) content, which interrupts crack propagation through the clay matrix and provides dimensional stability during rapid heating and cooling. Our complete raku kiln guide covers the full process from clay selection to post-firing reduction timing.
Raku pieces are not food-safe after firing. The porous clay body absorbs liquids, the low-fire glaze does not fully vitrify, and the carbon-trapping process can leave unoxidized carbon compounds in the clay and glaze. Raku is a decorative and sculptural technique, not a functional dinnerware process.
How Are Advanced Technical Ceramics Made in Industry?
Advanced technical ceramics (also called engineering ceramics) are manufactured from high-purity, precisely controlled raw materials (alumina, zirconia, silicon carbide, silicon nitride, boron carbide) using industrial forming and sintering processes that produce near-theoretical density with tolerances as tight as 0.001 inch (0.025 mm). These ceramics are used in jet engine turbine components, armor plating, hip implants, cutting tools, semiconductor substrates, and fuel cells because they combine extreme hardness (Mohs 9 to 9.5 for alumina, Mohs 9.5 for silicon carbide) with high-temperature stability and chemical inertness that no metal can match.
The technical ceramic manufacturing sequence differs from studio pottery in every stage except firing. Raw materials are chemically purified to 99.5 to 99.99% purity. Powders are milled to median particle sizes of 0.5 to 2 microns. Forming uses dry pressing, cold isostatic pressing (CIP), hot isostatic pressing (HIP), or injection molding, not hand-forming or wheel throwing. Sintering temperatures range from 2700°F to 3450°F (1482°C to 1899°C) in controlled atmosphere furnaces, which are industrial kilns capable of maintaining temperature uniformity within 5°F (3°C) across the full chamber volume.
Dry Pressing and Cold Isostatic Pressing
Dry pressing compacts ceramic powder (with binder added to provide green strength) in a rigid steel die under uniaxial pressure of 5,000 to 30,000 psi (34 to 207 MPa). The pressed compact (the “green body”) has 55 to 65% of theoretical density before sintering. The limitation of dry pressing is that pressure is applied in only one direction, creating density gradients in tall or complex shapes. These density gradients produce non-uniform shrinkage during sintering, causing dimensional warping.
Cold isostatic pressing (CIP) applies pressure from all directions simultaneously by placing the green body in a flexible rubber membrane inside a pressure vessel filled with hydraulic fluid at 10,000 to 60,000 psi (69 to 414 MPa). Equal pressure from all directions eliminates density gradients and allows pressing of complex shapes with uniform green density. The sintered result is dimensionally accurate to within 0.1 to 0.3% after firing shrinkage, compared to 1 to 3% for uniaxially dry-pressed parts.
Hot Isostatic Pressing (HIP): Achieving Near-Zero Porosity
Hot isostatic pressing applies both high temperature (2000°F to 3200°F / 1093°C to 1760°C) and high gas pressure (15,000 to 44,000 psi / 103 to 303 MPa) simultaneously using argon or nitrogen gas as the pressure medium. HIP is used as a post-sintering densification step to eliminate residual closed porosity (below 2%) that remains after conventional sintering. The combination of temperature and isostatic pressure drives the final pore closure that gravity-assisted sintering alone cannot achieve.
HIP-processed alumina reaches 99.9% of theoretical density (3.99 g/cm3 actual vs 4.0 g/cm3 theoretical). The same alumina sintered without HIP reaches 97 to 98% of theoretical density, with 2 to 3% closed porosity that reduces flexural strength by 15 to 25%. For aerospace and biomedical applications where failure is not acceptable, HIP is a standard process step, not an option.
Injection Molding of Ceramics (Ceramic Injection Molding, CIM)
Ceramic injection molding (CIM) mixes fine ceramic powder with a thermoplastic binder system (typically 35 to 45% binder by volume) to produce a feedstock with the flow properties of a plastic melt. This feedstock is injection-molded into complex shapes at 250°F to 400°F (121°C to 204°C) under pressures of 5,000 to 20,000 psi (34 to 138 MPa). The molded part is then subjected to thermal or solvent debinding to remove the binder over 12 to 48 hours, followed by sintering.
CIM allows production of ceramic parts with features (internal channels, undercuts, threads) that pressing and machining cannot produce economically. Spark plug insulators, dental crowns, and fiber optic ferrules are all manufactured by CIM. The dimensional tolerance after sintering is typically 0.3 to 0.5% of nominal dimension, requiring finish machining only for mating surfaces with tight tolerances.
For further context on how ceramic material science connects forming and firing at the molecular level, our complete ceramics materials science guide covers crystal structure, bonding types, and the relationship between microstructure and mechanical properties.
What Happens During Kiln Cooling, and Why Does It Matter?
Kiln cooling is not passive. The rate at which a kiln cools from peak temperature to room temperature determines whether glaze crazes, whether the clay body shatters from thermal shock, and whether the glaze surface has the correct crystal structure or glassy surface that the recipe predicts. Cooling too fast through two critical temperature ranges causes physical damage that cannot be repaired.
The first critical cooling range is the glaze transition temperature, between 1100°F and 900°F (593°C and 482°C). In this range, the glaze shifts from a viscous liquid to a rigid glass. If the glaze contracts at a different rate than the clay body during this transition, cracks form at the glass transition point. The safe cooling rate through this range is 100 to 150°F per hour (55 to 83°C per hour).
The second critical range is quartz inversion, between 1063°F and 1040°F (573°C and 560°C). As described in the bisque firing section, quartz crystals undergo an abrupt volume change of 0.45% at this temperature. The safe cooling rate through quartz inversion on the way down is 100°F per hour (55°C per hour) or slower. Cooling faster causes dunting, a progressive crack that can split a fired piece in half along a structural weakness in the clay body.
Below 572°F (300°C), the kiln can cool freely without risk to the ceramic. Many kiln controllers are programmed to “crash cool” from peak temperature to 1100°F (593°C) by opening dampers (in gas kilns) to speed up the initial cooling phase and save time, then slow-cooling from 1100°F to 500°F (593°C to 260°C). This saves 2 to 4 hours per firing cycle without affecting fired results.
Glaze crystal formation, such as in zinc silicate crystalline glazes, requires precisely controlled slow cooling below the glaze liquidus temperature. Zinc silicate crystals grow between 1900°F and 1832°F (1038°C and 1000°C) at cooling rates of 20 to 50°F per hour (11 to 28°C per hour). Faster cooling prevents crystal nucleation. Slower cooling allows crystals to grow to visible size (5 to 50 mm diameter). Crystalline glaze firing schedules can take 18 to 24 hours for a single firing because the cooling schedule is so precisely controlled.
Understanding kiln temperature ranges across different clay types is essential for planning your cooling schedule. Our guide to ceramic kiln temperature ranges by clay type provides a comprehensive reference for matching peak and cooling temperatures to your specific clay body and glaze combination.
The following step-by-step guide summarizes the complete ceramic production process from raw material to fired piece, so you can map each decision point against the stages covered in this article.
PROCESS GUIDE
How Ceramics Are Made: Complete Process From Raw Clay to Fired Piece
8 stages covering material preparation through final firing and cooling. Applies to studio and industrial ceramic production.
Raw Material Preparation
Weigh and blend dry mineral ingredients (kaolin, silica, feldspar, grog) to the target recipe. Mill to required particle size: 50 to 200 mesh for studio clay, sub-micron for technical ceramics.
Clay Preparation (Wedging or Pugging)
Add water to target moisture content (20 to 25% for plastic forming, 35 to 45% for slip casting). Wedge or pug to remove air pockets and align clay particles uniformly.
Forming
Shape the clay by wheel throwing, handbuilding, slip casting, ram pressing, extrusion, or tape casting. Match the method to the required shape, wall thickness, and production volume.
Drying
Dry slowly and evenly to bone-dry (0% moisture) at 5 to 8% linear shrinkage. Allow 24 to 72 hours under plastic sheeting for studio work. Industrial drying tunnels require 8 to 24 hours at controlled humidity.
Bisque Firing
Fire to cone 06 to cone 04 (1828°F to 1940°F / 998°C to 1060°C) in oxidation. Ramp at 100 to 200°F/hr through quartz inversion and chemical water removal stages. Produces porous, stable bisqueware ready for glaze application.
Glaze Application
Apply glaze by dipping (specific gravity 1.45 to 1.50), brushing (3 coats), or spraying (25 to 40 psi). Target wet coating thickness of 1.5 to 2 mm. Wax the foot ring to prevent kiln shelf adhesion.
Glaze Firing (Sintering)
Fire to the target cone temperature (cone 6 at 2232°F / 1222°C for mid-fire, cone 10 at 2381°F / 1305°C for high-fire). Sinter the clay body to target density and melt the glaze into a fused glass coating bonded to the clay surface.
Controlled Cooling
Cool at 100 to 150°F/hr through glaze transition (1100°F to 900°F / 593°C to 482°C) and quartz inversion (1063°F / 573°C). Do not open kiln above 300°F (149°C). Crash-cooling above 1100°F is acceptable to save time.
How Are Industrial Ceramics Different from Studio Pottery in Manufacturing?
Industrial ceramics and studio pottery use the same underlying physical and chemical processes but differ in every measurable parameter: raw material purity, forming precision, firing control, and dimensional tolerance. A studio potter works with raw material impurities measured in percentages. An industrial technical ceramics manufacturer specifies impurities in parts per million. Both produce ceramics by sintering, but the end results occupy different positions on the spectrum from decorative earthenware to structural aerospace components.
Use the table below to compare studio and industrial ceramic production across the key process parameters.
| Parameter | Studio Pottery | Industrial Technical Ceramics |
|---|---|---|
| Raw material purity | 95-99% (natural clay minerals) | 99.5-99.99% (chemically purified) |
| Particle size | 2-50 microns | 0.1-2 microns |
| Forming method | Wheel, handbuilding, slip casting | Dry pressing, CIP, HIP, CIM, tape casting |
| Peak firing temp | 1828-2381°F (998-1305°C) | 2700-3450°F (1482-1899°C) |
| Fired density | 90-97% theoretical density | 97-99.9% theoretical density |
| Water absorption | 0.5-15% depending on cone | Under 0.01% |
| Dimensional tolerance | +/- 1-3% (hand-formed) | +/- 0.1-0.5% (pressed and sintered) |
The biggest conceptual difference between studio and industrial ceramic production is the role of the glaze. Studio ceramics rely on glaze to create an impermeable surface on a clay body that may still have 1 to 2% absorption after firing. Technical ceramics are sintered to such high density that no glaze is needed for impermeability: the ceramic body itself is the functional material.
How Do You Troubleshoot Common Ceramic Forming and Firing Problems?
The most common ceramic defects (cracks, pinholes, crawling, crazing, and warping) each have a specific cause rooted in one of the process stages covered in this article. Identifying the cause from the defect symptom is the fastest path to fixing the problem. Changing multiple variables at once when a defect appears prevents you from identifying which change produced the improvement.
Use the table below to match the defect symptom to its most likely cause and corrective action.
| Defect | Appearance | Primary Cause | Process Stage | Corrective Action |
|---|---|---|---|---|
| S-crack | S-shaped crack in base | Insufficient base compression during throwing | Forming | Compress base 3x with rib during throwing |
| Rim crack | Crack at top edge | Rim drying faster than body | Drying | Cover rim loosely with plastic while drying |
| Dunting | Clean crack through wall | Too-fast cooling through 1063°F (573°C) | Cooling | Slow cool to max 100°F/hr through quartz inversion |
| Crazing | Fine crack network in glaze | Glaze CTE higher than clay CTE | Glaze chemistry | Increase silica or decrease high-expansion flux in glaze |
| Pinholes | Small holes in fired glaze | Gas escaping through sealing glaze surface | Firing schedule | Slow ramp through 1400-1600°F (760-871°C) to allow gas escape before glaze seals |
| Crawling | Glaze pulls back from surface in bare patches | Glaze too thick, dusty bisque surface, or high kaolin content | Glaze application | Reduce glaze thickness, clean bisque surface, reduce kaolin below 20% in recipe |
| Warping | Distorted form after firing | Uneven wall thickness or overfiring | Forming or firing temperature | Equalize wall thickness during forming; verify cone with witness cones |
Pinholes and crawling are the two defects most frequently misdiagnosed. Pinholes are almost always a firing schedule problem, not a glaze recipe problem. Adding a slower ramp rate through the 1400°F to 1600°F (760°C to 871°C) range and a 15-minute hold at peak temperature resolves most pinhole issues without changing the glaze formula. Crawling is almost always a glaze-application problem, not a chemistry problem: check specific gravity, glaze thickness, and bisque cleanliness before adjusting the recipe.
Most ceramic defects are repeatable and preventable once the root cause is correctly identified. Changing one variable at a time and documenting every firing is the most efficient path to consistent results.
Frequently Asked Questions About How Ceramics Are Made
Can I use the same clay body for both wheel throwing and slip casting?
No. Throwing clay and casting slip are physically different materials and cannot be interchanged without reformulation. Throwing clay is prepared at 20 to 25% moisture content with a plastic, workable consistency. Casting slip uses the same mineral recipe but is deflocculated with sodium silicate at 35 to 45% moisture content to achieve a pourable liquid state. Adding water to throwing clay to make it pourable does not produce casting slip. Without deflocculants, you need so much water that the slip becomes structurally weak and shrinks excessively during drying, causing cracks in every cast piece.
If you want to cast a clay body you already use for throwing, request the casting slip version of the same recipe from your supplier. Laguna Clay, Standard Ceramic, and Sheffield Pottery all sell matched throwing and casting versions of their most popular clay bodies.
What causes ceramic pieces to explode in the kiln?
Ceramic explosions in the kiln are caused by steam pressure from trapped moisture that converts to steam faster than it can escape through the clay walls. At 212°F (100°C), water turns to steam and expands to approximately 1,700 times its liquid volume. If the clay walls are too thick for the steam to permeate and exit before pressure builds, the piece shatters. This almost always happens between 200°F and 350°F (93°C and 177°C) in the first ramp of the firing schedule.
The fix is ensuring pieces are completely bone-dry before loading (drying for at least 24 to 72 hours after the piece feels dry to the touch, since the interior can still hold moisture) and ramping the kiln no faster than 50 to 100°F per hour (28 to 55°C per hour) from room temperature to 300°F (149°C). Pieces thicker than 1 inch (25 mm) in cross-section need at least 1 week of drying time and a maximum ramp of 50°F per hour (28°C per hour) through the steam-escape range.
Is fired stoneware food-safe without glaze?
Stoneware fired to cone 6 (2232°F / 1222°C) or higher with a water absorption rate below 1% is food-safe for dry and non-acidic foods even without glaze. The vitrified clay body is essentially non-porous and does not harbor bacteria. However, unglazed stoneware is not suitable for acidic foods (tomato sauce, citrus, vinegar) because the slight residual porosity allows acid to penetrate and potentially leach mineral compounds from the clay body over repeated use.
Earthenware (cone 06 to cone 04) with 5 to 15% water absorption is never food-safe without glaze, regardless of how it looks. The porous body absorbs food liquids and cannot be sanitized effectively in a dishwasher. Even a correctly applied and fired lead-free glaze on earthenware is borderline for repeated food contact: the ceramic standard ASTM C738 (cadmium release) and ASTM C927 (lead release) tests should be referenced for any commercial production on earthenware bodies.
What is the difference between bisque firing and glaze firing temperature?
Bisque firing converts bone-dry greenware to a stable, porous ceramic state at a lower temperature (cone 06 to cone 04, approximately 1828°F to 1940°F / 998°C to 1060°C) to prepare the piece for glaze application. Glaze firing reaches the full maturation temperature of the clay body (cone 6 at 2232°F / 1222°C for mid-fire stoneware, cone 10 at 2381°F / 1305°C for high-fire). Bisque firing is intentionally below full maturation so the piece remains porous enough to absorb glaze efficiently. A bisque-fired piece has 15 to 20% water absorption. A correctly glaze-fired piece on the same clay body has under 2% absorption.
Single-fire (also called once-fire or raw glazing) skips the bisque step and applies glaze directly to greenware, then fires once to the full maturation temperature. This saves fuel and time but requires careful glaze application technique to avoid the risk of the wet glaze softening the unfired clay and causing deformation.
Can I fire cone 10 clay in a cone 6 electric kiln?
Yes, but the clay body will not reach full maturation. A cone 10 stoneware body fired to cone 6 (2232°F / 1222°C) will have higher water absorption (typically 3 to 6% instead of under 1%), reduced strength, and a more porous, less vitrified structure than it would achieve at its designed cone 10 (2381°F / 1305°C) peak. The piece will hold together and look acceptable, but it is not suitable for functional dinnerware that will be used with hot liquids or washed repeatedly.
The reverse creates a more serious problem. Firing cone 6 clay in a kiln programmed for cone 10 will overfire the clay body: the fluxes melt excessively, the piece warps, slumps, and in severe cases fuses to the kiln shelf. Always match the clay body’s cone range to your kiln’s maximum firing temperature. For cone 6 electric kiln users, use clay bodies designed for cone 5 to 6 (2167°F to 2232°F / 1186°C to 1222°C).
What is the difference between vitrification and sintering?
Sintering is the broader term for particle bonding by solid-state diffusion at high temperature. It describes the mechanism by which any ceramic powder becomes a solid, dense body. Vitrification is a specific type of sintering in which a significant glass phase (produced by melted feldspathic minerals) fills the pore space between sintered clay particles, producing a dense, non-porous ceramic. All vitrified ceramics have sintered, but not all sintered ceramics are vitrified.
Technical ceramics like alumina crucibles and silicon carbide cutting tool inserts are sintered to near-theoretical density without any glassy phase: the particles bond purely by solid-state diffusion without a liquid flux. Stoneware and porcelain achieve their density through a combination of sintering and vitrification: the clay particles sinter together while feldspar melts and fills the remaining pore space with glass. The distinction matters for functional applications because a purely sintered ceramic (without a glass phase) has higher thermal shock resistance than a vitrified ceramic, where the glass phase has a different thermal expansion coefficient from the ceramic grains.
Do I need to wear a respirator when working with ceramic materials?
Yes, whenever you generate airborne dust from dry clay, glaze materials, or raw ceramic powders, you need a fitted particulate respirator (minimum N95 rating). Clay and silica dust contains respirable crystalline silica (RCS) particles small enough to reach the alveolar region of the lungs. Chronic exposure causes silicosis, a permanent and progressive fibrotic lung disease. There is no safe occupational exposure to respirable crystalline silica: the U.S. Occupational Safety and Health Administration (OSHA) permissible exposure limit is 50 micrograms per cubic meter as an 8-hour time-weighted average.
The highest-risk activities are mixing dry glaze materials, reclaiming dry clay scraps without wetting them first, sanding or grinding bisqueware, and cleaning dry studio surfaces by sweeping rather than wet-mopping. A HEPA-filter vacuum for studio cleanup and a half-face respirator with P100 filters for glaze mixing are the minimum safety equipment for regular ceramic work.
Why does my glaze crawl away from edges and sharp corners?
Glaze crawling at edges and sharp corners happens because glaze shrinks during drying and firing, and sharp edges have less clay surface area to grip as the shrinking glaze pulls toward flatter surfaces. The edge is the weakest attachment point. This is a geometry and application problem, not a glaze chemistry problem. The fix starts at the forming stage: round all edges and corners with a slightly rounded profile during trimming and finishing. A corner with a radius of 2 to 3 mm holds glaze far better than a sharp 90-degree corner.
If the form already has sharp edges, apply glaze more thinly at corners (one coat less than the flat surfaces) so the total wet thickness at the edge is the same as on flat areas. Thick glaze on a sharp edge always crawls. Applying a thin wash of clear base glaze as the first coat on sharp edges before full-glaze application helps bond the primary glaze coat to the bisque surface.
How long does a full ceramic kiln firing take from start to cool?
A standard cone 6 glaze firing in a mid-size electric kiln (7 to 10 cubic feet) takes 8 to 12 hours from room temperature to peak, plus 12 to 24 hours of cooling before the kiln can be opened safely (below 300°F / 149°C). The total cycle from loading to unloading is typically 24 to 36 hours. A bisque firing to cone 06 takes 6 to 9 hours to peak plus the same cooling period.
Firing duration varies by kiln size (larger kilns take longer to heat), element condition (worn elements are slower), load density (a heavily loaded kiln holds more thermal mass and heats more slowly), and the firing schedule programmed into the controller. A cone 10 gas firing takes 8 to 14 hours to peak. Raku firing takes 15 to 45 minutes from loading to removal because the target temperature is only cone 06 (1828°F / 998°C) and the pieces are small. For a detailed breakdown of how electric kiln temperature ranges affect firing times, our beginner electric kiln guide covers controller programming, loading patterns, and typical cycle times in detail.
Can ceramic pieces be refired after the glaze firing is complete?
Yes. Ceramics can be refired to add additional glaze layers, correct surface defects, or apply overglaze decoration (enamels, lusters, and gold leaf fired at cone 018 to cone 016, approximately 1346°F to 1463°F / 730°C to 795°C). Refiring to the same cone as the original glaze firing carries a small risk of warping if the clay body was already fired to maximum maturation, but most pieces tolerate one additional firing at the same temperature without deformation.
The practical limit is 3 to 4 firings on the same piece before thermal fatigue in the clay body (from repeated quartz inversions) increases crack risk. Never refire a crazed piece by heating to full cone temperature expecting the crazing to heal: the glaze will simply re-craze on cooling unless the glaze chemistry is corrected first.
What makes porcelain different from stoneware in the manufacturing process?
Porcelain is a ceramic body composed primarily of kaolin (50 to 60%), feldspar (25 to 35%), and silica (15 to 25%), with minimal iron or organic content. It fires to translucency at cone 6 to cone 10 (2232°F to 2381°F / 1222°C to 1305°C) because the high feldspar content creates a large glassy matrix that allows light transmission through thin walls. Stoneware contains higher iron oxide content (1 to 5% compared to under 0.5% in porcelain) and often includes secondary clay minerals and grog that fire to an opaque, gray or brown body.
The manufacturing difference is in workability. Porcelain has lower plasticity than stoneware because kaolin platelets are larger and less flexible than the mixed clay minerals in stoneware. This means porcelain requires more skill to center and pull on the wheel: it tears and collapses at thinner wall sections that stoneware would hold. Porcelain also has higher total shrinkage (12 to 15% wet to fired versus 10 to 12% for most stonewares) and less tolerance for uneven drying, making it more prone to warping if wall thickness is not carefully controlled during forming.
What happens if I mix glazes from different brands or firing ranges?
Mixing glazes from the same firing range (both cone 6, for example) from different manufacturers generally produces usable results, though the fired surface will be unpredictable because each brand’s flux system, colorant concentration, and surface quality may interact in unexpected ways. Layering one cone 6 glaze over another is a standard studio practice for creating surface variation. Test every combination in a small test tile before applying to finished work.
Mixing glazes from different firing ranges (a cone 06 glaze with a cone 10 glaze) produces an unreliable result that is different from either parent glaze. The low-fire flux system of the cone 06 glaze will overmelt at cone 10, causing running and blistering. The underfired cone 10 materials in the cone 06 glaze will not fully develop, producing a rough, matte, or crawled surface. Never combine glazes from different cone ranges expecting a midpoint result: the chemistry does not average in a predictable way.
Ceramics Manufacturing from Clay to Fired Piece
Every ceramic object, from a hand-thrown stoneware mug to a jet engine turbine blade, is the product of the same core process: raw mineral preparation, forming, drying, and high-temperature sintering that converts clay particles into a permanent, vitrified structure. The variables that separate a successful firing from a kiln of failures are specific and controllable: particle size, moisture content, forming method, firing ramp rate, peak cone temperature, atmosphere, and cooling speed.
Start by matching your clay body’s cone range to your kiln’s maximum temperature. Then verify specific gravity before every glaze dipping session. Place Orton witness cones on every shelf to confirm actual heat work rather than relying on controller readings alone. These three habits resolve the majority of studio ceramic failures before they happen.