How to Fix Chipped Ceramic: Repair Options for Every Item

A chipped ceramic piece is not automatically ruined. The right repair method depends on the item, the chip size, and whether the piece needs to hold food, liquid, or just look good on a shelf.
This guide covers every repair option for chipped ceramics, from food-safe adhesives and porcelain filler compounds to professional kintsugi restoration and kiln-refiring techniques, with specific product recommendations, cost estimates, and durability ratings for each approach.
What Type of Chip Are You Actually Dealing With?
Not all ceramic chips behave the same way, and misidentifying the damage type leads to repairs that fail within weeks. The three variables that determine your repair path are chip depth, chip location, and whether the piece is glazed or unglazed at the break point.
A surface chip removes only the glaze layer, leaving the clay body (called the bisque) intact beneath. A structural chip removes clay body material and creates a gap that compromises the form.
Location matters because stress concentrates differently at rims, handles, and bases. A chip on the rim of a mug experiences direct mechanical stress every time the piece is used, while a chip on the exterior body of a vase bears almost none.
Glaze type affects adhesion. Glossy glazes give repair compounds less surface texture to grip. Matte and satin glazes bond more reliably with most fillers because their slightly porous surfaces create mechanical interlocking at the microscopic level.
The four chip categories you will encounter are listed below.
- Flake chip: Glaze only, under 3mm deep, no bisque exposed. The easiest repair category.
- Surface chip: Glaze removed and bisque surface exposed, 3-8mm across. Requires filler plus finish.
- Deep chip: Clay body material missing, over 8mm across. Requires build-up compound in layers.
- Edge chip: Any chip on a rim, spout, or handle edge. Requires structural reinforcement even if small.
Identifying your chip category before buying any repair product saves both money and time. The wrong product on the wrong chip type produces a repair that looks worse than the original damage within a few months.
Which Repair Method Is Right for Your Item?
The item type determines the safety and durability requirements before any other factor. A chipped decorative plate and a chipped dinner plate look identical but require completely different repair approaches because one will contact food and the other will not.
The five item categories below each have a different repair ceiling, meaning a maximum level of repair quality achievable at home versus professionally.
Decorative Ceramics (Figurines, Vases, Display Plates)
Decorative pieces have no food contact, no thermal stress from dishwashers, and no daily mechanical use. This makes them the most forgiving repair category.
A two-part epoxy putty fills chips cleanly, sands to a smooth surface after curing, and accepts acrylic paint for color matching. Loctite Epoxy Gel and J-B Weld ClearWeld are both suitable for this application.
Cure time for most two-part epoxies is 24 hours at room temperature (68-77°F / 20-25°C). Full strength develops at 72 hours, so do not stress the repair before that point.
For high-value decorative pieces, a professional restoration service can achieve results indistinguishable from the original. Our guide on finding a qualified ceramic restoration specialist near you covers what to look for in a restorer and what a professional repair typically costs.
Functional Dinnerware (Mugs, Bowls, Plates)
Functional dinnerware contacts food, liquid, and the dishwasher. This category requires food-safe repair materials, and most consumer-grade adhesives and fillers do not qualify.
The FDA defines a food-contact surface as any surface that comes into contact with food during normal use. A chip repair on the interior of a bowl or on the rim of a mug is a food-contact surface. A chip on the exterior foot ring is not.
Food-safe repair options for functional dinnerware are limited to three categories: kiln-refirable porcelain paint (for glaze-only chips), food-safe two-part epoxy (for display-only use after repair), and professional re-glazing and refiring by a ceramic studio.
Be direct about this: most chip repairs on the interior of dinnerware are not safe for continued food use. The repaired surface creates microscopic pores that harbor bacteria, and most repair compounds are not rated for repeated dishwasher exposure above 140°F (60°C).
The honest recommendation for chipped mugs and bowls used for food is to retire the piece from food use or invest in professional refiring. A food-safe ceramic touch-up kit works for cosmetic repair on exterior surfaces only.
Ceramic Sinks and Bathroom Fixtures
Ceramic sinks present a unique repair challenge because they experience constant water exposure, thermal cycling, and abrasive cleaning products. A chip on a sink basin also creates a surface that stains rapidly and can harbor mold.
Sink repair requires a two-component porcelain repair compound specifically rated for wet environments. Porcelain sink repair kits from brands like Rust-Oleum and Tile Doctor contain epoxy filler plus a porcelain-matched topcoat that resists water penetration at sustained contact.
Application temperature matters for sink repairs. Most porcelain repair compounds require ambient temperature above 60°F (16°C) during application and a minimum 24-hour dry time before water contact. Applying in a cold or humid bathroom extends the cure time significantly.
For a full walkthrough of the sink repair process including surface preparation, filler application, and sanding sequence, see the detailed step-by-step guide to repairing a cracked or chipped ceramic sink.
Ceramic Tile (Floor and Wall)
Ceramic floor tile chips are a structural hazard as well as a cosmetic problem. A chipped floor tile edge catches socks and bare feet and can cause cuts.
Small chips under 5mm on wall tiles repair well with ceramic touch-up paint combined with a clear topcoat. Floor tile chips require a harder filler because foot traffic creates direct compressive force on the repair.
A ceramic tile repair kit with hard-setting filler rated for floor use (look for Shore D hardness above 70) handles most floor chip repairs. Color matching is the hardest part of tile repair because tile glaze varies by batch and fades over time.
The practical approach to color matching is to keep a spare tile from the original installation for reference. Most manufacturers sell touch-up pens matched to their glaze colors, but these are only available directly from the manufacturer for a limited time after purchase.
Ceramic Cookware and Bakeware
Chipped ceramic cookware, including ceramic-coated cast iron and pure ceramic baking dishes, should not be repaired for continued cooking use. The chip exposes the underlying material (cast iron, clay, or aluminum) to direct heat and acidic foods, which leaches metals into food.
A ceramic coating chip on a pan means the pan is at the end of its usable life for cooking. No consumer repair product creates a bond that withstands direct stove heat above 500°F (260°C) while remaining food-safe.
Ceramic bakeware (stoneware casserole dishes, earthenware baking pans) with exterior chips that do not contact food can continue in use. Interior chips on bakeware that contact food require the same conservative approach as dinnerware: retire from food use or seek professional refiring.
Use the table below to match your item type, chip size, and use case to the right repair method before purchasing any materials.
| Item Type | Chip Size | Food Contact? | Best Repair Method | Estimated Cost | DIY or Professional |
|---|---|---|---|---|---|
| Decorative vase / figurine | Any | No | Two-part epoxy + acrylic paint | $8-20 | DIY |
| Mug / bowl (exterior chip) | Any | No | Food-safe epoxy (display) or refire | $15-80 | DIY or pro |
| Mug / bowl (rim or interior chip) | Any | Yes | Professional reglaze and refire only | $40-150 | Professional |
| Ceramic sink | Any | Water contact | Porcelain repair compound + topcoat | $20-45 | DIY |
| Floor tile | Under 10mm | No | Hard-set tile filler + color pen | $12-30 | DIY |
| Ceramic cookware (coated) | Any | Yes | Retire from cooking use | N/A | N/A |
| Antique / heirloom ceramic | Any | Either | Professional conservation only | $100-500+ | Professional |
The item type and contact condition should determine your method before chip size does. A small interior chip on a mug demands more caution than a large exterior chip on a vase.
How to Fix a Chipped Ceramic Piece at Home: Step-by-Step
The home repair process for most decorative and non-food-contact chips follows a five-stage sequence: clean, prepare, fill, cure, and finish. Skipping the preparation stage is the single most common reason chip repairs fail within the first few months.
Here is the complete repair process for a surface or deep chip on a decorative ceramic piece.
STEP-BY-STEP GUIDE
How to Repair a Chipped Ceramic Piece at Home
7 steps. Estimated total time: 30 minutes active, 72 hours total with curing.
Clean the chip area thoroughly
Wash the chip area with dish soap and warm water, then wipe with 91% isopropyl alcohol on a cotton swab. Allow to dry fully for 30 minutes before proceeding. Any grease, soap residue, or moisture prevents adhesion.
Lightly abrade the chip edges
Use 220-grit sandpaper to lightly roughen the glaze around the chip perimeter. This creates a mechanical key for the filler to grip. Wipe away dust with the isopropyl alcohol swab and allow to dry again.
Mix the filler compound
For two-part epoxy putty, mix equal volumes on a clean disposable surface until the color is fully uniform with no streaks. Working time is typically 5-8 minutes for standard epoxy putties. Mix only what you need for one application.
Apply filler in layers for deep chips
Fill chips under 3mm depth in one application. For deeper chips, apply in 2mm layers and allow each layer to cure for 4 hours before adding the next. Overfill slightly (1-2mm above flush) to account for sanding shrinkage.
Allow full cure time
Do not sand or stress the repair for at least 24 hours at room temperature (68-77°F / 20-25°C). Full bond strength for most two-part epoxies develops at 72 hours. Cold rooms (below 60°F / 16°C) extend cure time by 50-100%.
Sand and smooth the cured filler
Begin with 220-grit wet-or-dry sandpaper, then progress to 400-grit and finally 800-grit for a smooth surface. Use light circular strokes and keep the area slightly damp to prevent scratching the surrounding glaze.
Color match and seal
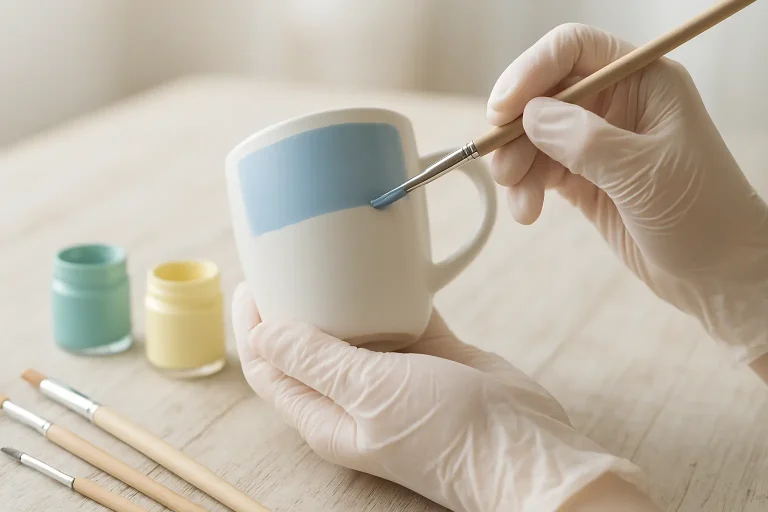
Apply acrylic ceramic touch-up paint in thin coats using a fine detail brush, allowing each coat to dry for 30 minutes before the next. Seal the finished repair with a clear acrylic varnish rated for the application type (matte, satin, or gloss to match surrounding glaze).
The preparation and curing stages determine the repair quality more than any other factor. A rushed repair that skips surface preparation or cuts curing time short will lift within weeks of normal handling.
The Best Products for Repairing Chipped Ceramics
Repair product selection depends on chip depth, the surface environment (wet, dry, thermal), and whether food contact is a requirement. The products below cover the most common repair scenarios with specific performance data for each.
Two-Part Epoxy Adhesives for Decorative Ceramics
Two-part epoxy systems are the most versatile chip repair option for decorative ceramics. They bond to glazed surfaces, fill gaps, and achieve lap shear strengths of 1,500-3,500 PSI depending on the specific formulation, which exceeds the tensile strength of most ceramic bodies.
Loctite Epoxy Gel (5-minute formula) works well for chips that need a fast initial set. The gel consistency prevents slumping on vertical surfaces, which matters for vase and figurine repairs where the chip may be on a curved wall.
Key Specifications for Loctite Epoxy Gel:
- Mix ratio: 1:1 by volume
- Working time: 5 minutes at 72°F (22°C)
- Full cure: 24 hours at 72°F (22°C)
- Bond strength: approximately 1,900 PSI lap shear
- Temperature resistance: -65°F to 200°F (-54°C to 93°C)
- Food safety: Not food-safe in contact with food surfaces
For deeper chips requiring extended working time, J-B Weld ClearWeld (25-minute formula) allows more time to shape and smooth the fill before it sets. The extended pot life is also better for multi-chip repairs where you are working on several areas in one session.
Porcelain Repair Compounds for Wet Environments
Porcelain repair compounds differ from general epoxy in two key ways: they are formulated to cure white or ivory (matching most bathroom and kitchen ceramics), and they contain additives that resist water absorption after curing.
Rust-Oleum Specialty Tub and Tile Repair Kit is the most widely available option for sink, bathtub, and tile chip repairs. It uses a two-part system with a matching topcoat that resists water penetration for sustained contact environments.
Key Specifications for Rust-Oleum Tub and Tile Repair:
- Application temperature: 50-90°F (10-32°C)
- Water contact time: 24 hours minimum before any water exposure
- Full cure: 72 hours
- Coverage: approximately 4 sq in per kit for deep chips
- Finish options: gloss white (standard), bright white (separate SKU)
The most common failure with porcelain repair compounds is applying them in a bathroom where ambient humidity exceeds 70%. High humidity slows the epoxy cross-linking reaction and produces a repair that feels set on the surface but remains soft underneath. Run ventilation or use a small fan directed at the repair area during the first 4 hours of cure.
Ceramic Filler Pens and Touch-Up Sticks
Ceramic filler pens are suitable only for hairline chips and glaze-only surface damage under 2mm in diameter. They use a single-component touch-up compound that air-dries rather than chemically curing, which limits bond strength to approximately 200-400 PSI.
For large chips (over 5mm), a touch-up pen produces a cosmetic film that will fracture and peel when the repaired piece is handled normally. Do not use filler pens on rims, handles, or any structural edge where mechanical stress is applied.
Where ceramic filler pens do work well is on floor tile hairlines and small wall tile chips that only need cosmetic correction without structural filling. Ceramic tile touch-up pens from DAP and Elmer’s are available in a range of grout and tile-matched colors for fast cosmetic correction.
Kintsugi Repair Kits
Kintsugi is the Japanese practice of repairing ceramics with lacquer mixed with gold, silver, or platinum powder. The philosophy behind it treats the repair as part of the piece’s history rather than something to hide.
Traditional kintsugi uses urushi lacquer, which requires 6-8 weeks of curing in a humidity-controlled box (70-80% relative humidity) and specialized craft skills. Modern kintsugi repair kits use epoxy resin mixed with gold or brass powder, which cures in 24-72 hours and does not require humidity curing.
Key Specifications for Modern Kintsugi Kits:
- Base adhesive: two-part epoxy (urushi substitute)
- Decorative powder: gold, silver, or brass (brass is most common at this price point)
- Cure time: 24-72 hours at room temperature
- Food safety: not food-safe in contact with food surfaces
- Suitable chip size: up to 8mm with proper buildup technique
- Cost range: $18-65 per kit depending on powder type
Kintsugi repairs are not food-safe with any consumer-grade kit. The gold or brass powder is sealed in epoxy resin, not in the fired glaze layer, and the sealed surface does not achieve the chemical stability of a fired ceramic glaze. Use kintsugi for decorative pieces only.
For a broader look at adhesive options across all types of ceramic damage, including cracks and full breaks, the complete guide to repairing broken ceramics using glues and fillers for every damage type covers bond strength, cure time, and compatibility by surface type.
Can You Refire a Chipped Ceramic Piece to Fix It?
Refiring is the only repair method that produces a genuinely food-safe result for chipped functional ceramics. It works by applying new glaze material to the chipped area and firing the piece to the original glaze temperature, fusing the repair into the ceramic body at the same chemical level as the original glaze.
Refiring has two conditions that determine whether it is possible. First, you need access to a kiln capable of reaching the original firing temperature (typically cone 6 at 2232°F / 1222°C for stoneware, or cone 06 at 1828°F / 998°C for low-fire earthenware). Second, you need to know the original glaze formula or find a compatible glaze that matches the thermal expansion coefficient of the original.
The thermal expansion coefficient (CTE, measured as the rate of expansion per degree of temperature change) of the new glaze patch must match the original glaze closely enough to prevent crazing (cracking in the glaze surface) or shivering (glaze flaking off) after cooling. According to Tony Hansen’s Digitalfire Reference Library, a CTE mismatch of more than 0.5 units between patch glaze and original glaze produces visible glaze fit problems in most firings.
In plain terms: if the patch glaze expands at a different rate than the surrounding original glaze when the kiln cools, one of them will crack or pop off. This is why randomly applying a commercial glaze to a chip and refiring often produces a worse surface than the original chip.
When Refiring Works
Refiring is most reliable when the piece was made and glazed by the same potter or studio that will perform the repair. Production pottery studios that sell their own work will often rework chipped pieces from their own inventory because they have access to the original clay body and glaze formula.
Refiring also works when the chip is on an unglazed surface (bare bisque), since no CTE matching is required. Simply applying a compatible cone-matched glaze to the bare chip and refiring at the correct temperature produces a clean, food-safe surface.
When Refiring Fails
Refiring fails when the original glaze formula is unknown. A commercially produced ceramic piece (machine-made dinnerware, imported tableware) uses proprietary glaze formulas that cannot be matched by a home studio.
It also fails when the piece has already been repaired with epoxy or filler. Any organic material in or near the chip will burn out in the kiln above 572°F (300°C), leaving voids or carbon deposits that contaminate the new glaze layer.
Refiring a piece that contains an existing epoxy repair produces a damaged surface worse than the original chip. Remove all non-ceramic repair material completely before any kiln refiring, using acetone to dissolve epoxy residue and 220-grit sandpaper to remove any remaining filler.
Professional Ceramic Repair Options
Professional ceramic repair covers three distinct service categories: cosmetic restoration (color and surface matching), structural conservation (for antiques and heirloom pieces), and functional refiring (returning chipped dinnerware to food-safe use). Each requires different expertise and equipment, and the cost ranges differ significantly.
Cosmetic Restoration Services
Cosmetic restoration services use cold-cure resins, automotive-grade color-matching techniques, and UV-stabilized topcoats to produce repairs that are nearly invisible under normal viewing conditions. They do not use kilns and do not produce food-safe results.
These services are best suited for decorative ceramics, antiques where firing would risk thermal shock damage, and high-value pieces where the aesthetic result justifies the cost. Typical pricing ranges from $45-200 per repair depending on chip size and complexity of color matching.
Conservation for Antique and Heirloom Ceramics
Antique ceramic conservation follows standards set by the American Institute for Conservation (AIC). Conservation-grade repair uses reversible adhesives and fillers, meaning the repair can be undone without damaging the original material. This is a legal and ethical requirement for pieces with historical or auction value.
Paraloid B-72 (an acrylic resin) is the standard conservation adhesive for ceramic repairs. It is dissolved in acetone to a working viscosity, applied in layers, and reversible with acetone at any point after curing. Non-reversible epoxy repairs on antique ceramics can permanently reduce auction value.
Conservation services charge $100-500 per chip for museum-standard reversible repairs, with higher costs for period-accurate color matching on decorated ceramics. Before using any consumer repair product on an antique, check the piece’s estimated value. If it exceeds $200, the cost of professional conservation is justified by the value protection.
Functional Refiring by a Ceramic Studio
Some studio potters and ceramic schools offer refiring services for chipped functional dinnerware. The potter applies a compatible glaze to the chip, loads the piece into a kiln alongside their own production work, and fires to the appropriate cone temperature.
This service costs $40-150 per piece and typically requires a 2-4 week wait. The result is a food-safe repair with genuine glaze fusion, not a surface coating. The limitation is that perfect color matching to a mass-produced glaze is rarely achievable, so the repaired area will often be slightly visible as a different glaze texture or tone.
For guidance on finding and evaluating professional repair and restoration services in your area, including what questions to ask before paying for any repair, the resource on locating a reputable ceramic repair and restoration professional covers vetting, pricing expectations, and what reversible versus permanent repair means for your piece’s value.
What About Glaze Issues Around the Chip?
A chip sometimes reveals or causes secondary glaze problems in the surrounding area. The three most common are crazing (fine cracks in the glaze network), shivering (glaze flaking away from the clay body), and glaze crawling (glaze pulling back from an area during firing).
These are not cosmetic issues caused by the chip. They are symptoms of glaze chemistry problems that existed before the chip occurred. The chip physically disrupted the glaze surface and made the underlying problem visible.
Crazing around a chip means the glaze has a higher thermal expansion coefficient than the clay body. The glaze is under tension, and the chip created a stress relief point where the tension network released. Filling the chip with epoxy does not solve the tension problem, and crazing will likely spread to new areas over time, especially with temperature cycling from dishwasher use.
For a full technical explanation of why crazing occurs and how to prevent it in future fired pieces, the detailed guide on diagnosing and fixing ceramic glaze crazing covers the thermal expansion mismatch mechanism, testing methods, and glaze adjustment strategies.
Shivering around a chip means the glaze has a lower CTE than the clay body. The glaze is under compression, and the chip created a fracture point where the compressive stress popped the glaze away from the surface. Shivering is a more serious safety concern than crazing because the glaze flakes can end up in food. A piece with active shivering near any food-contact surface should be retired from food use immediately.
If the area around a chip shows glaze lifting in sheets or flaking at the edges, the piece has a shivering problem that will continue to worsen with use and thermal cycling. See the detailed guide on understanding and fixing ceramic glaze shivering and peeling for the root cause analysis and correction strategies for both studio-made and commercial ceramics.
How to Prevent Ceramic Chips in the First Place
Most ceramic chips are caused by thermal shock, mechanical impact, or stacking damage. All three are preventable with small changes to handling and storage habits.
Thermal shock occurs when a ceramic piece experiences a rapid temperature change. Placing a cold ceramic mug directly onto a hot stovetop, or pouring boiling water into a room-temperature piece, creates a temperature differential across the ceramic body. The outside expands or contracts faster than the inside, and the stress fractures the glaze and sometimes the clay body at the weakest point, which is usually the rim or a handle attachment.
The safe temperature differential for most fired stoneware is under 100°F (38°C) change per minute. This means bringing a cold ceramic piece to room temperature before filling with hot liquid, and allowing hot pieces to cool below 200°F (93°C) before refrigerating.
Mechanical impact chips happen most often at the rim because rims are the thinnest, most projecting part of most ceramic forms. Storing mugs and bowls upside down reduces rim-to-rim contact during stacking. Using felt plate separators between stacked pieces prevents glaze-to-glaze abrasion that weakens rims over time before a full chip develops.
Dishwasher chips are often caused by pieces rattling against each other during the wash cycle. Ceramic pieces in the dishwasher should not touch each other. Use the prongs to separate every piece so none contact during the cycle, and avoid overcrowding. The high-temperature dry cycle (140-160°F / 60-71°C) is not harmful to a properly fired cone 6 or higher stoneware glaze, but it does stress low-fire earthenware glazes that were fired below cone 04 (1940°F / 1060°C).
Repair Durability: How Long Will a Chip Repair Last?
Repair longevity depends on the repair material, the environmental exposure, and the stress category applied to the repair after it cures. A well-executed epoxy repair on a decorative vase in indoor conditions can last decades. The same repair on a dishwasher-used mug rim typically fails within 6-18 months.
Use the table below to estimate the realistic service life of different repair types under different conditions before committing to a method.
| Repair Method | Indoor Display | Hand Wash Only | Dishwasher Use | Outdoor / Wet | Food Contact Safe? |
|---|---|---|---|---|---|
| Two-part epoxy (standard) | 10-30 years | 2-5 years | 6-18 months | 1-3 years | No |
| Porcelain repair compound | 10-20 years | 3-7 years | 1-3 years | 3-8 years | No |
| Ceramic touch-up pen | 2-5 years | 6-12 months | 1-3 months | 3-6 months | No |
| Kintsugi epoxy kit | 10-25 years | 2-4 years | Not recommended | 1-2 years | No |
| Professional refire (glaze fusion) | Permanent | Permanent | Permanent | Permanent | Yes |
| Conservation adhesive (Paraloid B-72) | 50+ years | Not for daily use | Not suitable | Not suitable | No |
The only repair method that produces a permanent, food-safe result is professional kiln refiring with a chemically compatible glaze. All cold-cure repair methods have a finite service life determined by the environmental exposure they experience.
The spectrum slider below shows which repair approach fits your situation based on how you use the piece, from purely decorative to daily functional use.
INTERACTIVE TOOL
What Is the Right Repair Approach for How You Use This Piece?
Slide to your position and your recommended repair approach updates instantly.
Daily food use, dishwasher
Color Matching a Chip Repair: The Hardest Part of Any Fix
Color matching is where most home chip repairs fall short. A structurally sound repair that is visually obvious defeats the purpose for most people. Achieving a close color match requires understanding what gives the original surface its color and texture.
Ceramic glaze color comes from metal oxide colorants fused into a glass matrix at high temperature. The surface texture (gloss, satin, matte) comes from the silica-to-flux ratio and the cooling rate in the kiln. Neither can be perfectly replicated with cold-cure repair materials, which is why professional restorers who specialize in color matching charge premium rates.
The practical approach for home color matching uses acrylic craft paints mixed to the dominant color of the surrounding glaze, applied in thin transparent layers rather than a single opaque coat. Thin layers allow you to build depth that approximates the translucent quality of a fired glaze better than one thick application.
Matching Gloss Level
Gloss level is as important as color. A matte repair on a glossy glaze surface is immediately visible. Match the finish of the surrounding glaze using the correct varnish type: gloss varnish for glossy glazes, satin varnish for satin surfaces, and flat/matte varnish for matte glazes.
Apply varnish to the entire repaired area plus a 3-5mm overlap onto the surrounding original glaze. This feathering technique blends the sheen transition and makes the repair boundary less distinct.
Matching Textured and Speckled Glazes
Textured and speckled glazes are the hardest category to color match. The speckles in a stoneware production glaze come from iron or manganese particles that created localized micro-crystals at firing temperature. These cannot be reproduced with paint.
The best approach for speckled glaze repairs is to use a fine spatter technique: thin a brown or black acrylic paint to a watery consistency and apply with a stiff brush flicked from a distance of 6-8 inches to produce random micro-dots that approximate the speckle pattern. Practice on a piece of paper first to control the spatter size before applying to the repair.
Frequently Asked Questions About How to Fix Chipped Ceramic
Is it safe to use a chipped ceramic mug for drinking?
A chipped ceramic mug rim is not safe for regular drinking use. The chip creates a rough edge that can cause small cuts to the lips, and the exposed bisque (unglazed clay body) at the chip site is porous and harbors bacteria that cannot be fully removed by hand washing. If the chip is on the exterior body and does not contact your lips or liquid, the mug can continue in use with monitoring. For any rim chip, retire the mug from drinking use or have it professionally refired.
What is the difference between a chip and a crack in ceramic?
A chip removes material from the ceramic surface, leaving a gap. A crack is a fracture that runs through the clay body or glaze without removing material. Chips are repaired with filler compounds. Cracks require adhesive penetration and different repair techniques because no material is missing, but the fracture plane needs to be bonded. Our detailed guide on repairing ceramic cracks using adhesives and fillers covers the distinction and the correct approach for each damage type.
Can I use superglue (cyanoacrylate) to fix a ceramic chip?
Superglue (cyanoacrylate) works for bonding a detached ceramic fragment back in place, but it does not fill chip voids. For a chip where material is missing, superglue cannot fill the gap and has no volume to bridge the chip. Superglue also has low water resistance, failing in dishwasher conditions within weeks. For chips, use a two-part epoxy filler. For reattaching a clean-broken fragment, superglue is acceptable for decorative-only use.
How do I fix a chip on a glazed ceramic pot that I made myself?
If you made the piece, you have the best repair option available: refire it. Apply a compatible commercial glaze (matched to the original cone temperature) to the bare chip, allow to dry, and refire at the original cone. This produces a food-safe, permanently bonded glaze repair. If you do not have access to your original glaze or a compatible formula, our guide on how to glaze a ceramic pot correctly for firing covers glaze selection, application thickness, and compatibility checking before you commit to a refire.
Does a chip repair affect the value of antique or collectible ceramics?
Any repair to an antique ceramic reduces its market value compared to an undamaged example, but a professional conservation-grade repair (using reversible materials like Paraloid B-72) causes significantly less value reduction than a DIY epoxy repair. According to the American Institute for Conservation guidelines, a visible DIY repair can reduce auction value by 30-70% depending on the piece's rarity. A professionally conserved repair with documentation may reduce value by only 10-20%. Always use a professional conservator for any ceramic with established collector or auction value.
Can you use nail polish to fix a ceramic chip?
Nail polish (nitrocellulose lacquer) can temporarily cover the appearance of a small glaze chip but provides no structural fill and no adhesion to the ceramic surface. It yellows within 6-12 months, peels under water exposure, and does not match ceramic glaze sheen accurately. It is not a recommended repair material for any chip on any ceramic item. Use a purpose-made ceramic touch-up pen or two-part epoxy depending on the chip depth.
Why does my repair keep peeling or falling out?
A chip repair that peels out typically failed for one of three reasons: insufficient surface preparation (oil or moisture on the ceramic prevented adhesion), incorrect mixing ratio for a two-part epoxy (improper ratio prevents full crosslinking, leaving a rubbery or tacky cure), or thermal stress from dishwasher or microwave use that exceeds the repair material's temperature rating. Clean the chip thoroughly with isopropyl alcohol, mix two-part systems precisely by volume, and confirm the repair material's temperature rating before exposing it to heat.
Is kintsugi repair food-safe?
Consumer kintsugi repair kits are not food-safe. Modern kintsugi kits use epoxy resin as the base adhesive, and epoxy is not rated for direct food contact under sustained liquid exposure. Traditional Japanese kintsugi uses urushi lacquer, which some food safety authorities consider food-safe after full cure (6-8 weeks), but urushi requires humidity-controlled curing conditions not achievable in most homes. Use kintsugi for decorative pieces only unless you are working with a professional who uses genuinely food-safe lacquer systems.
Can a ceramic chip be repaired invisibly?
A completely invisible chip repair is achievable only by professional conservators who specialize in ceramic restoration, using multi-layer pigmented fills, airbrushed color matching, and UV-cured topcoats. For a small chip (under 3mm) on a solid-color glaze, a skilled home repairer can achieve a near-invisible result with careful color matching and thin-layer application. On speckled, crystalline, or reactive glazes, complete invisibility is not achievable at home. Expect to reduce the visibility of the chip significantly rather than eliminate it entirely.
What happens if I microwave a piece with a chip repair?
Microwaving a piece with an epoxy chip repair is not safe. Microwave ovens heat food by exciting water molecules, and if any moisture is trapped in the repair or between the repair and the ceramic, that moisture will superheat and can cause the repair to crack or pop. Additionally, most epoxy repair compounds are not rated for the surface temperatures a ceramic piece reaches in a microwave (typically 160-200°F / 71-93°C at the ceramic surface). Remove the piece from microwave use after any cold-cure repair.
How do I know if my repair product is truly food-safe?
A repair product is food-safe for ceramic use if it carries an FDA 21 CFR 175.300 or equivalent EU food-contact material certification. The product label or technical data sheet must explicitly state "food contact safe" for direct contact with food, not just "non-toxic." Many products labeled "non-toxic" are safe if accidentally ingested in small amounts but are not certified for sustained food and liquid contact. Ask the manufacturer directly for the food contact certification documentation if it is not on the product label.
Can a chipped ceramic piece still be glazed and fired if I own a kiln?
Yes. If you have kiln access and the piece is already bisque-fired, you can apply a food-safe commercial glaze to the chip and any surrounding unglazed area, then fire to the appropriate cone temperature. The key requirements are that the glaze is rated for the same cone as the original (matching the clay body's maturation temperature), and that the piece contains no prior cold-cure repair material that would burn out during firing. If the piece was previously made in a cone 6 stoneware clay, apply a cone 6 commercial glaze at a specific gravity of 1.45-1.50 and fire to cone 6 (2232°F / 1222°C).
The Right Repair Makes the Difference
Chipped ceramics are fixable, but the correct repair depends entirely on how the piece will be used after the repair is complete.
For display pieces and decorative ceramics, a two-part epoxy repair with careful color matching is durable, accessible, and costs under $25 in materials. For functional food ware with interior or rim chips, professional kiln refiring is the only method that delivers a food-safe, permanent result.
Start by identifying whether your chip is structural or glaze-only, whether food contact is involved, and whether the surrounding glaze shows any crazing or shivering that signals a deeper chemistry problem. Those three answers will guide every decision that follows.