How to Tile a Shower Wall: Waterproofing & Installation

Most shower tile jobs fail at the waterproofing stage, not the tiling stage. A cracked grout joint or a missed seam behind the wall can push water into the framing for months before you see any damage.
Tiling a shower wall correctly means building a system where every layer, from the substrate to the grout, works together to block water. This guide covers waterproofing membrane selection, layout planning, adhesive mortar, tile setting, grouting, and sealing for ceramic and porcelain shower tiles.
What Do You Actually Need Before You Can Tile a Shower Wall?
You need a waterproof substrate, not just a flat one. Standard drywall absorbs water and fails inside a shower in under two years, regardless of how well the tile is set.
The substrate must be either cement board (such as HardieBacker or USG Durock), foam board (such as Schluter KERDI-BOARD or Wedi), or a standard drywall board covered with a sheet or liquid waterproofing membrane rated for wet areas.
Cement board is a type of cementitious backer unit (CBU) that resists moisture but is not itself waterproof. It must be paired with a liquid waterproofing membrane or sheet membrane over every seam and fastener to block water migration.
Foam backer boards like Schluter KERDI-BOARD are inherently water-impermeable. They eliminate the need for a separate membrane layer on the face of the wall, though seams still require waterproof tape and the joining compound specified by the manufacturer.
Here is what you need on hand before the first tile goes up:
- Cement board or foam substrate panels
- Waterproofing membrane (liquid or sheet) rated for continuous wet exposure
- Alkaline-resistant (AR) fiberglass mesh tape for seams
- Polymer-modified thinset mortar (white for light tiles, gray for dark)
- Notched trowel sized to tile format (6mm V-notch for mosaics, 12mm square-notch for large format)
- Tile spacers or wedge leveling system
- Sanded or unsanded grout rated for wet areas
- 100% silicone sealant for change-of-plane joints
- Level, chalk line, tape measure, and tile saw
The TCNA (Tile Council of North America) Handbook for Ceramic, Glass, and Stone Tile Installation is the industry reference for all substrate and installation method requirements. Every professional installer references it before specifying materials for a wet area.
How Do You Waterproof a Shower Wall Correctly?
Waterproofing a shower wall means creating a continuous, unbroken barrier between the water side and the structure side. A single missed seam or pinhole in the membrane is enough to allow water infiltration over time.
The most common failure point in DIY shower waterproofing is the seam between the shower floor pan and the wall. That corner joint is a change-of-plane transition, and it is the highest-stress point in the entire installation.
How to Apply a Liquid Waterproofing Membrane on Cement Board
Liquid waterproofing membranes such as Laticrete Hydro Ban or Mapei AquaDefense are applied in two coats directly over cement board. The first coat seals the surface pores; the second coat builds film thickness to the manufacturer’s specified minimum (typically 20 to 30 mil dry film thickness).
Step 1: Fill all fastener holes and surface voids in the cement board with the same liquid membrane material. Fastener depressions are pinhole failure points if left unfilled.
Step 2: Apply fabric seam tape (AR fiberglass mesh) at every board joint and at all inside corners. Press the tape firmly into a first coat of liquid membrane before it skins over.
Step 3: Brush or roll the first coat of liquid membrane across the entire wall surface, working the product into the tape at seams. Allow it to cure to the manufacturer’s specified time (typically 1 to 2 hours at 70°F).
Step 4: Apply the second coat perpendicular to the first to ensure even film thickness. Watch for pinholes where air is trapped. The cured membrane should be a uniform color with no thin spots or missed areas.
Step 5: Allow the membrane to cure fully before setting tile. Laticrete Hydro Ban requires a minimum of 2 hours at 70°F before tile can be set. In cold or humid conditions, add 50% to the cure time.
The mechanism behind liquid membranes is simple: the polymer emulsion coalesces into a continuous film as water evaporates. This only works if the film thickness is consistent. Thin spots (under 15 mil dry) remain semi-permeable and will allow vapor transmission over time.
If the membrane surface looks transparent or shows the cement board color clearly through it, the coat is too thin. Apply a third coat.
How to Install a Sheet Waterproofing Membrane (Schluter KERDI System)
Sheet membranes such as Schluter KERDI bond directly to the substrate using unmodified thinset mortar. The membrane is a composite of a polyethylene sheet with non-woven fabric fleece on both sides, which the thinset keys into mechanically.
Step 1: Spread unmodified thinset (not polymer-modified) onto the cement board surface using a 3/16 inch V-notch trowel. Unmodified thinset is specified because the Schluter system requires a specific bond chemistry that polymer additives can disrupt.
Step 2: Press the KERDI sheet into the wet thinset, working from the center outward to eliminate air pockets. The fleece face must be embedded fully with no dry spots.
Step 3: Overlap all sheet joints by a minimum of 2 inches. Apply KERDI-BAND fabric tape over every seam and inside corner, again set in unmodified thinset.
Step 4: At the floor-to-wall transition, use KERDI-KERECK pre-formed corners. These are molded pieces that eliminate the need to fold the sheet membrane into a tight inside corner, which is a common failure point when the sheet is stretched or kinked.
Step 5: Allow the thinset to cure for 24 hours before setting tile directly onto the KERDI surface.
Tile set on KERDI does not bond to the substrate. It bonds to the membrane’s fleece layer. This is why unmodified thinset is required on both sides of the membrane: the bond is mechanical, and polymer-modified thinsets create a rigid bond that can delaminate from the fleece under thermal movement.
For most standard shower wall installations on cement board, a liquid membrane is faster and easier for a single installer. A sheet membrane system is the better choice when the substrate has significant surface variation or when installing over existing drywall that cannot be replaced.
Regardless of which system you use, waterproofing is the layer that determines whether your shower lasts 5 years or 25 years.
The step-by-step sequence below summarizes the complete waterproofing workflow from substrate prep to ready-to-tile surface, so you can track where you are in the process at any point during installation.
Step-by-Step Guide
How to Waterproof a Shower Wall Before Tiling
7 steps covering substrate prep through membrane cure. Applies to liquid and sheet membrane systems.
Inspect and prepare the substrate
Check that cement board or foam board panels are fastened every 6 to 8 inches along studs with corrosion-resistant screws. All fastener heads must be flush or recessed, never proud of the surface.
Fill fastener holes and surface defects
Apply liquid membrane material or unmodified thinset to fill all screw depressions, surface chips, and gaps wider than 1/16 inch. Allow to cure before proceeding.
Apply seam tape at all joints and inside corners
Embed AR fiberglass mesh tape (for liquid membranes) or KERDI-BAND (for sheet membranes) at every board joint, inside corner, and floor-to-wall transition. Press into wet membrane or thinset.
Apply the first membrane coat or sheet layer
For liquid membranes, brush or roll the first coat over the entire wall surface. For sheet membranes, press KERDI into unmodified thinset spread with a 3/16 inch V-notch trowel.
Apply second membrane coat (liquid systems only)
Apply the second coat perpendicular to the first after the first coat skins over (typically 1 to 2 hours). The cured two-coat system must reach a minimum 20 to 30 mil dry film thickness.
Perform a flood test or inspection (optional but recommended)
After full cure, inspect all seams visually for thin spots or pinholes. On shower pan assemblies, a 24-hour water flood test confirms the complete system is watertight before tile covers it permanently.
Allow full cure before tiling
Wait the manufacturer’s specified cure time before setting tile. Laticrete Hydro Ban: 2 hours minimum at 70°F. Schluter KERDI thinset bed: 24 hours minimum. Setting tile too early compresses an uncured membrane and creates bond failures.
How Do You Plan a Shower Wall Tile Layout?
Layout planning determines whether your finished shower looks professional or amateur. The two biggest layout mistakes are starting tiles at the floor line (which is almost never level) and placing small cut tiles in visible outside corners.
The goal is to center your tile field visually and place cuts where they are least noticeable: at corners, behind fixtures, and near the ceiling.
How to Find the Right Starting Point for Your Layout
Start every shower wall layout by finding the lowest point of the shower floor or pan rim with a level. That is your datum line. From that point, measure up in full tile increments to determine where your first course of full tiles will sit.
If your first full tile course falls more than half a tile height above the floor, you will have a small slivers of tile at the base of the wall. Shift your layout up or down by half a tile to produce a wider, more balanced cut at the bottom.
Use a chalk line to snap a level horizontal reference line at your determined starting height. Every tile on every wall is set to this line.
For the vertical layout, find the center of the shower’s focal wall (usually the back wall opposite the showerhead). Snap a vertical chalk line from floor to ceiling. Measure outward from that centerline in full tile increments to see where cuts fall at the side walls. Adjust the centerline left or right to balance the cuts at both ends.
Tiles smaller than half a tile width at any outside corner or visible edge look like installation errors. If your layout produces cuts smaller than half a tile, shift the entire field by half a tile in that direction.
Detailed guidance on planning tile patterns and centering field tile is covered in our guide to brick, diagonal, and running bond layout patterns for various tile orientations.
What Tile Size Works Best for a Shower Wall?
Tile format affects both the visual scale of the shower and the difficulty of installation. Smaller tiles (2×2 to 4×4 inch) are more forgiving on walls with minor surface variation because each tile is small enough to follow substrate irregularities. Larger tiles (12×24 or 24×24 inch) require a flatter substrate and more precise layout but produce fewer grout joints.
Use the table below to match tile format to substrate flatness requirements and grout joint size.
Process Guide
Shower Wall Tile Format Selection Guide
Substrate flatness, trowel notch, and grout joint requirements by tile size. Source: TCNA Handbook and ANSI A108.5
| Tile Format | Max Substrate Variation | Trowel Notch Size | Min Grout Joint | DIY Difficulty |
|---|---|---|---|---|
| Mosaic (1×1 to 2×2 in) | 3/16 in per 10 ft | 3/16 in V-notch | 1/16 in | Moderate |
| Standard (4×4 to 6×6 in) | 1/4 in per 10 ft | 3/16 in V-notch | 1/16 in | Beginner-friendly |
| Medium (8×10 to 12×12 in) | 1/8 in per 10 ft | 1/4 in square-notch | 1/8 in | Intermediate |
| Large (12×24 to 18×36 in) | 1/8 in per 10 ft | 1/2 in square-notch | 3/16 in | Advanced |
| Slab / Gauged (24×48+ in) | 1/16 in per 10 ft | Manufacturer specified | 1/16 in rectified | Professional only |
| Subway (3×6 in) | 1/4 in per 10 ft | 3/16 in V-notch | 1/16 in | Beginner-friendly |
Substrate flatness measured as maximum deviation from a 10-foot straight edge per ANSI A108.02. Large-format tiles highlighted as the most common selection for current shower renovations.
For most DIY shower tile projects, the 4×4 to 6×6 inch or subway tile format is the most forgiving choice. It tolerates minor substrate irregularities and is easy to cut with a basic ceramic tile wet saw without specialized equipment.
Which Waterproofing System Should You Choose for Your Shower?
The right waterproofing system depends on your substrate type, your tile format, and whether you are installing over new framing or an existing surface. There is no universally “best” system, but each has clear conditions under which it performs better.
Use the table below to choose between the three most common shower wall waterproofing systems used in residential installations.
Product Comparison
Shower Wall Waterproofing Systems Compared
Liquid membrane vs sheet membrane vs foam board system. Source: TCNA Handbook and manufacturer technical data
| Feature | Liquid Membrane (Hydro Ban, AquaDefense) | Sheet Membrane (KERDI, Wedi) | Foam Board System (KERDI-BOARD) |
|---|---|---|---|
| Substrate required | Cement board or drywall | Cement board or drywall | Replaces substrate entirely |
| Application method | Brush or roller, 2 coats | Troweled into unmodified thinset | Screwed to studs, joints taped |
| Cure time before tiling | 2 hours (70°F, low humidity) | 24 hours (thinset cure) | Immediate after seam tape sets |
| Cost per sq ft (materials) | $1.50 to $3.00 | $3.00 to $5.00 | $5.00 to $9.00 |
| Best for | Standard new construction on cement board | Over existing substrates or complex shapes | Full system remodels, custom shower builds |
| Failure risk if installed incorrectly | Thin spots or missed seams | Delamination at sheet edges | Unsealed joints between boards |
| DIY difficulty | Easiest | Moderate | Most involved |
All three systems meet ANSI A118.10 waterproofing requirements when installed per manufacturer specifications.
For a first-time DIY shower tile project on new cement board, a liquid membrane system like Laticrete Hydro Ban is the most practical choice. It is forgiving on surface variations, bonds without a separate adhesive step, and cures fast enough to allow tiling the same day.
How Do You Set Tile on a Shower Wall? Step by Step
Setting tile on a shower wall requires the right mortar, the right trowel, and back-buttering technique to ensure the ANSI A108.5 minimum of 80% tile back coverage in wet areas. Coverage below 80% leaves voids that trap water and allow tiles to delaminate over time.
Which Mortar Do You Use for Shower Wall Tile?
Use a polymer-modified white thinset mortar for ceramic and porcelain shower wall tile. Polymer modification adds flexibility that standard thinset lacks, which is critical in a wet environment where thermal cycling and moisture movement create constant stress on the tile bond.
White thinset is specified for light-colored tiles, glass tiles, and any tile with a translucent glaze because gray thinset can show through and alter the tile’s appearance after setting.
Key Specifications for Shower Wall Thinset:
- Type: ANSI A118.4 polymer-modified thinset
- Color: White for tiles lighter than medium gray
- Open time: 20 to 30 minutes at 70°F (work in small sections)
- Consistency: Smooth peanut butter, holds ridges without slumping
- Pot life after mixing: 2 to 4 hours depending on temperature and humidity
- Cure before grouting: 24 hours minimum
Mix thinset to a smooth, lump-free consistency using a mixing paddle at low speed. Allow it to slake (rest without stirring) for 5 to 10 minutes after initial mixing, then remix before use. Slaking activates the polymer and produces a more workable mortar.
How to Apply Thinset and Set Tile on a Shower Wall
Step 1: Spread thinset on the waterproofed wall surface using the notched side of your trowel, held at a 45-degree angle to the wall. The notch size must match your tile format (see the tile format table above).
Step 2: Comb the ridges in one consistent direction. Consistent ridge direction allows trapped air to escape as the tile is pressed into place. Random ridge directions create air pockets that become voids under the tile.
Step 3: Back-butter each tile before setting. Apply a thin skim coat of thinset to the tile back using the flat side of the trowel. This step collapses the mortar ridges into full contact across the entire tile back and is the primary method for achieving the 80% coverage minimum.
Step 4: Press the tile into position with a slight twisting motion to ensure full mortar contact. Lift every 3rd or 4th tile to check coverage. The back should show 80% or more mortar contact with no large dry areas.
Step 5: Set tiles to your chalk lines using tile spacers or a wedge tile leveling system to maintain consistent joint width and prevent lippage (tile edges that are higher or lower than adjacent tiles).
Step 6: Remove excess thinset from grout joints before it cures. Hardened thinset in the joint prevents grout from bonding to the joint walls at full depth, which weakens the grout and creates a point where water can undercut it.
Step 7: Allow thinset to cure for a minimum of 24 hours before grouting. In cold or humid conditions, extend to 48 hours. Testing for cure: press firmly on a set tile. If it moves at all, the thinset is not cured.
The mechanism behind mortar bond strength is chemical: polymer-modified thinset forms a cross-linked polymer matrix as it cures, which mechanically keys into both the tile back and the waterproofing membrane surface. This only works correctly when the mortar ridges are collapsed to full contact and no air voids remain. Voids do not bond, and water finds them.
How Do You Handle Cuts, Corners, and Fixtures in a Shower?
The details of cut tiles and transitions are where shower tile installations look either professional or unfinished. Outside corners, fixture penetrations, and niche edges all require specific solutions.
What Do You Use at Outside Shower Corners?
Outside corners on shower walls have two correct solutions: metal edge trim profiles (such as Schluter Rondec or Quadec in aluminum or stainless) or bullnose tile that has a factory-finished edge on one side.
Metal trim profiles are the more durable solution for shower corners because they provide a hard edge that resists chipping, can be caulked at the base with 100% silicone, and are available in finishes that match common shower fixtures. They are set in the thinset bed before the field tile and act as a depth guide for the tile edge.
Bullnose tile works when the field tile manufacturer produces a matching bullnose piece in the same glaze and format. Not all tile lines include bullnose pieces. If no matching bullnose is available, a metal trim profile is the correct substitute. Detailed guidance on selecting the right trim tile type for each edge condition is covered in our overview of bullnose and trim tile options for wall installations.
How Do You Tile Around Shower Fixtures and Niches?
All plumbing penetrations through the tile wall (valve handles, showerhead arm, tub spout) must be sealed with 100% silicone after tiling. Never use grout to fill the gap between a pipe flange and the tile surface. Grout is rigid and cracks as the flange and tile move independently. Silicone remains flexible and maintains a watertight seal.
For shower niches, the niche interior surfaces must be waterproofed with the same membrane system used on the main walls before tiling. A niche without interior waterproofing is a direct water path into the framing behind it, even if the niche tiles are perfectly set and grouted.
Tile the niche floor with a slight slope (approximately 1/8 inch per foot) toward the shower interior to drain water out of the niche rather than pooling in it.
How Do You Grout and Seal a Tiled Shower Wall?
Grout color and type are final aesthetic and performance decisions. The wrong grout type in a wet area cracks, stains, and allows water infiltration. The right grout, properly applied, protects the tile installation for the life of the shower.
What Type of Grout Should You Use in a Shower?
For shower wall joints wider than 1/8 inch, use sanded grout. For joints narrower than 1/8 inch (including most large-format rectified tile with tight grout lines), use unsanded grout.
Sand particles in sanded grout prevent shrinkage cracking in wider joints. In joints narrower than 1/8 inch, the sand particles cannot pack correctly and the grout surface becomes rough and prone to cracking under pressure.
Epoxy grout is a third option and is the most water-resistant and stain-resistant grout available. It is used in commercial shower installations and by homeowners who want the lowest maintenance option. Epoxy grout requires faster working speed than cement-based grout because it cures through chemical reaction rather than evaporation. It is more expensive at $40 to $80 per unit versus $10 to $25 for cement grout, but it does not require sealing and resists mold and mildew far better.
For most residential DIY shower projects, a polymer-modified cement grout rated for wet areas (such as Laticrete PermaColor or Mapei Ultracolor Plus FA) is the practical choice. It is easier to work than epoxy, available in a wide color range, and performs well in residential shower conditions when sealed after cure.
How to Apply Grout on a Shower Wall
Step 1: Confirm the thinset is fully cured and all spacers are removed before mixing grout. Press each tile firmly. Any movement means the thinset is not ready.
Step 2: Mix grout to a smooth, peanut-butter consistency. Avoid adding excess water to loosen stiff grout. Too much water weakens the grout by diluting the cement binder and increases shrinkage cracking.
Step 3: Apply grout with a rubber grout float held at a 45-degree angle to the tile surface, working diagonally across the joints. Diagonal application packs the joints fully and prevents the float edge from dragging grout out of the joint.
Step 4: Remove excess grout from the tile surface with the float held nearly flat, then clean with a damp (not wet) sponge in circular motions. Rinse the sponge frequently. A sponge that is too wet will pull grout out of the joints and weaken the grout surface.
Step 5: Allow the grout to haze on the tile surface (typically 20 to 40 minutes), then buff with a dry cloth or cheesecloth to remove the grout film. Do not wait until the haze is completely hard before buffing, or it will require aggressive cleaning to remove.
Step 6: Allow the grout to cure for a minimum of 72 hours before the shower is used. Some manufacturers specify 7 days for full cure. Check the product data sheet for the specific grout used.
Where Do You Apply Silicone Instead of Grout?
Every change-of-plane joint in a shower must be filled with 100% silicone sealant, not grout. This includes the floor-to-wall joint, all inside corners where two walls meet, and any joint where tile meets a fixture, curb, or shower door frame.
The reason for this is structural: walls and floors move independently under load. A rigid grout joint at a change of plane will crack within the first year of use, regardless of how well it is packed. Silicone remains flexible and absorbs movement without cracking.
Choose a mildew-resistant 100% silicone sealant formulated for wet areas in a color that matches your grout. Apply it after grout is fully cured. Mask both sides of the joint with painter’s tape, fill the joint fully, tool it smooth with a wet finger, and remove the tape immediately before the silicone skins.
Key Specifications for Shower Silicone Sealant:
- Type: 100% silicone (not latex or siliconized latex)
- Rating: Must be rated for continuous wet exposure and mildew resistance
- Joint width: Fill to full depth, maximum 1/2 inch joint width for standard silicone
- Skin time: 20 to 45 minutes at 70°F (tool and clean before skinning)
- Full cure: 24 hours before water exposure
How Do You Seal Shower Tile and Grout?
Cement grout is porous. Without sealing, it absorbs water, soap, and oils, which creates conditions for mold growth and staining. Sealing closes the surface pores and dramatically extends the time between deep cleanings.
Apply a penetrating siloxane grout sealer after the grout has cured fully (minimum 72 hours, ideally 7 days). Penetrating sealers infiltrate the grout pores and form a hydrophobic barrier below the surface. Topical sealers coat the surface and wear off quickly in a shower environment and are not recommended.
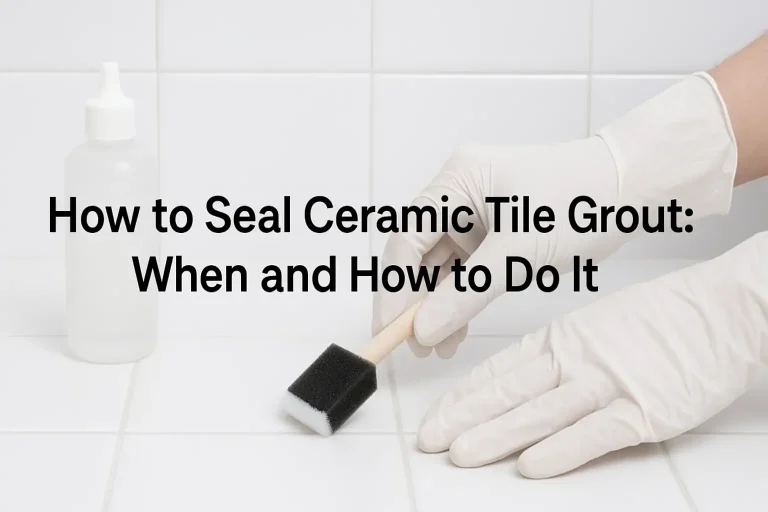
Apply the sealer with a small brush or applicator bottle directly to the grout lines. Wipe any sealer that contacts the tile face immediately with a clean cloth before it cures, especially on porous natural stone or matte-finish tiles where it can leave a residue.
Allow the sealer to cure for the time specified on the product label (typically 1 to 4 hours) before applying a second coat. Two coats provide significantly better protection than one coat on cement grout in a shower environment.
Reapply grout sealer every 12 to 18 months in a frequently used shower. The simple test: drop water on the grout line. If it beads, the sealer is still active. If it absorbs immediately, the sealer needs reapplication.
Glazed ceramic and porcelain tile faces do not require sealing. The glaze surface is non-porous. Only the grout joints need sealing.
After your shower is grouted and sealed, maintaining the tile surface correctly extends the life of the grout sealer and prevents etching of the tile glaze. Our complete guide to cleaning ceramic tile without damaging the glaze or grout covers the right cleaners, tools, and frequency for shower tile maintenance.
What Are the Most Common Shower Tile Installation Mistakes and How Do You Avoid Them?
Most shower tile failures trace back to one of five decisions made before the first tile was set. Understanding the failure mechanisms helps you catch these errors at the planning stage rather than after demolition.
Mistake 1: Using drywall as a shower substrate without a full waterproofing membrane system. Standard drywall begins absorbing moisture immediately in a shower environment. Even with a liquid membrane applied, the paper facing on standard drywall can delaminate from the core when wet, which takes the membrane and tile with it. Use cement board or foam board in all wet areas, or use moisture-resistant gypsum board (not standard drywall) only with a full sheet membrane system over the entire surface.
Mistake 2: Skipping back-buttering on large-format tiles. Troweling thinset onto the wall alone is not sufficient for tiles larger than 12×12 inches. The trowel ridges do not collapse completely when a large tile is pressed onto them, especially on a vertical surface where gravity pulls the mortar down. Back-buttering fills the tile back completely and ensures the 80% coverage minimum is met.
Mistake 3: Using grout at change-of-plane joints. As noted above, this produces guaranteed cracking within the first year. Every inside corner and floor-wall joint must be silicone.
Mistake 4: Grouting too soon after setting tile. Thinset that is not fully cured will move slightly under the pressure of grouting. This breaks the bond at the tile edges and creates a path for water under the tile. Wait the full 24 hours (or longer in cold or humid conditions) before grouting.
Mistake 5: Installing tile without a level starting course. The first horizontal course of tile sets the reference for every tile above it. A course set even 1/8 inch out of level produces a visible drift across a 6-foot wall. Always snap a level chalk line and set the first course to it, even if it means cutting the bottom course of tile to clear the shower floor.
Quick Reference: Shower Wall Tile Terms Defined
The following terms appear throughout this guide and throughout tile installation resources. Each one is defined here in plain language for reference.
CBU (Cementitious Backer Unit): Any cement-based panel used as a tile substrate. Includes cement board products like HardieBacker and Durock. Resists moisture but is not inherently waterproof.
Waterproofing membrane: A continuous barrier layer between the wet surface and the wall structure. Can be liquid-applied (Hydro Ban, AquaDefense) or sheet-applied (KERDI, RedGard sheet).
Thinset mortar: The adhesive mortar that bonds tile to the substrate. Polymer-modified thinset (ANSI A118.4) is required for wet area installations.
Back-buttering: Applying a thin skim coat of thinset to the back face of a tile before setting it. Required for large-format tiles and wet area installations to meet the 80% coverage minimum.
Lippage: A height difference between adjacent tiles at a shared edge. Caused by substrate variation, insufficient mortar, or tile warpage. Controlled with tile leveling systems.
Change-of-plane joint: Any joint where two surfaces meet at an angle, such as floor-to-wall or wall-to-wall inside corners. These joints must be filled with silicone sealant, not grout.
Grout joint: The space between adjacent tiles, filled with grout after the thinset cures. Width is determined by tile format and spacer size.
Penetrating sealer: A grout sealer that infiltrates the pore structure of the grout rather than coating the surface. The correct type for shower grout applications.
TCNA: Tile Council of North America. The industry organization that publishes the TCNA Handbook, the primary reference standard for tile installation methods and substrate requirements.
ANSI A108: The American National Standards Institute specification series covering tile installation materials and methods. Specifically, ANSI A108.5 governs wet area tile installations.
Slaking: The 5 to 10 minute rest period after initial mixing of thinset or grout, before the final remix and use. Slaking allows the polymer to fully hydrate and produces a more workable, consistent mortar.
Efflorescence: White mineral deposits that appear on grout surfaces when water moves through the grout and carries dissolved salts to the surface. A sign that the waterproofing system is not preventing water migration through the grout.
The comparison below shows the specific differences between a correctly installed shower tile system and one with common waterproofing and installation errors, so you can see exactly what is at stake with each decision.
Process Guide
Correct vs Incorrect Shower Tile Installation: What Changes When You Get It Right
Comparing a properly waterproofed and set shower tile installation to one with common substrate and mortar errors
Common Errors
- xDrywall substrate absorbs water behind the tile within months
- xGrout at inside corners cracks in the first year under thermal movement
- xUnder 50% tile back coverage creates voids where water pools under tiles
- xThinset grouted before 24-hour cure breaks bond at tile edges
- xUnsealed niche interior routes water directly into wall framing
Correct Installation
- +Cement board plus liquid membrane creates a continuous watertight barrier
- +100% silicone at all change-of-plane joints stays flexible under movement
- +Back-buttering plus notched trowel achieves 80% or more tile back coverage
- +Full 24-hour thinset cure before grouting maintains bond integrity
- +Waterproofed niche interior prevents water infiltration at recesses
A correctly installed shower tile system on proper substrate with full membrane coverage should last 20 or more years without structural water damage.
How Much Does It Cost to Tile a Shower Wall?
The total cost to tile a shower wall depends on tile format, waterproofing system choice, and whether you hire a tile setter or do the work yourself. A standard 3-wall shower enclosure (approximately 60 to 80 square feet of wall surface) costs between $800 and $2,500 in materials alone.
Use the table below to estimate your material budget based on tile format and waterproofing system.
Cost Reference
Shower Wall Tile Material Cost by Tile Format and Waterproofing System
Estimated material cost for 70 sq ft shower wall (3-wall enclosure). Tile prices are mid-range retail. Labor not included.
| Tile Format | Liquid Membrane | Sheet Membrane | Foam Board System |
|---|---|---|---|
| 4×4 / Subway | $800 to $1,100 Tile $4-7/sq ft |
$950 to $1,300 Membrane adds $150+ |
$1,150 to $1,500 Board system adds $350+ |
| 12×12 | $950 to $1,300 Most common selection |
$1,100 to $1,500 Membrane adds $150+ |
$1,300 to $1,700 Board system adds $350+ |
| 12×24 | $1,100 to $1,600 Tile $7-12/sq ft |
$1,250 to $1,800 Membrane adds $150+ |
$1,450 to $2,000 Board system adds $350+ |
| 24×24 or Larger | $1,400 to $2,500 Tile $10-20/sq ft |
$1,550 to $2,700 Membrane adds $150+ |
$1,750 to $2,900 Board system adds $350+ |
Estimates include tile, substrate, membrane, thinset, grout, spacers, silicone, and trim. Tile waste factor of 10 to 15% included. Professional installation adds $8 to $15 per square foot in labor.
For the majority of DIY homeowners tiling a standard 3×3 foot or 3×5 foot shower enclosure, a 12×12 inch or subway format ceramic tile with a liquid membrane system produces a professional result at the lowest overall material cost.
If you are also tiling the shower floor as part of the same renovation, our complete walkthrough for bathroom floor tile installation covers slope, drain preparation, and floor-specific mortar requirements that differ from wall applications.
Is There a Difference Between Tiling a Shower Wall and Tiling a Bathroom Wall?
Yes, and the difference is the waterproofing requirement. A bathroom wall outside the shower zone (above the tub surround or outside the wet zone) can be tiled over moisture-resistant drywall without a full waterproofing membrane, because it receives only splash exposure rather than continuous water contact.
A shower wall inside the wet zone, defined as any surface within 6 inches of the showerhead spray or within the shower pan footprint, requires a full waterproofing system per TCNA guidelines. This distinction matters because it determines your substrate and membrane specification before you purchase any materials.
Tiling a bathroom wall outside the wet zone follows the same layout and setting techniques as a shower wall, but with a simpler substrate specification. Our complete ceramic tile installation guide for general interior surfaces covers non-wet-area wall and floor applications in detail.
How Long Does a Shower Tile Installation Take from Start to Finish?
A standard 3-wall shower enclosure installed by a single DIYer typically takes 5 to 8 days from substrate preparation to first use. Each curing stage is non-negotiable and cannot be accelerated without compromising the installation.
Day 1: Substrate installation (cement board cutting, fastening, and joint taping). Approximately 4 to 6 hours for a standard shower enclosure.
Day 2: Waterproofing membrane application. Liquid membrane: 3 to 5 hours including two coats and seam taping. Sheet membrane: 5 to 7 hours including thinset application, sheet installation, and seam taping. Allow the membrane to cure overnight before setting tile.
Day 3: Layout planning and tile setting. Mark chalk lines, dry-lay tile to confirm the layout, then set tile. A standard shower enclosure takes 6 to 10 hours to tile depending on format and cut complexity.
Day 4 to 5: Thinset cure period. Minimum 24 hours, extend to 48 hours in cold or humid conditions.
Day 5 to 6: Grouting. Mix, apply, clean, and allow initial cure. Approximately 3 to 5 hours for application and cleanup.
Day 6 to 7: Grout cure period (minimum 72 hours before shower use). Apply grout sealer after 72 hours. Apply silicone at all change-of-plane joints after grout is fully cured.
Day 7 to 8: Final cure of silicone sealant (24 hours minimum), then the shower is ready for use.
Rushing any of the cure stages is the most common reason that DIY shower installations require early repair. The cure times are chemical minimums, not conservative estimates.
Can You Tile Over Existing Shower Tiles?
Tiling over existing shower tiles is technically possible but is only appropriate under specific conditions. The existing tile must be fully bonded, with no hollow or debonded tiles, no grout that crumbles under pressure, and no evidence of water damage behind the current tile layer.
The risk is structural: any water that has already reached the substrate behind the old tiles will continue to cause damage even under the new tile layer. If there is any doubt about the condition of the substrate, remove the old tiles and inspect the substrate before proceeding.
If the existing tile is sound, use a bonding primer or skim coat of thinset to create a uniform surface, then apply a liquid waterproofing membrane over the entire old tile surface before setting new tile. This adds approximately 1/4 to 3/8 inch to the wall thickness, which must be accounted for at door frames, window jambs, and fixture trim rings.
A diamond grinding disc on an angle grinder removes the glaze from the existing tile surface, which improves mechanical bond for the new thinset. Grind the surface in a cross-hatch pattern to create consistent tooth across the entire field.
What Happens If Water Gets Behind Shower Tile?
Water behind shower tile causes framing rot, mold growth in the wall cavity, and eventual delamination of the tile from the substrate. The sequence is: water infiltrates through a failed grout joint or membrane gap, it saturates the substrate and framing, organic growth begins within 24 to 48 hours of continuous moisture, and the substrate loses structural integrity over months to years.
Early signs that water has reached behind the tile include: grout that sounds hollow when tapped with a knuckle, tiles that flex slightly under finger pressure, efflorescence (white mineral deposits) on grout surfaces, persistent musty odor from the shower area, and visible mold at the base of the shower wall or on the ceiling of the room below.
If two or more of those signs are present, the correct course of action is full demolition of the affected area, inspection and replacement of damaged framing, and a complete reinstallation with a new waterproofing system. Patching over an active water damage situation prolongs the problem rather than solving it.
The only cost-effective repair for a failed shower waterproofing system is a complete reinstallation. The material cost of doing it correctly the first time is always less than the combined cost of a repair and the second installation.
Is Porcelain or Ceramic Tile Better for a Shower Wall?
Both porcelain and ceramic tile are appropriate for shower walls. The performance difference between them in a shower application comes down to water absorption rate and hardness, not appearance.
Porcelain tile has an absorption rate below 0.5%, making it essentially impermeable. This means that even if a grout joint cracks, water that reaches the tile back surface will not be absorbed by the tile body itself. Standard ceramic tile has an absorption rate of 3% or higher, which means the tile body itself can absorb water if the grout or waterproofing system is compromised.
For shower walls specifically, porcelain is the more durable long-term choice because of its lower absorption rate and higher surface hardness (typically 7 to 8 on the Mohs scale versus 5 to 6 for standard ceramic). However, ceramic tile is easier to cut, lighter in weight (which reduces adhesive stress on vertical surfaces), and available in a wider price range starting at $1.50 to $3.00 per square foot versus $3.00 to $8.00 per square foot for porcelain.
For a standard residential shower that will be properly waterproofed, either material performs well. Choose porcelain for high-use showers or any installation where the waterproofing system cannot be inspected regularly. Choose ceramic for budget-focused projects where the substrate and membrane are installed correctly and can be maintained.
Keeping your shower tile looking clean and preventing soap scum and hard water buildup on the grout is easier with the right tools and routine. Our routine and deep cleaning guide for ceramic tile surfaces covers the products and frequency that protect grout sealer and tile glaze without etching the surface.
Do You Need a Tile Saw to Install Shower Tile?
Yes, for any shower wall installation involving tiles larger than 4×4 inches or any layout requiring cuts at angles or curves around fixtures. A 7-inch wet saw handles all standard ceramic and porcelain shower tile formats accurately and safely. A manual snap cutter works for straight cuts on standard ceramic tile up to 12 inches wide but cannot cut porcelain tile reliably or make L-shaped or curved cuts.
For cuts around showerhead valves and pipe flanges, a diamond-tipped hole saw sized to match the flange diameter makes clean circular cuts in both ceramic and porcelain without cracking the tile.
How Do You Maintain Shower Tile and Grout After Installation?
Proper maintenance of a tiled shower starts with the correct cleaning frequency and the correct cleaners. Using harsh acidic cleaners (vinegar, citrus-based products, or bathroom tile sprays containing hydrochloric acid) on cement grout will erode the grout surface over time and accelerate the need for resealing or regrouting.
Use a pH-neutral tile cleaner with a soft brush or non-scratch pad for weekly cleaning. A stiff-bristle grout brush removes soap scum and mold from grout lines without damaging the grout surface.
Rinse the shower walls with cold water at the end of each use to remove soap and mineral deposits before they dry and bond to the surface. A shower squeegee used daily reduces hard water deposit buildup by 80% and significantly extends the cleaning interval between deep cleans.
Inspect the silicone at all change-of-plane joints annually. Silicone that is cracking, pulling away from the tile edge, or showing black mold colonies that do not respond to surface cleaning should be removed entirely with a utility knife and replaced with fresh 100% silicone sealant. This is the most important maintenance task for a tiled shower and takes approximately 2 hours to complete correctly.
Reapply grout sealer every 12 to 18 months. Mark the date of application inside a cabinet door or on the grout sealer bottle so the schedule is easy to track.
Can You Tile a Shower Wall Yourself or Should You Hire a Professional?
A DIYer with basic tile cutting skills and the patience to follow cure schedules correctly can produce a shower tile installation that meets professional standards. The critical distinction is not skill level but discipline: the cure times, the waterproofing seam detail, and the 80% coverage minimum are all verifiable steps that any careful installer can execute.
Hire a professional tile setter when: the shower has complex geometry (angled walls, curved surfaces, or multiple niches), the tile format is 24×24 inches or larger (which requires very flat substrate preparation that is difficult without professional grinding equipment), or when the existing substrate has been water-damaged and framing repair is required alongside the tile work.
A licensed tile contractor who is a member of the National Tile Contractors Association (NTCA) will install to TCNA Handbook standards and can provide a warranty on the installation. Expect to pay $8 to $15 per square foot in labor for a standard shower tile installation, in addition to material costs.
For a full breakdown of the general ceramic tile installation process that applies across multiple surface types, our complete DIY ceramic tile installation guide covers substrate preparation, thinset application, and tool selection in additional detail beyond what is covered here for shower-specific requirements.
What Grout Color Should You Choose for a Shower?
Grout color is an aesthetic decision, but it has practical implications in a shower environment. Light grout (white, cream, light gray) shows soap scum and hard water deposits quickly and requires more frequent cleaning. Dark grout (charcoal, navy, black) hides deposits but shows efflorescence (white mineral deposits) very clearly when the sealer degrades.
The most practical grout color for a shower is a medium tone that closely matches the tile color. A close match makes grout joints visually recessive, which emphasizes the tile surface rather than the joint pattern. It also hides both the light deposits that show on white grout and the white mineral deposits that show on dark grout.
Grout color shifts slightly during cure. Most cement grouts dry approximately 10 to 15% lighter than the wet color. Test grout color on a small area or examine dried samples from the manufacturer before committing to a shade for the entire shower.
Epoxy grout does not change color during cure and does not require sealing. If color consistency and low maintenance are priorities, epoxy grout is worth the additional material cost and the slightly more demanding application process.
What Is the Minimum Tile Height for a Shower Wall?
The TCNA Handbook specifies that shower walls must be tiled to a minimum height of 6 feet (72 inches) from the shower floor, or to the ceiling if the ceiling height is under 8 feet. Many designers and contractors tile floor to ceiling regardless of minimum standards because it eliminates the paint-to-tile transition line, which is a common point of moisture intrusion when steam contacts an untiled painted surface above the tile field.
Floor-to-ceiling tiling also allows the waterproofing membrane to extend continuously from the pan to the ceiling without a termination edge partway up the wall. A membrane that terminates mid-wall requires a precise flashing detail at the termination line, which is a more complex installation and a more common failure point than a continuous system.
For a standard 8-foot ceiling height, floor-to-ceiling tiling in a shower adds approximately 15 to 20 square feet of tile and substrate to the installation compared to a 6-foot tile height. The additional material cost is typically $75 to $200 depending on tile price, which is a reasonable investment for the reduction in long-term maintenance risk.
Is Grout Waterproof in a Shower?
Cement grout is not waterproof. It is water-resistant when freshly sealed, but even sealed cement grout is permeable to water vapor and absorbs liquid water when the sealer degrades. This is the fundamental reason that a waterproofing membrane behind the tile layer is required in a shower, regardless of grout quality or sealer application.
The grout joint provides aesthetic continuity between tiles and protects the thinset mortar bed from direct water contact. The waterproofing membrane behind the substrate protects the structure. These are two separate systems serving two different functions. Neither one replaces the other.
Epoxy grout is the closest available product to a waterproof grout. Its absorption rate is near zero and it does not require sealing. Even epoxy grout, however, can crack under thermal movement at change-of-plane joints, which is why silicone sealant is always specified at those locations regardless of grout type.
Can You Use Large-Format Tile on a Shower Wall?
Yes, but large-format tiles (12×24 inches and larger) require stricter substrate flatness and a back-buttering technique that is more demanding than standard tile installation. The TCNA Handbook specifies a maximum substrate variation of 1/8 inch over a 10-foot span for tiles with any dimension larger than 15 inches, compared to 1/4 inch for standard format tile.
Achieving that flatness in a shower wall framing system typically requires back-blocking between studs, a skim coat of thinset to fill low spots before waterproofing, or the use of a foam backer board system that can be shimmed to a flatter plane than standard framing allows.
Use a tile leveling system rated for large-format tile (such as the Raimondi or Peygran system) to control lippage during setting. Large tiles are more susceptible to lippage because any variation in mortar thickness or substrate flatness produces a larger height difference at the tile edge than the same variation under a smaller tile.
Do You Need to Seal Porcelain Tile in a Shower?
Glazed porcelain tile does not require sealing. The glaze surface is fired to vitrification and has an absorption rate below 0.5%, which means it does not absorb water, soap, or staining agents through the tile face. Applying a topical sealer to glazed porcelain tile produces no benefit and can leave a residue that makes the surface look hazy.
The grout joints between porcelain tiles still require sealing with a penetrating siloxane sealer because the grout is cement-based and porous. The tile face does not need it; the joint does.
Unglazed porcelain tile (including through-body porcelain used for its natural stone appearance) has a textured, matte surface that can absorb liquids and staining agents. Seal unglazed porcelain with a penetrating sealer before grouting and again after the grout is cured. This prevents grout from bonding to the tile face during application and protects the unglazed surface from staining in use.
After sealing, maintaining the appearance of all your ceramic tile surfaces, both in the shower and throughout the bathroom, is straightforward with the right routine. Our complete guide to cleaning ceramic tile properly covers safe product selection, frequency, and tools for both glazed and unglazed tile surfaces.
What Causes Grout to Crack in a Shower?
Grout cracks in a shower for one of three reasons: the thinset beneath the tile was not fully cured when grout was applied, the grout was mixed with too much water and shrank excessively during cure, or the cracking is occurring at a change-of-plane joint where rigid grout was used instead of silicone.
If grout cracks appear across the field tile (not at corners), the most common cause is vibration or movement in the substrate during the thinset cure period. Even minor foot traffic or plumbing vibration during the 24-hour cure window can micro-fracture the thinset bond and produce grout cracks that appear weeks after installation as the bond continues to fail.
Repair cracked field grout by removing the damaged grout with a grout removal tool or oscillating tool with a grout blade, cleaning the joint thoroughly, and regrouting with fresh material mixed at the correct water ratio. If the same joint cracks again within a few months, the issue is substrate movement and a structural fix is required before regrouting.
Cracks specifically at inside corners and the floor-wall joint are not repairable with grout. Remove the grout from those joints entirely and replace with 100% silicone sealant, which is the correct material for all change-of-plane joints in a shower.
Correctly installed and maintained shower tile is one of the most durable surfaces in a residential bathroom. The system works when each layer, substrate, membrane, thinset, grout, and sealant, is the right material for its function and is applied with the correct cure time between stages. Get the waterproofing layer right first, and every subsequent step builds on a foundation that will last the life of the structure.